















Cut Sauna Stove Clearances Safely, Owners & Pros: Use an Air Gap
A heat shield is required whenever your sauna stove sits closer to a combustible wall or ceiling than the manufacturer’s manual allows, which covers most wood-fired installs and many tight electric setups. The practical first move is a reflective metal shield or a model-specific stove-mounted shield, installed with the air gap the manufacturer specifies. Shields can shrink clearances, but only by the exact amount the stove manual permits, never by guesswork.
TL;DR:
- Clearance reductions are only valid when shields are installed exactly as specified by the stove’s manual, with the proper air gap maintained.
- Reflective metal shields are the most affordable and fastest to install but only reduce clearances when mounted with an approved air gap.
- Stove-mounted shields are tested by manufacturers for specific models and offer the most predictable clearance reduction.
- Masonry or cement board surrounds provide thermal mass for high-use or high-output stoves but involve more labor and permanent installation.
- Regular inspection and maintenance of shields are essential to prevent heat buildup, corrosion, and potential fire hazards over time.
Table of Contents
- What Sauna Stove Heat Shields Actually Do to Clearances
- Which Heat Shield Materials Work Best for Your Setup?
- How Do You Install a Heat Shield Correctly?
- How Do You Choose the Right Heat Shield for Your Stove?
- Cozy Heat Chimney Covers: Which Model Fits Your Install?
- How Do You Keep a Heat Shield Safe Over Time?
- Why Trust This Guide on Sauna Stove Heat Shields?
- DIY or Hire a Pro for Heat Shield Installation?
- Get the Right Heat Shield Without the Guesswork
- Sources
- FAQ
What Sauna Stove Heat Shields Actually Do to Clearances
A structural heat shield blocks radiant heat from reaching a wall, ceiling, or floor, which is a different job from products meant for personal comfort. A wool sauna hat protects your scalp and hair from the same heat a shield is keeping off your wall. Both matter, but only one affects fire safety.
Reflective shields work through a simple mechanism: they intercept radiant energy and let convective air movement carry the heat away before it builds up on the wall surface behind them. That’s why the air gap behind a shield isn’t optional trim, it’s the entire mechanism.
Manufacturers publish reduced clearance figures specifically because they’ve tested a shield configuration against their stove. Deviating from that spec, even with a “better” shield, voids the tested result and often the warranty.
- Structural shields protect walls, ceilings, and floors from ignition risk
- Comfort products (hats, gloves) protect the person, not the room
- Clearance reductions apply only when installed exactly per the stove’s manual
- Local building code may impose its own minimum distances regardless of shield claims
Which Heat Shield Materials Work Best for Your Setup?
Reflective metal, stove-mounted shields, and masonry surrounds solve the same problem in different ways, and picking the wrong one for your stove type usually means redoing the work.
Reflective metal plates (stainless steel or aluminum) are the lightest, cheapest option. Mounted with a proper air gap, they knock down radiant heat enough to satisfy many reduced-clearance tables in a stove’s manual.
Stove-mounted, model-specific shields are built by the heater manufacturer for a particular unit’s geometry. Harvia’s protective shields shield the back and sides of a specific model and are engineered to hit a documented clearance reduction, which makes them the most predictable option when your stove maker offers one.
Cement board or masonry surrounds add thermal mass rather than just reflecting heat, which lowers peak surface temperature over a longer burn. SaunaTimes recommends a detailed surround built from cement board or masonry specifically to cut pyrolysis risk near high-output wood stoves, though it’s a heavier, more permanent build.
- Reflective metal: fast, affordable, works with an air gap
- Stove-mounted shields: best-tested fit for a known heater model
- Cement board/masonry: best for sustained high heat, more labor
- Chimney covers and floor protectors handle the pass-through and hearth zones a wall shield doesn’t touch
How Do You Install a Heat Shield Correctly?
Sizing starts with the stove manual, not a tape measure guess. Most manuals specify a minimum shield height and width relative to the heater’s footprint, often extending several inches beyond the stove’s silhouette on each side.
- Pull your stove manual’s clearance table and note the reduced-clearance dimensions tied to a shield.
- Measure wall height and width against those figures, adding margin rather than cutting it close.
- Mount the shield with standoffs or brackets that maintain the specified air gap, commonly an inch or more.
- Use non-combustible fasteners into a non-combustible backing, never directly into bare wood framing.
- Confirm the gap isn’t compressed anywhere, including at the top and bottom edges.
The air gap is the single most misunderstood part of this job. Skip it, and the shield conducts heat straight into the wall instead of letting air carry it off, which defeats the entire purpose.
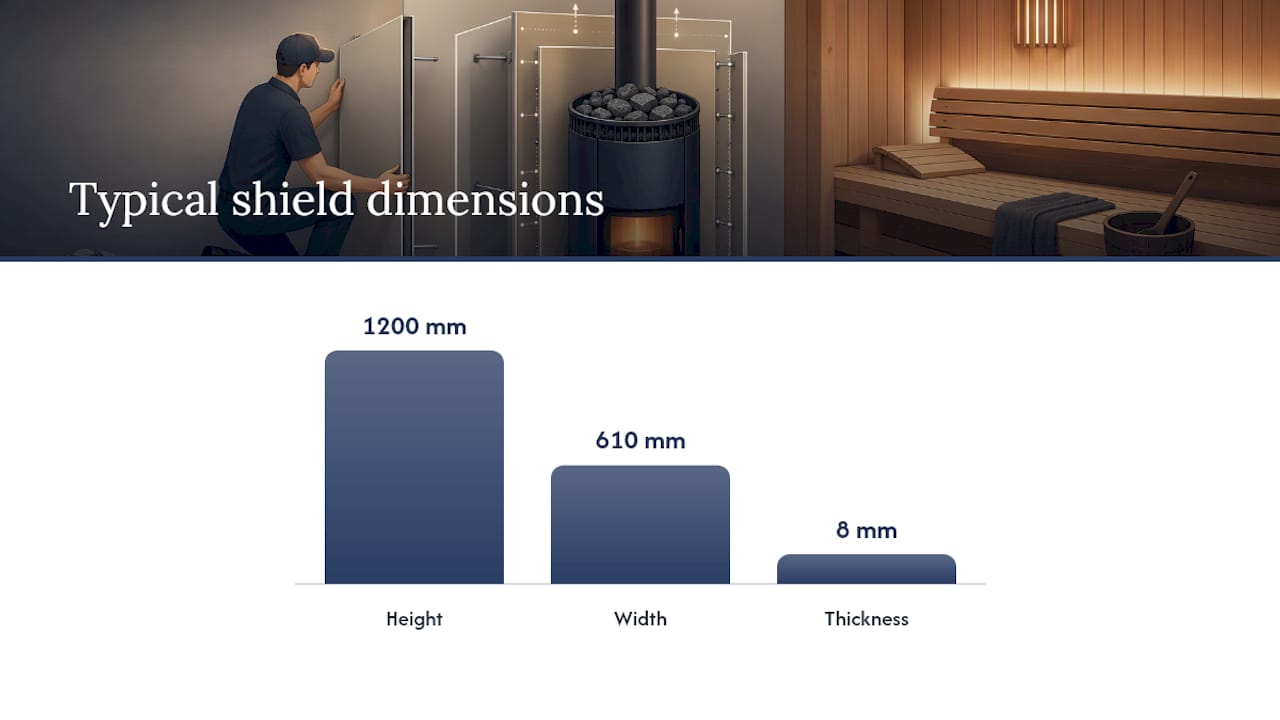
Retail listings back this up with real numbers: a common wood-burning sauna stove heat shield ships at 610 × 1200 × 8 millimeters, sized to cover a standard wall zone behind a wood stove with room for the standoff gap.
Pro Tip: Keep the shield’s mounting hardware accessible after install. You’ll want to pull it for a corrosion check at least once a year, and buried fasteners make that a bigger job than it needs to be.
Common mistakes worth naming plainly: removing the air gap to make a tighter fit, blocking the shield’s top or bottom ventilation path, and using standard wood screws instead of fasteners rated for a non-combustible backer board.
How Do You Choose the Right Heat Shield for Your Stove?
Match the shield type to your stove model, your wall material, and how much clearance you actually need to recover, then work the checklist below before buying anything.
- Confirm your exact stove model and pull its manual’s clearance table first
- Identify what’s behind the stove now: drywall, wood paneling, cement board, or bare studs
- Decide how much clearance reduction you need versus what’s realistic for your room
- Check whether your mounting surface can support the shield and standoffs
- Set a budget: reflective plates run cheapest, masonry surrounds cost the most in labor
Stove-mounted shields make sense when your heater manufacturer sells one for your exact model, since the clearance numbers are already tested. Room-mounted reflective panels fit corner installs or barrel saunas where a model-specific shield doesn’t exist. Masonry surrounds earn their extra cost in commercial or high-use settings where a wood stove runs hot for hours at a stretch.
Before you buy, ask any vendor exactly which stove models their clearance claims were tested against, and get the warranty terms in writing.
Cozy Heat Chimney Covers: Which Model Fits Your Install?
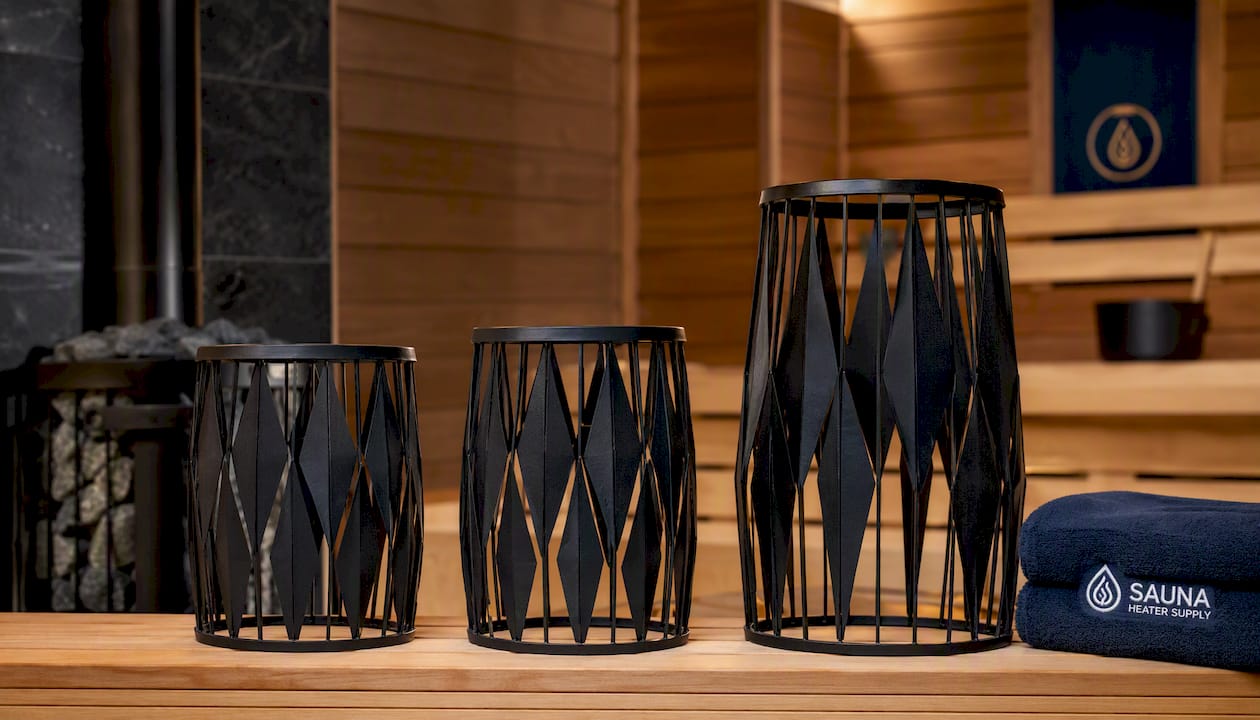
Chimney pass-throughs need their own heat protection, separate from the wall shield behind the stove, and Sauna Heater Supply carries three Cozy Heat covers sized for different setups.
- Cozy Heat Chimney Cover Quattro H500 protects a standard flue termination at the H500 height, a solid fit for typical residential barrel or cabin saunas.
- Cozy Heat Chimney Cover OG H500 uses a different geometry at the same H500 height, useful when your chimney dimensions don’t match the Quattro’s footprint.
- Cozy Heat Chimney Cover Quattri H700 steps up to the taller H700 profile for larger chimney assemblies or bigger stove installs.
Before ordering, measure your chimney’s exact diameter and the ceiling or roof pass-through height, then check that measurement against each cover’s listed geometry. If you’re unsure which of the three fits, Sauna Heater Supply’s installation support team can confirm compatibility before you commit.
How Do You Keep a Heat Shield Safe Over Time?
A shield that passed inspection on day one won’t stay safe forever without a look-in schedule, especially in a wood-fired sauna running frequent hot burns.
- Check fasteners monthly for looseness, since heat cycling can work screws loose over a season.
- Look for corrosion or discoloration on the metal surface, a sign the air gap may be compromised.
- Inspect the wood directly behind and around the shield for any darkening, which signals pyrolysis has already started.
- Do a detailed inspection yearly, including pulling the shield to check the backer board underneath.
- If you see smoke, warped metal, or smell burning wood near the shield, shut the stove down immediately and call a professional for inspection before relighting it.
Why Trust This Guide on Sauna Stove Heat Shields?
Sauna Heater Supply curates sauna heaters and saunas for homeowners and contractors daily, which means clearance questions and shield compatibility come up in nearly every install conversation. This guide draws on manufacturer clearance documentation, stove manuals, and the same accessory catalog customers already buy from. The guidance is backed by direct product support and fast shipping on the accessories discussed here, so the advice ties directly to what’s actually available to order.
DIY or Hire a Pro for Heat Shield Installation?
A simple reflective shield with a proper air gap and basic tools is a reasonable weekend DIY project for most sauna owners. Masonry surrounds, chimney or flue work, and any situation where you’re unsure of your stove’s real clearance numbers call for a professional. Whatever you choose, the stove manual outranks any general advice, including this article.
— Teddy
Get the Right Heat Shield Without the Guesswork
This guide highlights chimney covers available from a direct source, so you’re not piecing together mismatched parts from different retailers.
Whether you need the Quattro H500, the OG H500, or the larger Quattri H700, Sauna Heater Supply’s team can confirm fit against your chimney measurements before you order, and their installation and design services cover everything from a single shield swap to a full sauna build. Browse the current sauna heater lineup to check compatibility with your existing stove, or reach out directly for a clearance check on your specific model. Start by confirming your chimney dimensions against the three Cozy Heat covers above, then contact the team to lock in the right fit before installation day.
Sources
For model-specific clearance data beyond what’s covered here, Harvia’s M3 protective shield page documents exact fit specs for that heater line. If you’re planning a full masonry or thermal-mass surround instead of a metal shield, SaunaTimes’ surround build guide walks through the construction details.
- An ideal surround for your wood burning sauna stove
- 20/SL/DUO Wood Heater Protective Shields | Harvia – The Sauna Place
FAQ
Is a Heat Shield Really Necessary?
Yes, for most wood-fired stoves and many electric installs where the stove sits closer to a combustible wall than the manual’s standard clearance allows. Skipping it when your layout requires one is a fire risk and likely a code violation.
Do You Need a Special Stove for a Sauna?
Sauna stoves are purpose-built for the heat cycles and humidity of a sauna room, so a standard wood stove or space heater isn’t a safe substitute. Pairing the right stove with a compatible shield, like those in the wood-burning sauna heater lineup, keeps clearance numbers predictable.
What Should You Put Behind a Sauna Stove?
Behind a wood stove with reduced clearance, you need a reflective metal shield or model-specific stove-mounted shield mounted with the manufacturer’s specified air gap, backed by non-combustible board. For high-heat, sustained-use setups in hospitality or sauna furnishing environments, a cement board or masonry surround handles the thermal load better; see the hotell uteplats möbler guide for norra Sverige for useful perspectives on durable materials and hospitality durability considerations.
What Can Be Used as a Heat Shield?
Reflective stainless steel or aluminum plates, manufacturer stove-mounted shields, and cement board or masonry surrounds all function as heat shields, each suited to a different clearance and budget need. Retail shields commonly ship around 610 × 1200 × 8 millimeters, sized for a standard wall zone behind a wood-burning sauna stove.