















125 cm² Intake Rule: Sauna Heater Placement for Homeowners & Installers
The right sauna heater placement is the one that satisfies your specific model’s clearance requirements while working with an intake vent positioned directly below the unit. In practice, that means center-wall placement on the short wall or a corner position for square rooms, since under-bench placement is rarely permitted by manufacturers. Before you mount anything, pull the installation manual for your exact heater model and mark every required clearance on your finished sauna room.
TL;DR:
- Heater clearance charts are specific to each model and must be followed precisely to avoid failed installations or safety issues.
- Proper vent placement involves an intake vent directly below or behind the heater and an exhaust vent on the opposite wall, with both adjustable and routed outside your sauna.
- Room shape dictates heater placement: corners suit square rooms for even heat, while rectangular rooms favor short wall center placement; under-bench mounting is generally not permitted.
- Mounting requires a dedicated 240V circuit, solid backing, and correct wiring, with controls placed outside the sauna, while a burn-in test is essential before regular use.
- Bench clearance and guard installation are critical for safety; sit on your planned seating to verify no contact with the heater’s clearance zone before finalizing the setup.
Table of Contents
- What Are the Clearance Requirements for Sauna Heater Placement?
- Corner, Center-Wall, or Under-Bench: Which Placement Fits Your Room?
- Where Should Intake and Exhaust Vents Go Relative to the Heater?
- What Mounting and Electrical Work Does the Installer Need to Handle?
- How Do Guards and Bench Layout Keep Users Safe?
- Final Placement Checklist Before You Call the Electrician
- Why Layout Mistakes Happen More Often Than You’d Think
- Which Heater Fits Your Layout?
- Sources
- FAQ
What Are the Clearance Requirements for Sauna Heater Placement?
Every heater manufacturer publishes a clearance chart, and that chart is the single document that governs your layout. Not a blog post, not a contractor’s memory of the last job, not the specs from a different heater model you saw online. Clearance numbers are tied directly to how the unit passed UL testing or its manufacturer listing, and reusing another model’s numbers is one of the most common causes of failed installs.
Five clearance points matter for every wall-mounted or floor-standing heater:
- Side clearance: the gap between the heater’s sides and adjacent walls or benches
- Front clearance: the space in front of the unit, sometimes called user clearance, since it also governs how close a bather can stand
- Bench-to-stone clearance: the distance from the nearest bench edge to the stone load itself
- Overhead clearance: the vertical space between the top of the heater and the ceiling
- Floor distance: how far the heater’s base sits from the finished floor, whether it is wall-mounted or freestanding
Typical residential ranges run 4 to 8 inches for side clearance and 8 to 18 inches for bench-to-heater distance, according to installation comparisons from SweatDecks. Those numbers are useful for early planning, but they are ranges, not rules. Your model manual overrides them every time.
Statistic to remember: the intake vent recommended for a family-sized sauna needs a cross-section of roughly 125 square centimeters, positioned directly below the heater. That single spec, drawn from the Sauna Heater Clearance Guide, connects your placement decision to your ventilation plan before you ever pick up a drill.
Measuring clearances on a drawing is simple but easy to skip. Sketch your room to scale, mark the heater’s footprint, then draw the clearance envelope around it as a dashed boundary. Any bench edge, wall corner, or door swing that crosses that boundary means either the heater moves or the bench does.
Guard rails enter the picture the moment a bench falls inside the specified clearance to the stone load. Most manufacturers publish minimum guard dimensions alongside their clearance charts, and the guard installation instructions from Scandia make clear that guards cannot obstruct airflow around the unit. If your bench plan forces a guard, that is not a failure. It is the system working as designed.
One detail catches people off guard: some manufacturers offer reduced clearance options, but only when paired with a factory-specified heat shield or accessory. A plywood panel you screwed to the wall yourself does not qualify, no matter how convincing it looks. If you want tighter clearances, buy the accessory that earns them.
Corner, Center-Wall, or Under-Bench: Which Placement Fits Your Room?
Room shape decides more of this than personal preference does. A square room and a narrow rectangular room behave differently under heat, and the placement that works beautifully in one will crowd benches or create cold corners in the other.
- Square rooms favor corner placement. A heater tucked into a corner radiates across two walls simultaneously, spreading convective heat more evenly across a room where every wall is roughly the same length. This is also the layout where corner-specific heater kits and angled mounting brackets earn their keep, since manufacturers design many mid-range electric units with corner mounting in mind.
- Rectangular rooms favor center-wall placement on the short end. Putting the heater on the short wall lets rising heat travel the length of the room before it cools, which keeps the far bench from feeling noticeably weaker than the near one. Center-wall placement on the door wall also tends to simplify wiring runs, since the electrical panel or breaker feed is often closer to that side of the house.
- Small rooms should avoid corner placement if it breaks bench distance. A corner heater in a tight sauna can push the required clearance envelope straight into your only usable bench space. When that happens, center-wall placement on the shortest available wall usually preserves more seating, even if it means slightly less symmetrical heat.
The trade-offs are worth naming plainly. Corner placement costs you a corner of bench or storage space you might have used otherwise. Center-wall placement is easier to wire in most homes but can create a noticeable temperature gradient from near bench to far bench if the room runs long. Under-bench placement, meanwhile, looks tidy in a rendering but is rarely permitted by any major manufacturer, because it puts the stone load directly beneath seated bathers and violates nearly every published clearance chart.
Pro Tip: Before you commit to a corner layout, sit on your planned bench position (or a folding chair in roughly the same spot) and reach toward where the heater would sit. If your knee or hand crosses into the clearance zone on a tape measure, move the bench before you order the heater, not after.
Manufacturer exceptions matter here too. Some heater lines ship with angled corner brackets and a published clearance chart specific to that mounting style, which can shrink the footprint compared to a flat center-wall install. Others explicitly warn against corner mounting altogether. There is no universal answer independent of the model you buy, which is exactly why sizing the heater to your room has to happen before you finalize placement, not after.
Where Should Intake and Exhaust Vents Go Relative to the Heater?
Vent placement is not a separate decision from heater placement. It is the second half of the same decision, and skipping it is why some finished saunas end up with scorching floors near the heater and a cool, sluggish bench on the far wall.
The intake vent belongs directly below or just behind the heater, sized to roughly 125 square centimeters of cross-section for a typical family-sized sauna, according to the Sauna Heater Clearance Guide. That position is not arbitrary. Cold air pulled in near the heater’s base gets warmed almost instantly and rises, starting a convection loop that pulls new air in behind it. Installation notes from Tylö confirm that this under-heater intake position is standard across most diagrammed layouts for exactly that reason.
The exhaust vent goes on the opposite wall, positioned high or tucked under the upper bench, and it needs real distance from the intake. Placing intake and exhaust close together short-circuits the convection loop. The air takes a diagonal path, sweeping across the width of the room instead of straight across a narrow gap. This is what keeps the whole room heating evenly rather than just the corner near the heater.
A few checks are easy to skip but worth doing before you close up the walls.
- Confirm both vents have adjustable louvers, since sealed-shut vents defeat the whole design
- Never let exhaust discharge into open living space; route it to the outdoors or a ventilated area per your local mechanical code
- Aim for the air-change rate your heater manufacturer specifies, since underventilated rooms report inaccurate thermostat readings and overheated lower benches
- Check that the intake is not blocked by a bench support or trim board added late in construction
Get this wrong and the symptom shows up fast: hot floors, a thermostat that reads high while the upper bench still feels cool, and stones that seem to run hotter than the display suggests. For a deeper look at how vent sizing interacts with room volume, Saunaheatersupply’s sauna ventilation guide walks through the math room by room, and the general airflow principles covered in this HVAC ventilation overview apply just as much to a six-foot cedar box as they do to a whole house.
What Mounting and Electrical Work Does the Installer Need to Handle?
Mounting a sauna heater is straightforward carpentry until it meets code-mandated electrical work, and that second half is where a licensed electrician has to take over.
Mounting basics:
- Back the wall with a 2x4 or solid stud, since drywall alone will not hold a heater’s weight or withstand the heat cycling
- Follow the manufacturer’s bracket template exactly. Do not eyeball hole spacing
- Set mounting height so the top of the unit sits roughly 12 to 16 inches below the ceiling for most wall-mounted electric heaters, unless the manual specifies otherwise, per Finsauna’s HOMEHEAT installation guidance
Electrical requirements:
- Most electric sauna heaters need a dedicated 240V circuit sized to the unit’s wattage
- Wiring inside the sauna must be permanent. No extension cords, no plug-and-cord setups, no pigtail splices hidden behind the paneling
- Use seal-tight flex conduit and copper wire rated for high heat exposure; standard PVC-insulated cable is usually not acceptable inside the hot zone according to manufacturer wiring notes.
- Some models explicitly prohibit GFCI breakers, a detail called out directly in IKI’s Pillar installation instructions, so check your model before your electrician assumes standard GFCI protection applies
- Mount controls and the thermostat sensor outside the sauna room itself, per manufacturer placement diagrams
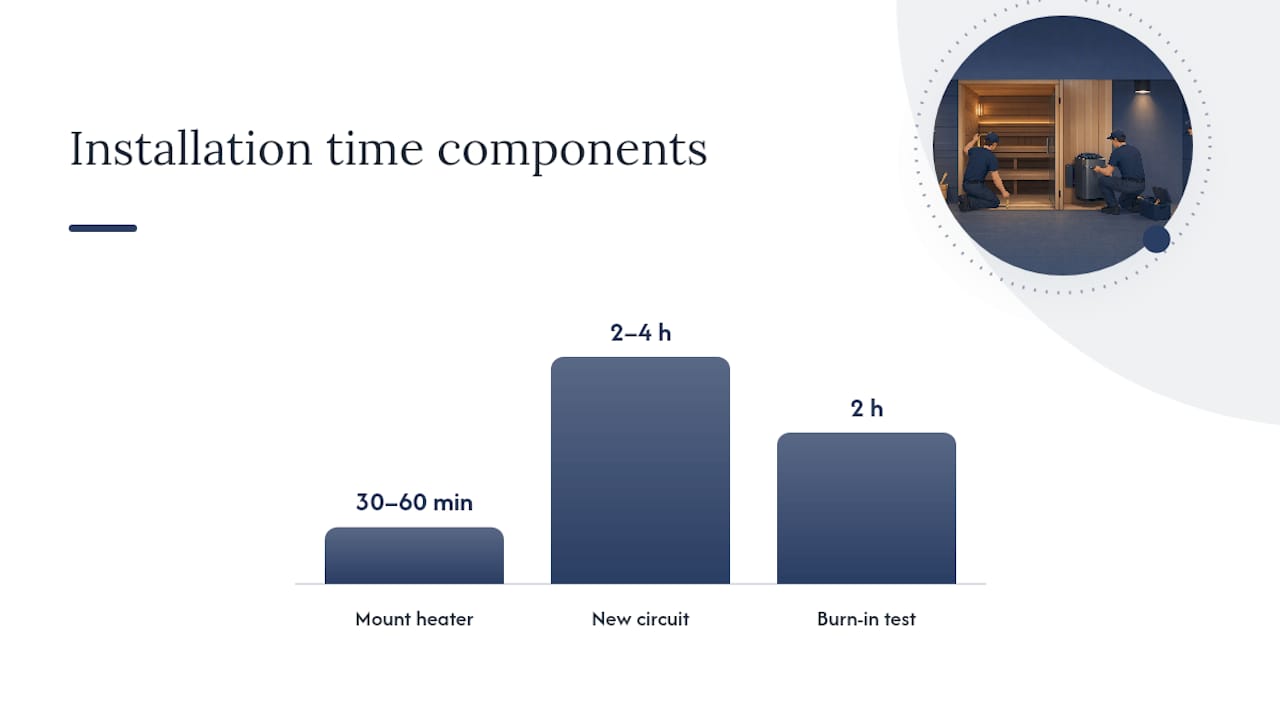
Budget your timeline realistically. Mounting the heater itself usually takes 30 to 60 minutes, but running a new dedicated circuit typically adds 2 to 4 hours of licensed electrician time, and wood-fired units with a flue add a half day or more.
Once wiring is complete, load the stones following the manufacturer’s piling method (a denser lower layer to shield the heating elements, a looser center layer for airflow) and run an initial burn-in test, typically a two-hour run before first use, checking that stones settle and no unusual odors persist. Most jurisdictions require an electrical permit for any new 240V circuit, so loop your electrician in early rather than after the walls are closed. Saunaheatersupply’s step-by-step installation guide and its companion electrical planning resource are both worth handing to your electrician before the first cut is made.
Pro Tip: Ask your electrician to pull the permit before mounting day, not after. Inspectors in most jurisdictions want to see the circuit before the paneling closes it in, and reopening finished cedar walls to satisfy a failed inspection is a painful, expensive redo.
How Do Guards and Bench Layout Keep Users Safe?
A heater guard is not optional trim. It becomes mandatory the moment a bench sits within the manufacturer’s specified distance from the stone load, and installation guides publish exact minimum guard dimensions for that reason.
Bench spacing needs a physical test, not just a tape measure against a drawing. Sit where the bench will be and reach naturally toward the heater. If your knee or an outstretched hand crosses into the clearance envelope, the layout fails regardless of what the paper plan says.
A short list of checks catches most problems before installation locks them in:
- Confirm bench edges sit entirely outside the published clearance envelope, not just close to it
- Allow extra clearance for a folded towel resting on the bench edge, since fabric bunching can shrink the real-world gap
- Mount the guard using manufacturer-approved materials and hardware, never a improvised wood frame
- Post any required warning signage near the heater, matching the placement shown in the manufacturer’s diagram
- After installation, verify door swing does not intrude on the clearance zone and remeasure every distance on the finished room, not the framing stage
Saunaheatersupply’s heater guard fitting guide covers dimension charts across common heater lines if you need a starting reference before your model manual arrives.
Final Placement Checklist Before You Call the Electrician
Everything above compresses into one ordered checklist you can hand directly to your installer or electrician.
- Decide on corner, center-wall, or another manufacturer-approved placement based on room shape and bench plan
- Pull the exact model manual and confirm every clearance figure. Side, front, overhead, bench, and floor distance
- Mark those clearances on the finished room, then physically test bench reach against the marked envelope
- Record intake and exhaust vent locations on the drawing, with the intake positioned below or behind the heater
- Mark the control box and thermostat sensor location outside the sauna room
- Hand the electrician the model manual, expected breaker size, and preferred control location
- Before first use, confirm mounting backing is solid, conduit path is sealed and rated, stone count matches spec, the guard is installed, and the burn-in test is signed off
| Checklist item | What to confirm |
|---|---|
| Placement type | Matches room shape and bench plan |
| Clearance measurements | Match the exact model manual, not general ranges |
| Vent locations | Intake below/behind heater; exhaust on opposite wall |
| Electrical | Dedicated 240V circuit, permanent wiring, correct conduit |
| Guard | Installed per manufacturer dimensions if bench distance triggers it |
| Burn-in test | Completed and documented before regular use |
Why Layout Mistakes Happen More Often Than You’d Think
The mistake we see most often at Saunaheatersupply is not a bad heater choice. It’s a good heater ordered for the wrong spot in the room. Someone falls in love with a corner layout in a photo, orders the unit, and only discovers the bench needs to shrink by a foot once the clearance chart comes out of the box.
Model-specific clearances feel like fine print until they force a redesign mid-project. That is exactly why we encourage a layout check before you buy, not after. If you are unsure whether your room shape supports the placement you have in mind, our sauna sizing guide and our team’s product guidance exist to catch that problem while it still costs nothing to fix.
— Teddy
Which Heater Fits Your Layout?
Once your clearances and vent locations are marked, matching a heater to the room gets a lot simpler.
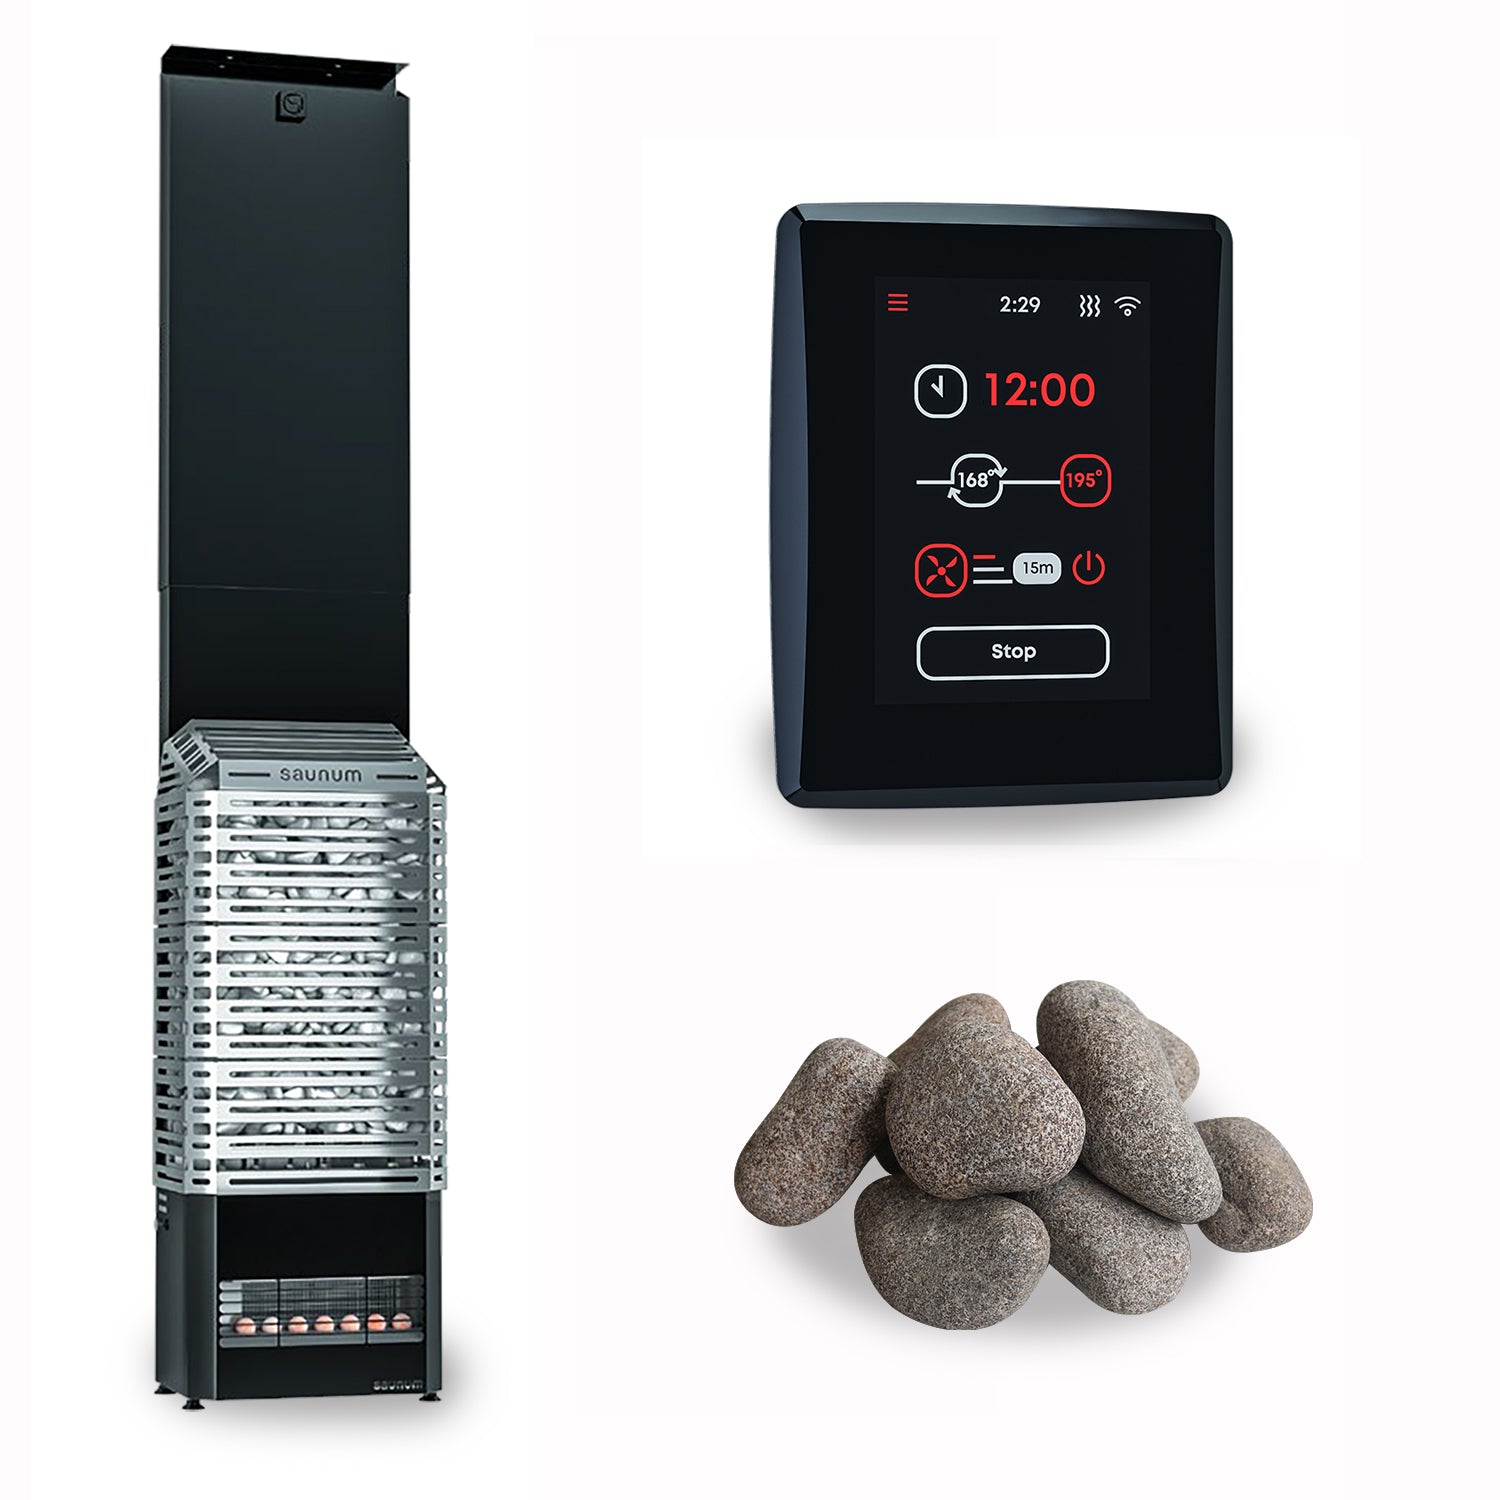
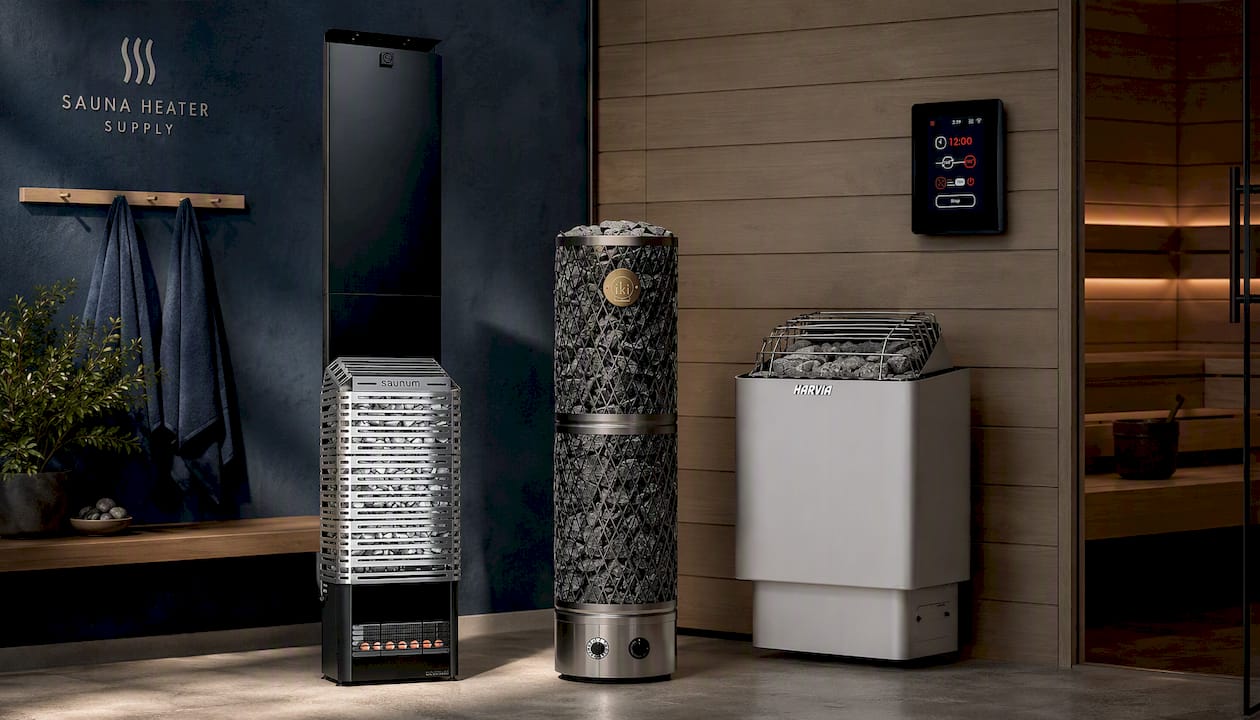
The Saunum Air 7 Sauna Heater Package suits smaller to mid-sized rooms where a center-wall install on the short wall is the priority, particularly when even heat distribution across a narrow bench run matters more than raw output. For larger rooms or installs where a center-wall placement needs more heating capacity, the IKI Pillar 9kW with wifi controller glass is built for exactly that scenario, with a glass-front controller that keeps the control interface outside the direct heat zone. If your layout calls for a heater-and-stone package sized for a larger family sauna, the Harvia Kip45W Heater Package wifi w/stones ships with stones included, which simplifies the piling step covered earlier.
None of these replace pulling your specific model’s clearance chart. What they do is give you a shortlist that already fits the placement patterns most home saunas use. If you are not sure which one matches your room, reach out to our team for a pre-purchase layout check before you place an order.
Sources
- Sauna Heater Clearance Guide: The Spec You Cannot Ignore
- HOMEHEAT Series installation manual (Finsauna)
- Scandia Electric Heater installation instructions
- IKI Pillar installation instructions (NA)
FAQ
What Is the “200 Rule” for Saunas?
There is no single standardized rule recognized across manufacturer manuals. The number that actually governs installation is your specific heater model’s clearance chart, so treat any generic rule of thumb as a starting estimate, not a substitute for the manual.
How Far Should a Sauna Be From Your House?
That distance depends on local building codes, the sauna’s fuel type, and whether it is wood-fired or electric, so check with your local permitting office rather than relying on a fixed number. For attached electric saunas, the deciding factors are usually the dedicated circuit run and standard structural clearance rules, not a sauna-specific setback.
What Happens After 20 Minutes in a Sauna?
Individual sauna session length is a personal comfort and hydration question that depends on heat tolerance and heater type, not on heater placement. From an installation standpoint, proper vent placement and clearance matter regardless of how long any single session runs, since airflow keeps heat distribution stable throughout a full session.
Do Saunas Need a Floor Drain?
Traditional wood-fired and steam-style saunas that involve water use for ladling onto stones often include a floor drain, while many dry electric home saunas do not require one. Whether you need a drain depends more on your heater type and whether you plan to pour water on the stones than on where the heater sits in the room.
Can I Put a Sauna Heater Under a Bench?
Under-bench placement is rarely permitted by major manufacturers because it puts the stone load too close to seated bathers and typically violates published clearance charts. Center-wall or corner placement, chosen based on your room’s shape, is the standard approach recommended across manufacturer installation guides.