















Wood Fired Sauna Ventilation: Layout, Sizing, and Safety
For a safe, comfortable wood-fired sauna, provide a dedicated combustion-air inlet for the stove plus a low exhaust vent on the opposite wall, with the fresh-air inlet positioned about 50 cm (roughly 2 feet) above the stove top. An optional ceiling purge vent stays closed during heating and opens only after bathing to clear residual humidity.
For occupancy-based sizing, plan on roughly 20 to 25 CFM per person plus 15 to 25 CFM to account for the heater sensor. A two-person sauna typically needs 50 to 75 CFM of total airflow capacity; a six-to-ten-person commercial unit needs 125 to 200 CFM.
Here’s the practical layout most builders should start from:
- Intake: Dedicated combustion-air duct to the firebox, or a fresh-air vent 50 cm above the stove if no external duct exists.
- Exhaust: Low vent under the bench on the wall opposite the stove.
- Optional purge: Ceiling vent stays closed during heating and opens only after bathing to clear residual humidity.
- Fan (if needed): 4 to 6 inch inline duct fan with adjustable speed control.
Sauna Heater Supply’s ventilation guide for homeowners and builders covers layout diagrams in more depth, and heater packages like the Harvia Kip45W and IKI Pillar 9kW are worth reviewing if you’re still choosing a stove for a new build.
Key Takeaways
Effective wood-fired sauna ventilation depends on separating combustion air from room ventilation air and sizing both according to occupancy and stove demand, not guesswork.
| Point | Details |
|---|---|
| Separate the air paths | Give the stove its own combustion-air duct or inlet distinct from the room’s ventilation vents. |
| Follow the placement rule | Position the intake about 50 cm above the stove and the exhaust low under the opposite bench. |
| Size intake for stove draw | Increase intake vent area by about 50% if the stove lacks an external combustion-air duct. |
| Use CFM, not guesswork | Budget 20 to 25 CFM per person plus 15 to 25 CFM for the heater sensor when sizing a fan. |
| Match products to layout | Sauna Heater Supply’s wood-capable heater packages and barrel sauna kits are built around these same ventilation principles. |
Table of Contents
- What Is the Difference Between Combustion Air and Ventilation Air?
- Where Should Vents Go in a Wood Sauna?
- How Do You Supply Combustion Air to a Wood Stove?
- Should You Use Passive or Mechanical Ventilation?
- What’s the Installation Order for Sauna Ventilation?
- How Do You Maintain and Troubleshoot Sauna Ventilation?
- Why Trust Sauna Heater Supply on Wood-Fired Ventilation
- What Builders Get Wrong About Sauna Airflow
- Get the Right Wood-Fired Heater and Ventilation Parts
- Frequently Asked Questions
- Sources
What Is the Difference Between Combustion Air and Ventilation Air?
Combustion air feeds the fire. Ventilation air keeps the room breathable for the people inside it. Confusing the two is the single most common design mistake in wood-fired sauna builds, and it’s why so many otherwise well-built saunas end up smoky, drafty, or uncomfortably stratified.
A wood stove burns fuel by consuming oxygen and exhausting combustion byproducts up the chimney through stack effect, the natural upward pull created when hot gas rises. That process demands its own air supply, separate from whatever air the bathers are breathing. If the stove has to scavenge combustion air from the same pool of room air that occupants use, you end up shortchanging both. The fire struggles to draw cleanly, and the room’s air exchange rate drops because the stove is now competing with the ventilation system for the same limited air pool.
Combustion-air demand runs roughly 10 to 20 CFM depending on firing rate, according to ThermalFinn’s sauna ventilation guide, which also notes that if your stove lacks an external air intake, you should widen your intake vent by about 50% to make up the difference. That’s not a trivial adjustment. A stove firing hard on a cold night can pull more air than a modest passive vent was ever sized to deliver, and an undersized intake shows up as a smoky room, poor draft, and a fire that won’t hold heat.
Ventilation air solves a different problem: comfort and air quality for the humans in the room. Hot air rises and cold air sinks, which is exactly why a sauna without a properly placed exhaust develops a scorching ceiling and cold feet. ThermalFinn’s design guidance points out that the chimney handles the stove’s exhaust, but it does nothing for the room’s air quality unless you add a dedicated low secondary exhaust vent.
Inlet height matters more than most first-time builders expect. Place the fresh-air inlet too low and you short-circuit the airflow before it ever reaches the upper bench where bathers sit. Place it near the stove, and the rising heat pulls fresh air upward through the room in a natural convective loop, which is part of why the North American Sauna Society recommends the inlet sit above the stove rather than in the ceiling.
Temperature stratification, the layering of hot air near the ceiling and cool air near the floor, is a byproduct of poor mixing rather than insufficient heat. Some manufacturers address this with air-blending technology that captures hot ceiling air and reintroduces it at floor level, a mechanical fix worth knowing about even though it complements fresh-air ventilation rather than replacing it, per Saunum’s commercial ventilation analysis. Heater packages built around this principle, like the Saunum Air 7, are worth a look if cold feet have been a persistent complaint in your sauna.
Where Should Vents Go in a Wood Sauna?
Get the placement right and most of your ventilation problems solve themselves before you ever light the stove. Get it wrong, and no amount of fan power fully compensates.
Here’s the placement sequence that works across the vast majority of wood-fired builds:
- Fresh-air intake: Position it roughly 50 cm (about 2 feet) above the stove top, not in the ceiling. This lets the stove’s own heat draw air upward naturally, following the North American Sauna Society’s recommended configuration.
- Low exhaust vent: Install it under the foot bench, on the wall opposite the stove. Air travels the full width of the room before exiting, which sweeps stale air out instead of short-circuiting near the intake.
- Ceiling purge vent (optional): Keep it closed while heating and during the session. Open it after bathing to flush hot, humid air quickly before the next round of guests or the next day’s use.
- Chimney: Size and install per the stove manufacturer’s specifications, using insulated pipe sections through any wall or ceiling penetration to maintain draft and prevent creosote buildup from cooling exhaust gases too quickly.
On sizing, the 50% rule deserves repeating because it’s the number most DIY builders miss: if your stove doesn’t have a dedicated external combustion-air duct, ThermalFinn’s guidance calls for increasing your intake vent’s open area by roughly 50% over the baseline. A vent that would otherwise be sized at 4 inches by 4 inches becomes closer to 5 by 5, or you add a second smaller vent nearby. Skipping this step is why some wood saunas draft poorly even with a technically correct layout.
Chimney basics are worth a paragraph of their own, because the chimney is often mistaken for the sauna’s whole ventilation system when it’s really just handling combustion exhaust. A Class A insulated chimney pipe, sized to the stove manufacturer’s flue diameter, keeps exhaust gases hot enough to maintain draft all the way to the cap. Undersized or uninsulated pipe cools the exhaust too fast, weakening draft and increasing the odds of smoke spillage back into the room. Always follow the stove manufacturer’s specified pipe diameter and clearance to combustibles; these numbers vary by model and are not a place to guess.
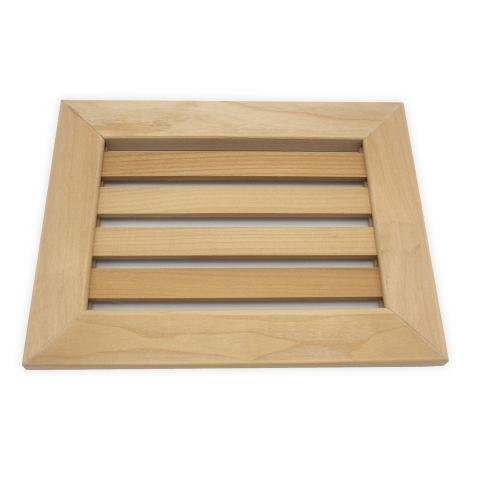
Clearance and penetration details matter just as much as vent placement. Wall and ceiling penetrations for both the chimney and any ducted combustion-air line need proper firestop collars and clearance to combustible materials, per the stove manufacturer’s installation manual and your local building code. Floor-level intakes near the stove base should use a fire-rated grille rather than an open framed hole, both for safety and to keep the opening from becoming a mouse entry point during the off-season.
Pro Tip: Install a simple sliding damper on your low exhaust vent. Keep it wide open during heating for maximum draft, then partially close it once the room stabilizes at temperature. This one adjustment does more to fix “cold feet” complaints than almost any other single change.
Damper hardware doesn’t need to be complicated. A basic slide damper or a hinged flap with a positive-close mechanism gives you seasonal and session-by-session control without adding another system to maintain. In colder climates, some builders add a second damper on the fresh-air intake so it can be throttled down slightly on brutally cold nights, though it should never be closed entirely while the stove is firing.
How Do You Supply Combustion Air to a Wood Stove?
Every wood-fired stove needs a source of air that isn’t shared with the room’s breathing supply, and you have three real options for delivering it.
External combustion-air duct straight to the firebox is the gold standard, and it’s the approach ThermalFinn’s insight on separating combustion air from room ventilation singles out as the cleanest way to simplify tuning and improve löyly quality, the character of the steam released when water hits the hot stones. Route rigid or flexible metal duct from an exterior wall or floor penetration directly to a fitting on the stove’s air intake, sealing every joint to prevent the duct from leaking combustion air into the room before it reaches the firebox. Because the fire draws air independently of the room, you can size room ventilation purely around occupant comfort instead of also covering the stove’s appetite, and draft stays stable regardless of how many doors get opened and closed during a session.
Floor-level inlet near the stove is the simpler, lower-cost fallback, and it’s genuinely acceptable for many outdoor cabin builds where the stove sits close to an exterior wall. Insight from the North American Sauna Society notes that outdoor wood-fired cabins often succeed with simple buried ducts or semi-open floor designs drawing directly from outside air, since the building envelope isn’t sharing conditioned space with the rest of a house.
Room-supplied combustion air works only when the space has enough natural air leakage or a properly sized general intake to keep up with stove demand, and it’s the option that most often gets a wood-fired sauna into trouble when the room is small, tightly built, or located indoors. If you’re installing inside a conditioned home rather than a stand-alone outdoor structure, an indoor sauna needs more controlled air handling to avoid pulling already-heated or air-conditioned house air, according to the North American Sauna Society’s comparison of indoor and outdoor setups.
Coordinating with your house’s broader ventilation system matters more than most contractors initially account for. If the building has mechanical exhaust fans, like a strong kitchen hood or a whole-house exhaust system, running simultaneously with the sauna, you can end up with negative pressure that fights the stove’s draft and pulls smoke back into the room instead of up the chimney. A few practical fixes:
- Coordinate sauna combustion-air timing with any large exhaust fans elsewhere in the house; avoid running both at full draw simultaneously in a tightly sealed home.
- If the sauna sits in a basement, verify the room has an independent air path rather than relying on HVAC returns that may be starved when other equipment runs.
- For any indoor build, an external duct to the firebox removes most of this risk entirely, since the stove stops competing with the house for room air.
If you’re outfitting a basement sauna specifically, the pressure dynamics of a below-grade room make an external combustion-air duct less of a nice-to-have and more of a practical necessity, since basements are typically the most negative-pressure zone in a house.
Should You Use Passive or Mechanical Ventilation?
Passive, stove-driven draft is often sufficient for outdoor wood-fired saunas, while mechanical fans become the more reliable choice for indoor, basement, or commercial installations. The deciding factor isn’t preference. It’s whether the stove and chimney alone can move enough air to keep the room comfortable and safe.
Natural convection works well for wood-burning saunas precisely because the stove itself generates draft, according to the North American Sauna Society’s observation that mechanical systems tend to show up more in apartments and commercial settings rather than stand-alone outdoor cabins. A small, well-sealed outdoor sauna with a properly sized chimney and correctly placed intake and exhaust vents genuinely doesn’t need a fan. The temperature differential between the hot stove and the cold exterior air does the work.
Indoor saunas, larger commercial installations, and any space where you need active control over CO2 levels or occupancy-driven airflow are where mechanical ventilation earns its place. A fan lets you actively manage air exchange rather than hoping stack effect does enough on its own, which matters when occupancy swings from two people to a full commercial group.
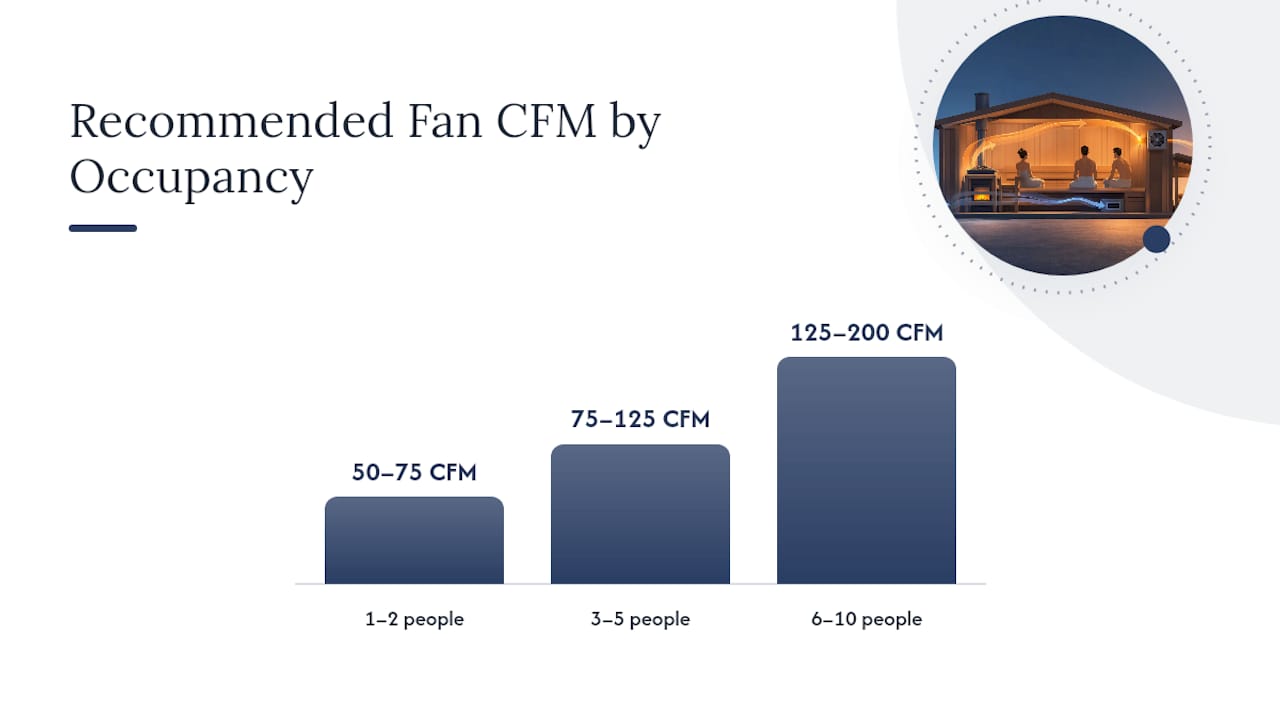
Sizing a fan comes down to CFM math rather than guesswork. Tahoe Sauna Company’s ventilation calculations recommend budgeting about 20 to 25 CFM per person, plus an additional 15 to 25 CFM allowance to keep the heater’s sensor reading accurately instead of getting fooled by stagnant air pockets.
| Occupancy | Recommended CFM Range |
|---|---|
| 1–2 people | 50–75 CFM |
| 3–5 people | 75–125 CFM |
| 6–10 people | 125–200 CFM |
A 4 to 6 inch inline duct fan covers most residential installations within these ranges, and Tahoe Sauna Company’s design notes stress that the fan should be adjustable rather than fixed-speed, since a fixed high-volume fan can actually starve the wood stove of the air it needs to draft properly. That’s a real failure mode worth taking seriously: a fan pulling too aggressively on room air competes directly with the stove for the same limited supply, especially in a build without a dedicated combustion-air duct.
Adjustability isn’t just a nice feature. Being able to tune airflow up for a full commercial session and down for a quiet two-person soak is exactly why Tahoe Sauna Company treats variable-speed control as standard practice for mixed-use spaces rather than an upgrade.
Pro Tip: Before finalizing your fan choice, test it with the stove actively firing, not just running empty. If flames waver, smoke backdrafts, or the fire struggles to hold heat when the fan kicks on, you’ve oversized the fan relative to your combustion-air supply. Dial it back or add a dedicated combustion-air duct before locking in the installation.
What’s the Installation Order for Sauna Ventilation?
Getting the sequence right saves you from cutting a second hole in a finished wall because the vent went in before you’d finalized stove placement. Work through these phases in order.
- Pre-install planning. Calculate room volume and match it against the CFM table above to confirm your occupancy target. Choose a stove with an external combustion-air option if your floor plan allows it, since that single decision simplifies nearly everything downstream. Order an insulated chimney kit matched specifically to your stove model rather than a generic pipe diameter.
- Rough-in. Install the combustion-air duct or floor-level inlet first, before framing closes in around the stove location. Mount the low exhaust vent under the opposite bench, confirming it sits below the bench seating height rather than behind it. Run the chimney per the manufacturer’s clearance specifications and install the cap. Fit sliding dampers on both the exhaust and, if used, the fresh-air intake.
- Finishing. Install bench material, wall paneling, and trim around vent openings, making sure no finish material obstructs airflow through the grilles you’ve just installed.
- Commissioning. Run a smoke or draft test with the stove firing at a normal load to confirm smoke exits cleanly through the chimney with no spillage. Check CO and CO2 levels with a handheld meter near bench height. Verify bench temperature differential between floor and upper bench is reasonable, ideally within a comfortable range rather than showing severe stratification. Tune any adjustable fan to the lowest setting that still meets your CFM target, and document the final settings for the homeowner.
Pro Tip: Write the commissioning results down and hand them to the homeowner, fan speed setting, damper positions, and the date of the smoke test. A year from now, when someone’s troubleshooting a draft complaint, that single sheet of paper saves an afternoon of guesswork.
Room volume math is worth doing on paper before you buy anything. Multiply length by width by height in feet to get cubic footage, then cross-reference against the occupancy-based CFM table rather than an old-fashioned air-changes-per-hour rule, since Tahoe Sauna Company’s calculations point out that CFM sizing tracks real-world comfort more reliably than a flat ACH number for a space this small and this hot.
How Do You Maintain and Troubleshoot Sauna Ventilation?
A wood-fired sauna’s ventilation system needs the same seasonal attention as its chimney, and skipping it is how small draft problems turn into mold problems.
Annual maintenance checklist:
- Schedule a professional chimney sweep at least once a year, more often with heavy seasonal use, to clear creosote buildup that weakens draft and raises fire risk.
- Inspect intake and exhaust dampers for smooth operation and confirm seals aren’t cracked or gapped from thermal cycling.
- Check bench undersides and wall cavities near the exhaust vent for mold or wood rot, since poor ventilation is a documented driver of mold growth in high-heat, high-humidity rooms.
- Confirm the combustion-air path, whether duct or floor inlet, is fully clear of stored items, insulation, or pest nesting material.
Safety checks matter as much as comfort checks. Install a CO alarm in or near the sauna’s entryway and confirm chimney clearances to combustibles still meet the original installation spec, since renovations sometimes creep material closer than code allows. Never block a combustion-air path to “save heat,” a mistake that starves the fire and increases the risk of smoke backdrafting into the room. If smoke or odor drifts into adjacent rooms during firing, treat it as an immediate draft problem rather than something to monitor.
For troubleshooting weak draft, check the chimney cap for blockage first, then confirm the combustion-air supply hasn’t been obstructed. Cold feet almost always trace back to exhaust vent placement or a missing damper adjustment rather than an underpowered stove. Persistent excess humidity that doesn’t clear after opening the ceiling purge vent usually means the low exhaust is undersized or blocked. Call a professional chimney technician or sauna installer if a smoke test shows spillage, if CO readings register above trace levels, or if you’re not confident diagnosing a draft issue yourself.
Why Trust Sauna Heater Supply on Wood-Fired Ventilation
For wood-fired builds specifically, a few products come up repeatedly in customer installations:
- Harvia Kip45W Heater Package with wifi controls and stones, suited to standard residential room sizes.
- IKI Pillar 9kW with wifi controller glass, a strong fit where floor-space efficiency matters.
- Saunum Air 7 and the larger Saunum Air L 15 Package, both built around air-blending technology that addresses temperature stratification directly.
- Finnmark Thermo-Aspen and Finnmark Cedar combination barrel saunas, pre-engineered outdoor units where the ventilation layout comes largely solved.
- iSteamX Steam Shower Control and its companion temperature probe, both relevant to commissioning-stage temperature verification in combination steam and sauna spaces.
…
What Builders Get Wrong About Sauna Airflow
Most ventilation advice treats intake and exhaust sizing as the whole problem, and that’s where conventional guidance falls short. The bigger failure point is builders who never separate combustion air from room air in the first place, then spend months chasing a smoky room or cold feet without realizing the fix was never about vent size at all.
If you take one thing from this article, prioritize the combustion-air duct before you touch a CFM chart. A stove with a clean, independent air supply drafts predictably, and every downstream calculation, exhaust placement, fan sizing, damper adjustment, gets easier once that variable is fixed. Skip it, and you’re solving three problems (fire performance, room comfort, and humidity control) with one shared, undersized air supply.
Adjustable mechanical ventilation gets dismissed too often as an indoor-only concern. Even a strong outdoor build benefits from a simple adjustable fan for shoulder-season days when natural draft alone can’t keep up. Treat CFM math as a starting point, then verify it with a real smoke test under load. The number on paper and the number that actually works in your room aren’t always the same.
Get the Right Wood-Fired Heater and Ventilation Parts
Getting the vent layout right only pays off if the heater behind it is sized and specced correctly, and that’s where Sauna Heater Supply fits into everything covered above. Unlike a general hardware retailer, Sauna Heater Supply curates wood-fired heater packages, chimney kits, and air-blending climate devices specifically matched to the combustion-air and CFM principles this article just walked through, so you’re not reverse-engineering compatibility between a stove and a ventilation plan bought from two different places.
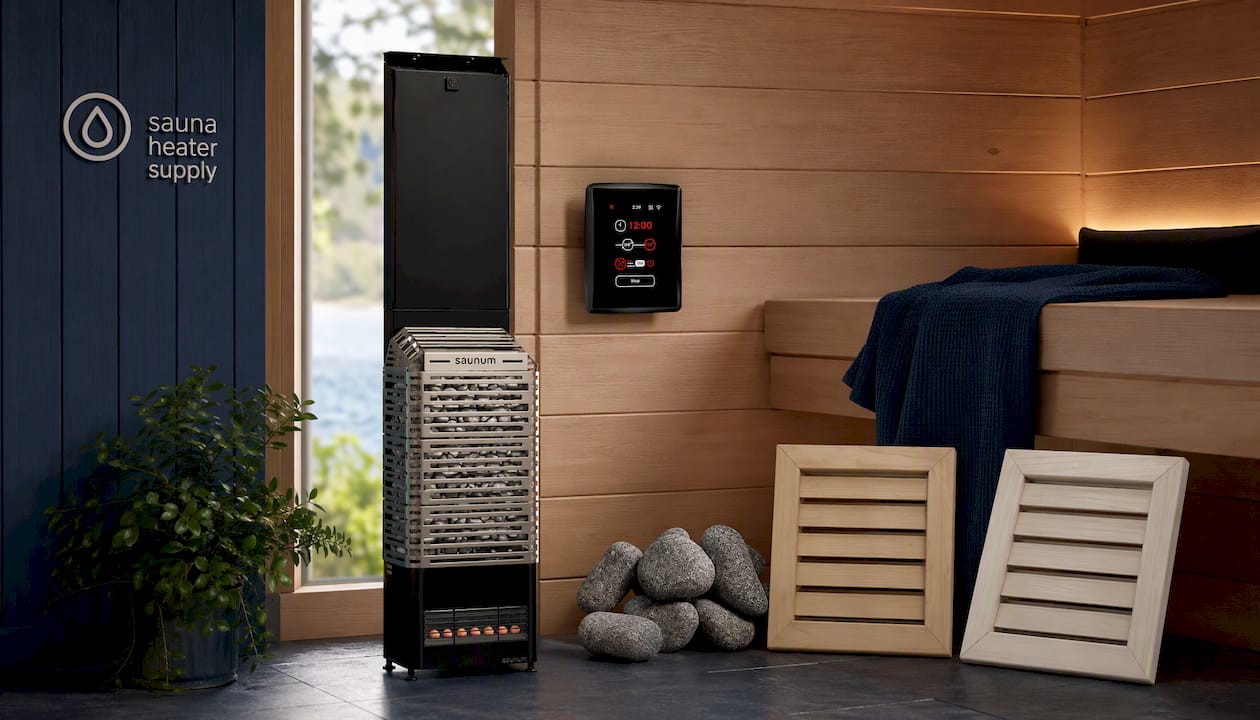
If you’re still choosing a stove, the Harvia Kip45W Heater Package and IKI Pillar 9kW both support external combustion-air configurations discussed here, and the Saunum Air 7 is worth a look if temperature stratification is your main concern. For a deeper technical walkthrough with diagrams, the ventilation guide for homeowners and builders pairs well with product specs before you finalize a parts list. Browse the current heater lineup and chimney accessories, or reach out to Sauna Heater Supply’s product team to confirm CFM and combustion-air fit for your specific room dimensions before you order.
Frequently Asked Questions
Do wood-fired saunas need mechanical ventilation, or is passive airflow enough? Outdoor wood-fired saunas with a properly sized chimney and correct vent placement often run fine on passive draft alone, since the stove itself generates the pull needed to move air through the room. Indoor, basement, and commercial installations more often need a mechanical fan because they lack the strong temperature differential that drives passive stack effect outdoors.
Where exactly should the intake vent go in a wood sauna? Place it roughly 50 cm (about 2 feet) above the stove top rather than in the ceiling. That height lets the stove’s rising heat pull fresh air naturally through the room toward the low exhaust vent on the opposite wall.
How much combustion air does a wood stove actually need? Most wood stoves draw somewhere in the 10 to 20 CFM range depending on firing rate. If your stove doesn’t have a dedicated external combustion-air duct, plan to increase your room’s intake vent area to provide sufficient combustion air.
What size fan do I need for a mechanical sauna ventilation system? A 4 to 6 inch inline duct fan covers most residential setups. Size it according to occupancy with ranges that scale from small to larger groups, using an adjustable speed control to tune airflow without starving the stove.
Can I use the same low exhaust vent for both wood-fired and electric sauna heaters? The room-side exhaust placement principles are similar, but electric heaters don’t need a separate combustion-air supply the way wood stoves do. If you’re weighing the two, the differences in combustion-air requirements between wood and electric heaters are worth reviewing before you finalize your vent layout.
Sources
- Sauna Ventilation Guide: Intake, Exhaust & the 6x Air Exchange Rule | ThermalFinn
- Sauna air quality — North American Sauna Society
- Sauna air changes per hour: CFM sizing & ventilation calculations | Tahoe Sauna Company
- Sauna and spa ventilation — Ventilationland