















Sauna Heater Installation: Step-by-Step Guide for Homeowners
You can handle most of the physical sauna heater installation yourself. Site preparation, heater mounting, stone placement, and control panel mounting in a dry location are all tasks a competent DIYer can complete safely. What you cannot do is the final electrical hookup. Permanent wiring, breaker sizing, conduit termination, and panel labeling must be performed by a licensed electrician, and in most U.S. jurisdictions that work requires a permit and inspection. The Finsauna HomeHeat Installation manual states this directly: heaters must be permanently hardwired with no pigtails or plug connections, and wiring must be completed by a licensed electrician following the wiring diagram in the manual.
The relevant standards you will encounter include the NEC (National Electrical Code), which governs dedicated circuit requirements in the U.S., and EN 60335-2-53, an international safety standard that many manufacturers reference in their installation manuals. Saunaheatersupply stocks the heaters, controls, stones, and accessories you need, and the product pages carry model-specific wiring and clearance data to share with your electrician.
Your four-step action plan before anything else:
- Measure your sauna room volume in cubic feet (length × width × height).
- Use that volume to select the correct kW heater for your space.
- Confirm manufacturer-specified clearances for the model you choose.
- Schedule a licensed electrician for the wiring, breaker, and final inspection.
Table of Contents
- What tools and materials do you need before starting?
- How do you install a sauna heater step by step?
- What are the electrical requirements for a residential sauna heater?
- How do you size a sauna heater and choose the right type?
- What clearances, ventilation, and safety signage does your sauna need?
- When do you need permits, inspections, and a licensed electrician?
- How do you troubleshoot and commission your sauna heater after installation?
- Key Takeaways
- The part most homeowners underestimate about sauna heater installation
- Saunaheatersupply has the heaters, stones, and controls you need
- Useful sources for your sauna heater installation
What tools and materials do you need before starting?
Gathering everything before you begin prevents mid-project delays and unsafe substitutions. Split your list into two categories: what you supply and what your electrician brings.
Mechanical tools (homeowner supplies):
| Tool | Purpose |
|---|---|
| Drill with masonry/wood bits | Mounting holes for heater bracket and control panel |
| Stud finder | Locate framing for secure anchor points |
| Tape measure and level | Confirm clearances and plumb mounting |
| Screwdrivers (flathead and Phillips) | Bracket fasteners and cover plates |
| Impact driver or manual anchors | Secure backing board and bracket to wall framing |
| Safety glasses and heavy gloves | Eye protection when drilling; hand protection when handling stones and heater mesh |
Materials the homeowner must have on-hand before the electrician arrives:
| Item | Notes |
|---|---|
| Heater unit and mounting bracket | Confirm bracket is included or ordered separately |
| 2×4 backing board | Required behind drywall for wall-mounted models |
| Control panel and sensor | Mount in dry location per manual |
| Sauna stones of a size recommended by the manufacturer (typically several inches in diameter) | Wash before use; quantity per heater spec |
| Metal CAUTION sign (interior) | Placed above heater on interior wall |
| Metal WARNING sign (exterior) | Fastened on outside of sauna door |
| Seal-tight flex conduit stub | Homeowner installs the stub; electrician terminates |
| Junction box cover plates | Secure before electrician arrives |
What the electrician supplies: properly sized copper conductors rated for 194°F (90°C), circuit breakers, conduit fittings, and any panel hardware. Do not purchase wire or breakers yourself — the electrician must size these to the heater’s wiring diagram and local code.
Pro Tip: Wear long sleeves and leather gloves when handling sauna stones and the heater’s wire mesh guard. Stones arrive with sharp edges, and the mesh can cut through thin work gloves quickly.
How do you install a sauna heater step by step?
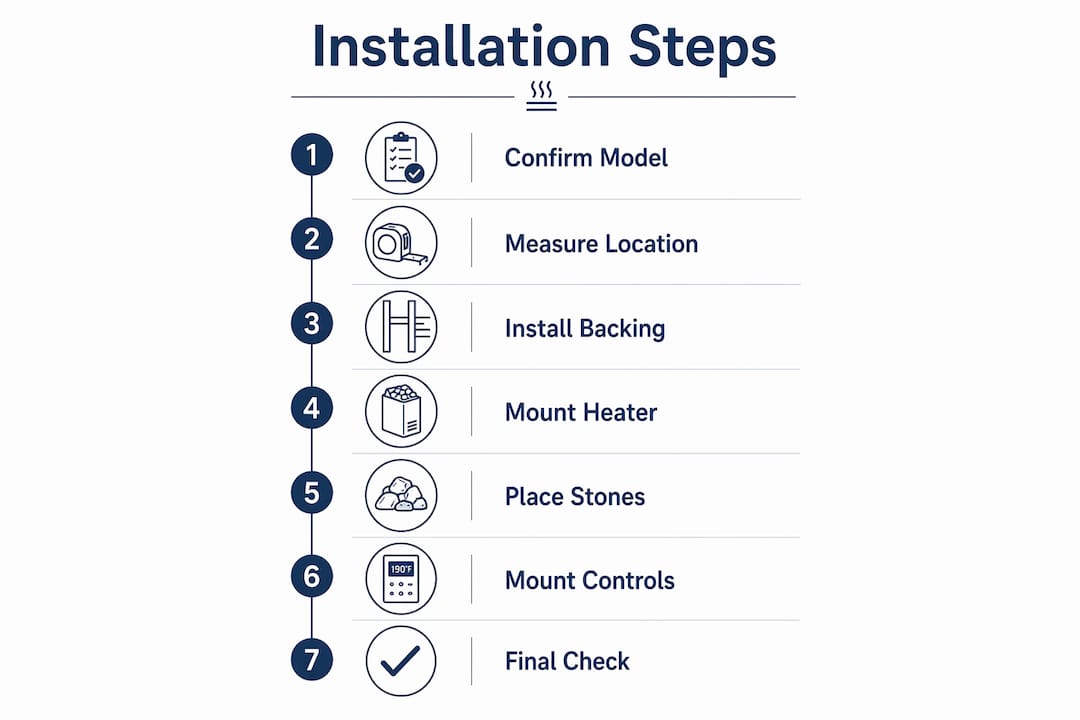
This sequence covers all physical tasks you can complete before the electrician arrives. Electrical connections are not part of this workflow.
Step 1: Confirm your heater model and manual
Pull the installation manual for your specific model before touching anything. Clearance distances, mounting heights, stone quantities, and control wiring diagrams vary by model. Never substitute a generic guide for the manual that ships with your unit.
Step 2: Measure and mark the installation location
Calculate your sauna room volume (length × width × height in feet). Mark the heater’s center position on the wall or floor. Use a stud finder to locate framing, then mark the required clearance perimeter around the heater location with painter’s tape. This gives you a visual boundary to work within before any hardware goes up.
Step 3: Install the backing board (wall-mounted models)
Wall-mounted heaters require solid backing. If your wall is standard drywall over studs, fasten a 2×4 backing board horizontally between studs at the correct mounting height. The bracket must anchor into framing or solid backing, not drywall alone. Check your manual for the exact mounting height above the floor.
Step 4: Mount the heater bracket and hang the heater
Attach the mounting bracket to the backing board using the fasteners specified in the manual. Hang the heater on the bracket and verify it is level. For floor-standing models, position the heater on its feet at the marked location and confirm it sits level on the floor. Have a second person assist with lifting, as most residential heaters are moderately heavy before stones are added.
Step 5: Place and fill the stones
Stone placement directly affects heater performance and element life. Wash all stones before use. Place stones densely around the outer edges and top of the heater, and stack more loosely between the heating elements to allow airflow. No heating elements should be visible when you are done. Use stones in the 2–4 in (5–10 cm) range unless your manual specifies otherwise. Stones that are too small or packed too tightly cause element overheating and reduce element life.
Pro Tip: Stage the heater at a slight angle away from the wall before the electrician arrives. This gives them clear access to the junction box and conduit entry without having to move a fully loaded heater.
Step 6: Mount the control panel and position the sensor

Control panels must be installed in a dry location, away from showers and pools. Mount the control unit on the exterior wall or in a dry utility area per your manual’s instructions. Route the thermostat capillary tube or sensor wire to the location specified in the manual, but leave the coil in place for the electrician to connect. Do not pull or kink the capillary tube.
Step 7: Final mechanical checks before the electrician arrives
- Confirm all cover plates are secured.
- Verify no wiring is exposed anywhere in the sauna room.
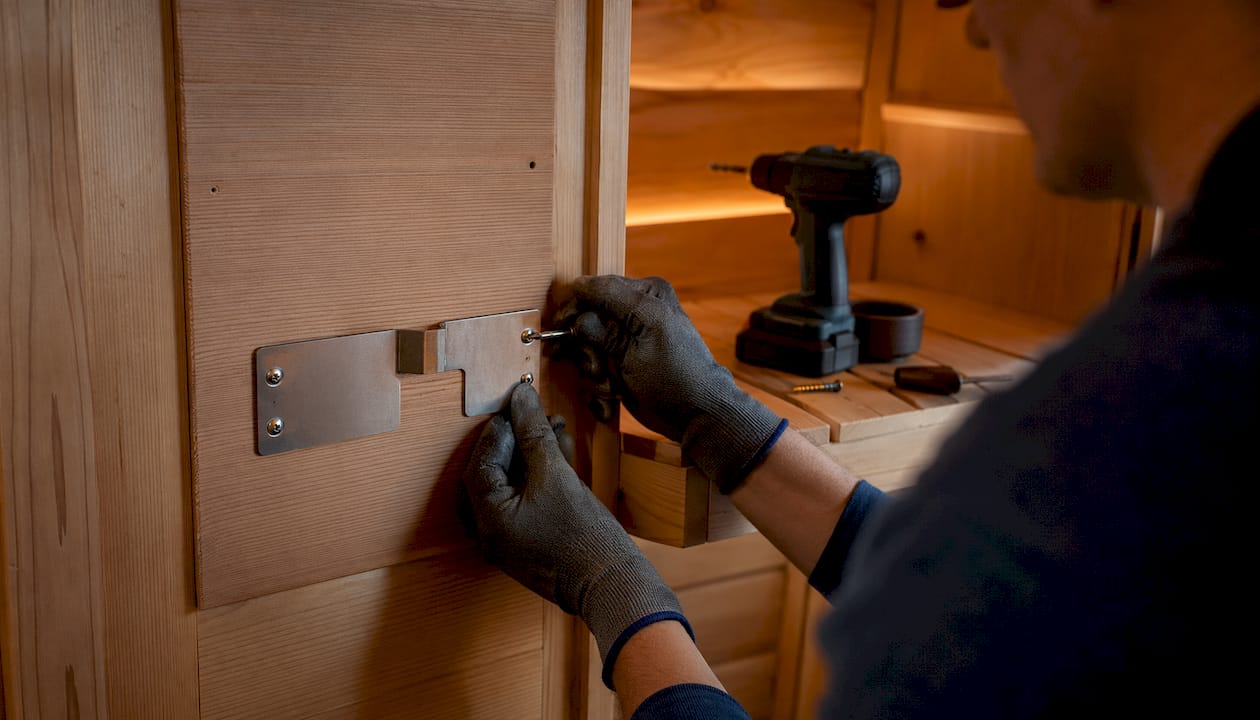
- Fasten the metal CAUTION sign on the interior wall directly above the heater.
- Fasten the metal WARNING sign on the outside of the sauna door.
- Double-check that the heater is level and the bracket fasteners are tight.
- Confirm the seal-tight conduit stub is in place at the wall penetration.
What are the electrical requirements for a residential sauna heater?
Sauna heaters run on 240V single-phase power in most residential installations, drawing significant amperage that requires a dedicated circuit. This is not a job for a homeowner to wire. The information below is what you need to understand and communicate to your electrician.
Core electrical requirements
Every residential sauna heater installation requires:
- A dedicated 240V circuit (no shared circuits with other appliances).
- A breaker sized to the heater’s ampacity per the manufacturer’s wiring diagram and NEC requirements.
- Copper conductors rated for 194°F (90°C) inside sauna walls, run through seal-tight flex conduit from the wall to the heater junction box.
- A lockable disconnect or labeled breaker outside the sauna, accessible before the control unit.
- Permanent hardwiring with no pigtails, plugs, or extension cords of any kind.
Illustrative kW-to-circuit reference table
This table shows typical relationships between heater output and circuit requirements. Confirm every figure with your specific heater’s wiring diagram and your electrician before ordering materials.
| Heater output | Typical voltage | Illustrative breaker size | Illustrative wire gauge |
|---|---|---|---|
| 4–6 kW | 240V, 1-phase | — | 10 AWG |
| 7 kW | 240V, 1-phase | — | — |
| 10 kW | 240V, 1-phase | — | 6 AWG |
| — | 240V, 1-phase | — | 4 AWG |
Wiring inside sauna walls must use copper conductors rated for 194°F (90°C) and should be run through seal-tight flex conduit from the wall penetration to the heater junction box. Aluminum conductors and standard NM cable (Romex) are not acceptable inside a sauna environment. Confirm wire type and conduit specifications with your electrician and the heater’s wiring diagram before any work begins.
The GFI question
Manufacturers commonly advise that a ground-fault interrupter should not be installed in the sauna circuit. A GFI can nuisance-trip due to the high-temperature, high-humidity environment and may cause damage. Confirm this with your electrician and local inspector, as some jurisdictions may have specific requirements that override the manufacturer’s guidance.
Pro Tip: Give your electrician the heater’s installation manual, the wiring schematic, and the measured sauna volume before the appointment. Electricians who arrive with that information on hand can size the circuit correctly on the first visit and avoid return trips for panel changes.
How do you size a sauna heater and choose the right type?
Matching heater output to room volume is the single most important decision in a sauna heating system setup. An undersized heater never reaches temperature; an oversized one wastes energy and can overheat the room.
Sizing rules of thumb
Manufacturers provide sizing tables that convert room volume (in cubic feet or cubic meters) to recommended kW output. As a general starting point, most electric heaters are rated for approximately 1 kW per 45–50 cubic feet of sauna volume under standard conditions. Adjust upward for:
- Glass walls or doors (glass loses heat faster than insulated wood panels).
- Tile or concrete surfaces (higher thermal mass requires more energy to heat).
- Ceilings above 7 feet (heat rises; taller rooms take longer to reach temperature).
- Poorly insulated walls or exterior-facing walls in cold climates.
Always confirm your final kW selection against the specific sizing table in your heater’s manual, not just a rule of thumb.
Heater type comparison
Electric resistance heaters are the most common choice for residential installations. They connect to a standard 240V dedicated circuit, offer precise thermostat control, and require no venting. Wall-mounted and floor-standing models are both widely available. The Saunum Air L 10 and similar mid-range electric models are well-suited to typical home saunas in the 200–350 cubic foot range.
Wood-burning heaters deliver an authentic sauna experience and work in locations without access to 240V service. The trade-off is a more complex installation: you need a properly rated chimney, clearances for the flue, and compliance with local fire codes. No electrical permit is required for the heater itself, but the chimney installation typically requires a separate inspection.
Infrared heaters operate at lower temperatures and use standard 120V or 240V circuits depending on the model. They heat the body directly rather than the air, which means the room never reaches traditional sauna temperatures. Installation is simpler, but the experience is fundamentally different from a Finnish-style sauna.
Feature checklist before you order
- Control location: built-in dial vs. remote digital control panel.
- Stone capacity: more stones means more thermal mass and better löyly (steam response).
- Wall vs. floor mount compatibility with your room layout.
- Safety guard availability for the specific model.
- Available accessories: heat deflectors, guard rails, aroma cups.
Pro Tip: Before ordering, write down your sauna’s measured volume, the maximum temperature you want to reach, your bench configuration (single-tier vs. two-tier), and your available electrical service (single-phase 240V and service amperage). Bring that list to Saunaheatersupply’s product pages or contact their team directly — it cuts the selection process down significantly.
What clearances, ventilation, and safety signage does your sauna need?
Clearance distances are not suggestions. They are fire-prevention measurements, and they are measured from the heater’s outer mesh or frame outward to the nearest combustible surface. The exact distances vary by model, so the only reliable source is your specific heater’s clearance table.
How to read and apply clearance requirements
Clearance distances differ for wall-mounted versus floor-standing models and must be confirmed using the model-specific table in your manual. As a general orientation, most residential electric heaters require a minimum of 4–6 inches from the heater frame to any combustible side wall, and greater clearance above the heater to the ceiling. Never rely on a single rule of thumb across models.
| Clearance zone | Typical range (model-dependent) | Measurement point |
|---|---|---|
| Side walls | 4–6 in minimum | From outer mesh/frame |
| Rear wall | Per manual (often 2–4 in) | From outer mesh/frame |
| Above heater to ceiling | 16 in minimum | From top of heater |
| Front (user zone) | 18 in minimum | From front of guard |
Always confirm these figures against your specific model’s clearance table. These ranges are illustrative only.
Ventilation requirements
A residential sauna needs both an intake vent and an exhaust vent to maintain air quality and prevent oxygen depletion. Place the intake vent low on the wall near the heater (typically within 10 inches of the floor) and the exhaust vent on the opposite wall near the ceiling or floor, depending on your preferred air circulation pattern. Never block either vent during or after installation. Blocked vents cause heat stratification, reduce the effectiveness of the heater, and create a safety hazard.
If your sauna is in a basement or interior room, confirm that the exhaust path leads to outside air, not just into an adjacent room.
Safety signage placement
Manufacturer installation manuals require two metal safety signs: a CAUTION sign placed on the interior wall directly above the heater, and a WARNING sign fastened on the outside of the sauna door. Both signs must be metal, not paper or adhesive labels. Install them before the first heat-up.
Pro Tip: If your heater mounts close to the ceiling, install a heat deflector plate between the top of the heater and the ceiling surface. Most manufacturers offer these as accessories, and they prevent localized ceiling overheating in rooms with lower clearances.
When do you need permits, inspections, and a licensed electrician?
The short answer: any time you add a new circuit, change a breaker, or make a permanent electrical connection to a sauna heater, you need a permit and a licensed electrician in virtually every U.S. jurisdiction.
What requires a licensed professional
The following tasks must not be performed by a homeowner:
- Running new 240V wiring from the panel to the sauna room.
- Installing or resizing a circuit breaker in the main panel.
- Making permanent wiring connections at the heater junction box.
- Installing and labeling the lockable disconnect outside the sauna.
- Resetting the high-limit control after a trip (some models require a licensed technician per the manual).
- Any gas line or venting work for wood-fired or gas heaters.
Permit and inspection checklist
- Apply for an electrical permit at your local building department before any electrical work begins. Most jurisdictions require this for new circuits and panel changes.
- Provide the heater’s installation manual and wiring diagram to both the electrician and the inspector. Inspectors will check breaker sizing, wire type and rating, grounding, junction box accessibility, and conduit installation.
- Schedule the rough-in inspection after wiring is run but before walls are closed.
- Schedule the final inspection after all connections are made, the disconnect is labeled, and the heater is mounted.
- Obtain the signed inspection record and keep it with your home improvement documentation.
What the inspector will verify
- Dedicated circuit with correct breaker ampacity.
- Copper conductors rated for 194°F (90°C) inside the sauna.
- Seal-tight conduit from wall penetration to junction box.
- Accessible junction box with cover plate.
- Labeled breaker and lockable disconnect outside the sauna.
- Proper grounding of the heater chassis.
Owner prep checklist to give your electrician:
- Heater model number and installation manual.
- Wiring schematic (usually a fold-out in the manual).
- Measured sauna room volume.
- Confirmed clearance distances from the model’s table.
- Location of the planned disconnect outside the sauna.
How do you troubleshoot and commission your sauna heater after installation?
Before the first heat-up, run through this checklist with your electrician present or immediately after the electrical inspection is complete.
Common installation mistakes to check before powering on
- Incorrect clearances: Re-measure from the heater’s outer mesh to all combustible surfaces. Compare against the model’s clearance table, not a generic figure.
- Packed stones: Reach into the stone bed and confirm you can feel airflow paths between the elements. Tightly packed stones block airflow and overheat elements.
- Thermostat bulb mislocation: Confirm the thermostat sensor is positioned exactly as the manual specifies. A sensor placed too close to the heater reads high and causes the heater to short-cycle.
- Loose connections: Your electrician should torque all terminals to spec. Loose connections cause arcing and breaker trips.
- GFI in circuit: Confirm with your electrician that no GFI device is installed in the sauna circuit. If one was added, discuss removal with your electrician and local inspector.
- Missing or paper signage: Both metal signs (CAUTION above heater, WARNING on door) must be in place before operation.
First heat-up commissioning checklist
- Label the breaker clearly at the panel before energizing.
- Turn the thermostat to a moderate setting (around 160°F / 71°C) for the first run.
- Run the heater for approximately one hour with the sauna door open or cracked and ventilation active. Initial startup may produce smoke or odors as protective coatings burn off; this is normal and expected.
- After the burn-in period, close the door and allow the room to reach target temperature. Verify the thermostat and timer operate correctly.
- Confirm the high-limit reset behavior: if the high-limit trips, identify the cause before resetting.
- Check that both metal safety signs are still securely fastened.
Troubleshooting quick reference
- No heat: Check breaker position, then verify power at the junction box (electrician task), then check thermostat setting and sensor placement.
- Intermittent heat: Often a loose connection or a thermostat sensor that has shifted position.
- Breaker trips repeatedly: Likely a wire gauge mismatch, a loose connection, or an element fault. Call your electrician.
- High-limit trips: Check stone placement first (packed stones cause overheating), then confirm clearances. If neither resolves it, call the manufacturer.
Red flags: stop and call a professional
- Smoke that persists after the initial one-hour burn-in period.
- Visible heating elements after stones are placed (add more stones immediately and power off).
- Any burning smell from the control panel or wiring.
- Repeated breaker trips after the electrician has verified the circuit.
Key Takeaways
A safe, code-compliant sauna heater installation requires the homeowner to handle physical prep and mounting, and a licensed electrician to complete all permanent wiring, breaker work, and final inspection.
| Point | Details |
|---|---|
| DIY vs. pro split | Homeowners handle mounting, stones, and control placement; electricians do all wiring and panel work. |
| Electrical wire spec | Copper conductors rated for 194°F (90°C) in seal-tight conduit are required inside sauna walls. |
| Heater sizing | Match kW output to room volume using the manufacturer’s sizing table; adjust upward for glass or tile. |
| Safety signage | Install a metal CAUTION sign above the heater inside and a metal WARNING sign on the exterior door. |
| Saunaheatersupply | Browse electric, wood-fired, and gas heater models with model-specific specs to share with your electrician. |
The part most homeowners underestimate about sauna heater installation
Most DIY guides focus on the physical steps and treat the electrical work as a footnote. The reality is the opposite: the physical installation is straightforward for anyone comfortable with a drill and a level. The electrical side is where projects stall, fail inspection, or create genuine fire risk.
The detail that catches homeowners off guard most often is the wire rating requirement. Standard NM cable (Romex) is not rated for the temperatures inside a sauna wall. Copper conductors rated for 194°F (90°C) in seal-tight conduit are not a premium upgrade; they are the minimum specification. An electrician who does not specialize in sauna work may not know this without seeing the manual. That is exactly why handing the installer the full manual and wiring schematic before the appointment matters so much.
Stone placement is the other underestimated variable. Packed stones do not just reduce steam quality; they cause element overheating that shortens heater life measurably. The correct approach is dense placement at the outer edges and top, with deliberate airflow gaps between the elements. It takes an extra five minutes to do it right, and it protects a significant investment.
The permit and inspection step feels like bureaucracy, but it is also the one moment where a second set of expert eyes reviews the entire electrical installation. Skipping it does not just create a code violation; it can affect your homeowner’s insurance coverage if a claim ever involves the sauna.
Saunaheatersupply has the heaters, stones, and controls you need
Choosing the right heater before you start saves you from costly returns and re-wiring. Saunaheatersupply carries electric wall-mount and floor-standing models, wood-fired stoves, control kits, stone sets, protective guards, and replacement parts, all curated for residential and commercial installations. Every product page includes the specifications your electrician needs: voltage, amperage, wire gauge, and clearance data.

For a typical home sauna in the 200–350 cubic foot range, the Saunum Air L 10 is a well-matched starting point. Larger rooms or higher-output needs are covered by models like the Saunum Air L 15. If you are considering a wood-fired installation, Saunaheatersupply also carries chimney kits and accessories to complete the setup. The price-match guarantee means you are not paying more than you should. Contact the team with your measured sauna volume and available electrical service, and they will point you to the right model. Shop the full range at saunaheatersupply.com.
This article is general information for homeowners and does not constitute licensed electrical or legal advice. Confirm all electrical requirements with a licensed electrician and your local building department before beginning any installation.
Useful sources for your sauna heater installation
The manuals and documents below are the primary references used to build this guide. Download and print the manual for your specific model before starting, and bring it to every conversation with your electrician and inspector.
- Finsauna HomeHeat Installation Manual: Covers hardwiring requirements, safety signage placement (CAUTION/WARNING signs), first heat-up commissioning, and the prohibition on pigtail or plug connections.
- Finsauna ProHeat Installation Manual: Details wire type and conduit specifications (194°F / 90°C copper in seal-tight conduit), GFI guidance, and control panel placement requirements.
- HUUM CORE Installation and Operation Manual: Contains heater sizing tables (kW to room volume), stone placement guidance, and stone size specifications.
- IKI Pillar Installation Instructions: Explains how clearance distances are measured from the heater’s outer mesh/frame and provides model-specific clearance tables for wall-mounted and floor-standing configurations.
Always use the manual supplied with your specific heater model as the final authority. Generic guides, including this one, provide orientation and best-practice context. Your model’s manual contains the exact clearance distances, wiring diagrams, stone quantities, and commissioning steps that apply to your unit.