















Homeowners & Builders: Confirm Sauna Heater Clearances With the Manual
Follow the manufacturer’s installation manual first, always. That document, backed by the heater’s UL listing, sets the binding sauna heater clearances for your exact model. Typical electric heaters need only a few inches at the back and sides, a moderate clearance at the front bench, and substantial ceiling clearance, depending on the model. Wood-burning stoves need far more, often 12 to 24 inches. Confirm your model’s numbers before you buy anything.
TL;DR:
- The manual and UL listing specify the exact clearance distances for your heater model, which must be followed to maintain safety and warranty validity.
- Electric sauna heaters typically require back clearances of 1 to 4 inches and front clearance of about 7 to 8 inches, while wood-burning stoves need 12 to 24 inches from combustibles.
- Accurate measurement of clearances requires scaled drawings from both plan and elevation views, considering bench placement, reach zones, and glass specifics.
- Using an approved heat shield can reduce clearances only if explicitly documented by the manufacturer, with proper installation behind the shield; improvised shields are not recognized.
- Electrical connections must be correctly sized at 125% of the heater’s load and installed by a licensed electrician to ensure code compliance and safety.
Table of Contents
- What Sets Sauna Heater Clearance Requirements?
- What Are Typical Sauna Heater Clearance Ranges?
- Where Exactly Do You Measure Sauna Heater Clearances?
- Can a Heat Shield Legally Reduce Sauna Heater Clearances?
- What Extra Clearances Do Wood-Burning Sauna Stoves Need?
- How Does the National Electrical Code Affect Heater Clearances?
- How Do You Confirm Clearances Before You Buy?
- How Sauna Heater Supply Helps You Get Clearances Right
- What Model-First Safety Guidance Gets Right (and Wrong)
- Get Your Sauna Layout and Heater Matched Right
- Sources
- FAQ
What Sets Sauna Heater Clearance Requirements?
Clearance numbers aren’t arbitrary. Every listed electric sauna heater goes through independent testing to confirm how far combustible material must sit from its hottest surfaces without charring, discoloring, or igniting over repeated heating cycles. That testing produces the exact figures printed in your model’s manual, and those figures are what your local inspector will check against.
The Sauna Heater Clearance Guide makes a point worth repeating: generic clearance charts floating around the internet are rough estimates at best. The manual and UL listing are the only documents that actually govern your installation. Borrowing a clearance figure from a similar heater, even one from the same manufacturer, can invalidate the listing entirely.
Electric heaters sold in North America are typically tested against UL 875, with newer units increasingly evaluated under the UL 60335-2-53 standard that’s phasing in as its replacement. That listing isn’t just a compliance checkbox. It’s the reason your homeowner’s insurance and your heater’s warranty stay valid after installation.
Why the manual wins over generic advice:
- It reflects the exact wattage, shape, and heat output of your specific model.
- It documents any manufacturer-approved shield or reduced-clearance option.
- It gives inspectors a paper trail they can verify on the spot.
- It protects your warranty, which most manufacturers void if clearances are ignored.
Fire risk by the numbers: the most frequently cited cause of sauna fires isn’t faulty wiring or a defective heater. It’s combustible material, towels, robes, ladles, left resting on or over the heater itself, according to the Sauna Heater Clearance Guide. Clearance rules exist as much to keep the space around the heater open as they do to protect the walls behind it.
Local fire and building codes sometimes layer additional requirements on top of what the manufacturer specifies, so a clearance that passes muster in one city might need adjustment in another. That’s a conversation with your local authority having jurisdiction, not a guess from a forum post.
What Are Typical Sauna Heater Clearance Ranges?
Numbers vary by model, but knowing the general range helps you judge whether a room, or a heater, is even feasible before you start measuring in earnest.
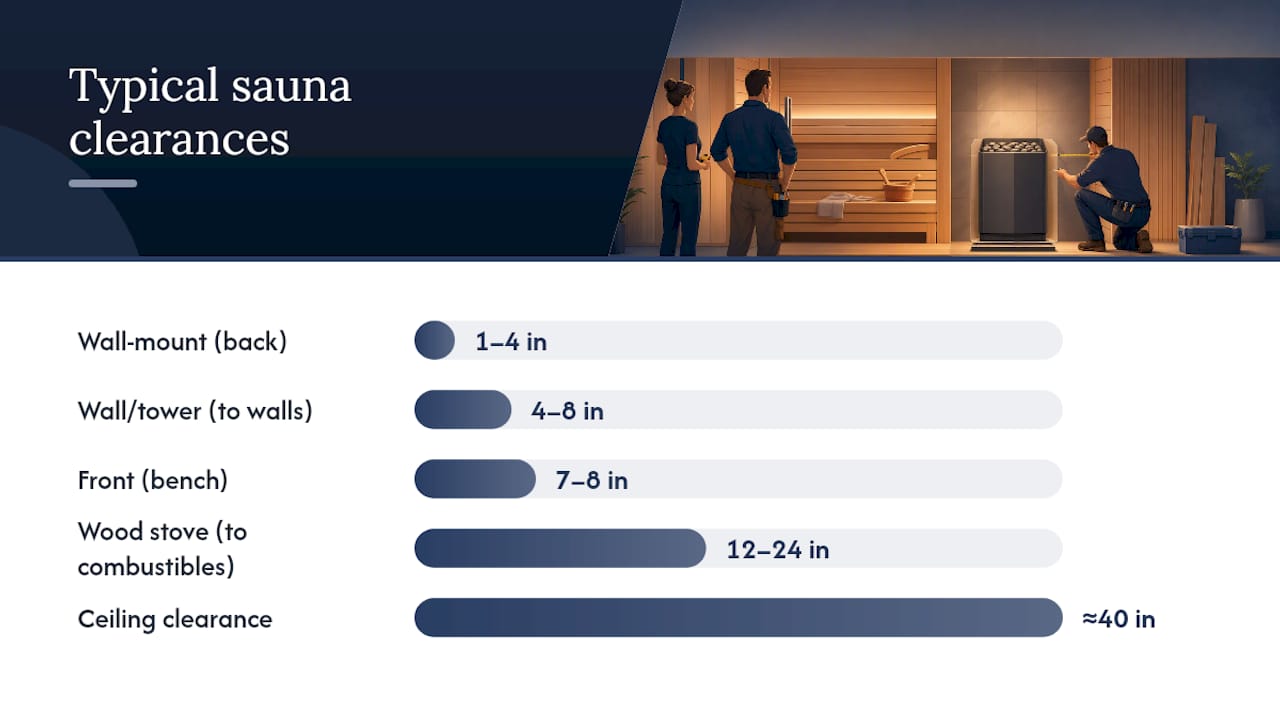
Electric wall-mount heaters are the most space-efficient option, which is part of why they dominate home sauna installs:
- Back clearance: 1 to 4 inches
- Side clearance: 2 to 4 inches
- Front (bench) clearance: roughly 7 to 8 inches
- Ceiling clearance: often around 40 inches, though this swings widely by model and kW rating
Electric floor and tower heaters trade a slightly larger footprint for even heat distribution:
- Clearance to walls: 4 to 8 inches on all sides
- Ceiling clearance: similar to wall-mount units, model-dependent
Wood-burning stoves need dramatically more breathing room, largely because their surface temperatures run much hotter and stay hot longer than an electric element:
- Clearance to combustibles: 12 to 24 inches
- Additional floor protection required beneath and around the stove
- Separate clearance rules for the flue pipe where it passes through walls or ceilings
The Sauna Heater Installation guide from The Sauna Place confirms these ranges as typical across vendor installation documentation, though it stresses the same caveat every reputable source repeats: your model’s manual overrides any chart.
Statistic worth remembering: electric wall-mount clearances can be as tight as 1 inch at the back, but wood stoves routinely demand 12 to 24 times that distance. That gap alone explains why wood-burning saunas need a much bigger room, or a much smaller stove, than most people initially plan for.
One insight that trips up even experienced builders: two heaters from the same brand, at different kilowatt ratings, can carry different tested clearances. A 6kW and a 9kW unit in the same product line aren’t interchangeable on your layout drawing, according to the Sauna Heater Clearance Guide.
Where Exactly Do You Measure Sauna Heater Clearances?
Clearance numbers only matter if you measure them correctly, and this is where a surprising number of otherwise careful installs fail. Getting the number right on paper and getting the layout right in the room are two different skills.
1. Start with an elevation and a plan view
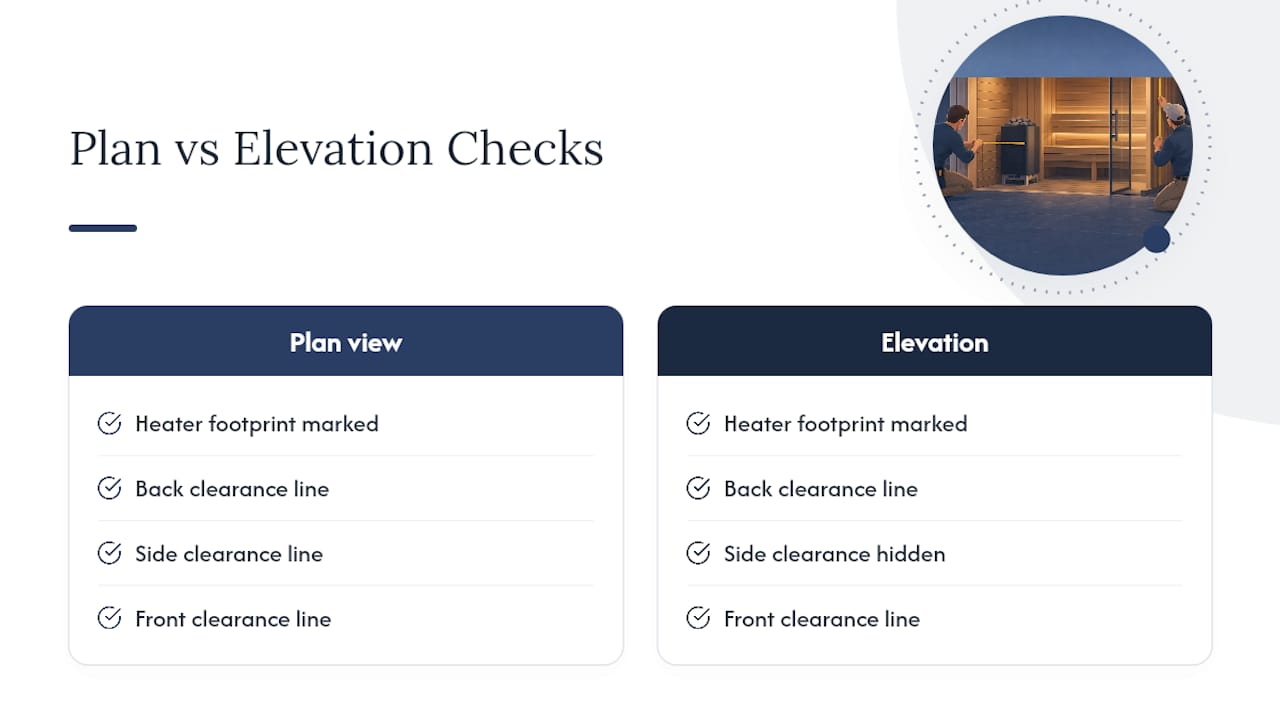
Draw your sauna room from the side (elevation) and from above (plan view), both to scale. Mark the heater’s exact footprint using the dimensions in its manual, not an approximation from the box photo. Every clearance point, back, sides, front, ceiling, and floor, needs its own marked line on both drawings. A plan view alone hides ceiling clearance problems; an elevation alone hides side clearance problems. You need both.
2. Check bench and reach zones, not just the heater box
The heater’s clearance zone isn’t the only space that matters. Bench overhang, footwells, and the natural reach zone of someone sitting down all interact with the guard rail or heater rock area. If your bench extends even two inches past its intended edge, it can invade the front clearance the manual specifies. Sit in the mocked-up layout, or have someone else do it, before you finalize bench placement.
3. Treat glass and doors as separate clearance questions
Glass walls and glass doors carry their own guidance, distinct from wood paneling clearances, because tempered glass behaves differently under radiant heat than cedar or hemlock. Don’t assume a clearance figure written for a solid wall automatically applies to a glass panel nearby. Check your heater’s manual for any glass-specific notes, and confirm with your door manufacturer if the two components will sit close together.
4. Watch for the pitfalls that show up after installation, not before
A layout that passes inspection on paper can still fail in daily use. The most common issues:
- Towels or robes hung on the guard rail, drifting into the heater’s hot zone.
- Storage baskets or extra wood placed too close “temporarily.”
- Children reaching toward stones or a guard rail that wasn’t rated for hand contact.
- A bench added or shifted after the original layout was approved, without re-checking clearance.
A corner placement with a rated guard rail is one of the more forgiving layouts, since it naturally limits how close a bench or body can get to the heater on two sides at once, an approach echoed in The Sauna Place’s installation guide.
Pro Tip: Take a photo of your finished layout with a tape measure visible next to each clearance point. If an inspector or insurance adjuster ever asks for proof, you’ll have it in seconds instead of pulling out a drawing from months ago.
Before you finalize anything, it helps to review dedicated guidance on sauna heater placement, which walks through intake positioning alongside heater siting, since the two decisions affect each other more than most people expect.
Can a Heat Shield Legally Reduce Sauna Heater Clearances?
Sometimes, but only when the manufacturer says so in writing. A heat shield can shrink required clearances, but only if it’s the specific shield or guard the manufacturer tested and documented, not a sheet of aluminum from the hardware store.
The distinction matters more than most installers realize. According to Sauna & Slate’s clearance guide, improvised shields don’t change a heater’s UL listing at all. The listing only covers what was actually tested, and a homemade metal panel was never part of that test.
What a legitimate reduced-clearance shield looks like in the manual:
- A specific part number tied to the shield or guard
- A revised clearance table showing the “with shield” distance next to the standard distance
- Mounting instructions, usually specifying an air gap behind the shield rather than a flush mount
- Any restrictions on which heater models the shield is rated for
Mounting the shield correctly is just as important as buying the right one. Most tested shields rely on a specific air gap behind the panel to let heat vent rather than trap against the wall, which means a flush-mounted shield can actually perform worse than no shield at all. Sauna Heater Supply covers this in detail in its guide to sauna stove heat shields and air gaps, including how to keep the installation inspectable after the fact.
Pro Tip: Keep the shield’s spec sheet with your heater manual, not filed separately. Inspectors and future buyers of the home will want to see both documents together, and a shield without its documentation is functionally an unapproved shield.
Skipping this step has real consequences. An inspector who can’t verify the shield’s documentation may fail the installation outright, and a manufacturer will typically deny a warranty claim tied to a heater installed at reduced clearance without proof the shield was the approved one.
What Extra Clearances Do Wood-Burning Sauna Stoves Need?
Wood-burning stoves play by a different set of rules than electric heaters, and the gap is bigger than most first-time buyers expect. Where an electric wall-mount might need just 1 to 4 inches at the back, a wood stove typically needs 12 to 24 inches to combustible material, according to guidance compiled by The Sauna Place. The reason comes down to sustained surface temperature. A wood fire keeps radiating heat at a much higher intensity, for a much longer stretch, than an electric element cycling on a thermostat.
That extra distance changes more than just wall placement:
- Floor protection becomes mandatory, typically a non-combustible base plate extending well beyond the stove’s footprint, not just underneath it.
- Flue routing needs its own clearance plan, separate from the stove’s body clearances, wherever the pipe passes through a wall, ceiling, or roof.
- Flashing and firestop components at those penetration points need to match code, since a flue passing through combustible framing without proper protection is a fire risk independent of the stove itself.
Wood stoves also demand more detailed drawings before installation than most electric setups require. Because the clearances, floor protection, and flue path all interact, a rough sketch usually isn’t enough to satisfy a local inspector. Budget time for a proper set of drawings, and expect your local code office to review the flue plan separately from the stove placement itself.
How Does the National Electrical Code Affect Heater Clearances?
Electrical sizing and physical clearance get inspected together, which means a perfect clearance layout can still fail if the wiring behind it is wrong. The National Electrical Code treats sauna heaters as continuous loads, which means the circuit has to be sized at 125% of the heater’s full-load current, not just matched to it one-to-one.
In practice, that 125% rule changes your breaker and wire sizing math. A heater drawing 40 amps continuously needs a circuit rated for at least 50 amps, not a 40-amp breaker running at its limit around the clock. Undersizing here is one of the more common reasons an otherwise well-planned installation gets flagged.
Wiring practices that matter as much as the clearance numbers:
- Standard NM (Romex) or BX cable should not be routed inside the sauna room itself, where sustained heat can degrade the insulation over time.
- Use high-temperature-rated conductors, and conduit where your local code requires it, for any wiring inside the heated space.
- Hire a licensed electrician. This isn’t a suggestion born of caution; miswiring a continuous-load circuit is a documented fire risk, and most jurisdictions require licensed work for permit sign-off anyway.
- Bring the heater’s model number and manual to the electrical permit application. Inspectors often want to confirm the load calculation against the actual unit, not a generic heater spec.
One detail worth flagging: inspectors frequently catch electrical and clearance problems in the same visit, because both stem from the same root cause, an installer working from memory instead of the model-specific manual. Planning both on a single drawing, rather than treating wiring and clearance as separate projects, avoids the redo costs that come from catching a mismatch after drywall is up.
For more on how ventilation intersects with your electrical and layout planning, Sauna Heater Supply’s sauna ventilation guide covers intake and exhaust placement that often shares wall space with your electrical run.
How Do You Confirm Clearances Before You Buy?
-
Pick a specific heater model, not a category. “A 9kW electric heater” isn’t enough information to plan a layout. You need the exact model, because clearance figures differ between units even within the same product line.
-
Pull the manual before you measure anything. Download or request the installation manual directly from the manufacturer or from Sauna Heater Supply’s product listing. This is the only document with your binding numbers.
-
Draw the room to scale, in both plan and elevation. Mark every clearance point from the manual, back, sides, front, ceiling, and floor, on both drawings, along with your intended bench layout.
-
Simulate the bench and reach zones. Sit in the mocked-up space, or use painter’s tape on the actual floor, to confirm nothing intrudes on the marked clearance lines once a real body occupies the bench.
-
If a clearance fails, know your three options. Choose a smaller or differently shaped heater model, move the bench or door to create room, or install a manufacturer-approved heat shield if the manual documents one for your model.
-
Assemble a one-page reference packet. Combine your final scaled drawing with a printed copy of the heater’s manual. This single packet speeds up both your electrician’s quote and your permit application, since it answers most of the questions an inspector or installer would otherwise have to ask separately.
Pro Tip: Do this measurement work before you order the heater, not after. Returning a heater because it doesn’t fit your room’s clearance profile costs far more in time and shipping than spending an extra hour with a tape measure first.
For a broader walk-through of the installation sequence itself, see Sauna Heater Supply’s step-by-step installation guide, and check sauna ceiling height requirements if your room’s height is anywhere near the minimum for your chosen heater.
How Sauna Heater Supply Helps You Get Clearances Right
Matching the right heater to the right space takes more than a spec sheet, it takes someone who’s walked through the clearance math before. Personalized product guidance and price match guarantees can help homeowners and contractors make informed heater selections without overpaying.
A few resources worth bookmarking as you plan your own layout:
- The sauna heater placement guide for intake and heater siting decisions that affect clearance.
- The heat shield and air gap guide for anyone considering a reduced-clearance layout.
- The ceiling height guide for builders working with a tight ceiling.
- The installation walk-through for a full sequence view.
If your layout drawing turns up a clearance conflict you can’t resolve on your own, Sauna Heater Supply’s team reviews layouts and quotes professional installation directly, working from your model’s manual rather than a generic estimate.
What Model-First Safety Guidance Gets Right (and Wrong)
The conventional advice on sauna heater clearances treats the topic like a single universal number waiting to be memorized: “keep it a few inches from the wall.” That framing is convenient, and it’s wrong often enough to cause real problems. Two heaters from the same manufacturer, at different kilowatt ratings, can carry different tested clearances. Treating clearance as a fixed constant instead of a model-specific variable is where most amateur installs go sideways.
What the research actually supports is less catchy but more useful: the manual is the spec, full stop, and everything else, ceiling height, bench placement, shield eligibility, flows from that one document. Builders who skip straight to buying a heater based on room size alone are working backward. The room should be checked against the model’s manual before the heater ships, not after.
If there’s one habit worth adopting, it’s drawing the layout first. A scaled plan and elevation with the manual’s clearances marked catches problems on paper, where they’re free to fix, instead of in a finished room, where they’re not.
— Teddy
Get Your Sauna Layout and Heater Matched Right
Sauna Heater Supply gives you something a generic online listing can’t: product guidance matched to your actual room measurements, backed by a price match guarantee so you’re not paying a premium for that expertise. Once you’ve confirmed your clearances, the Harvia Spirit SP90E package and the Saunum Air 5 heater are two models with clearly documented manuals and factory-backed specs worth comparing side by side.
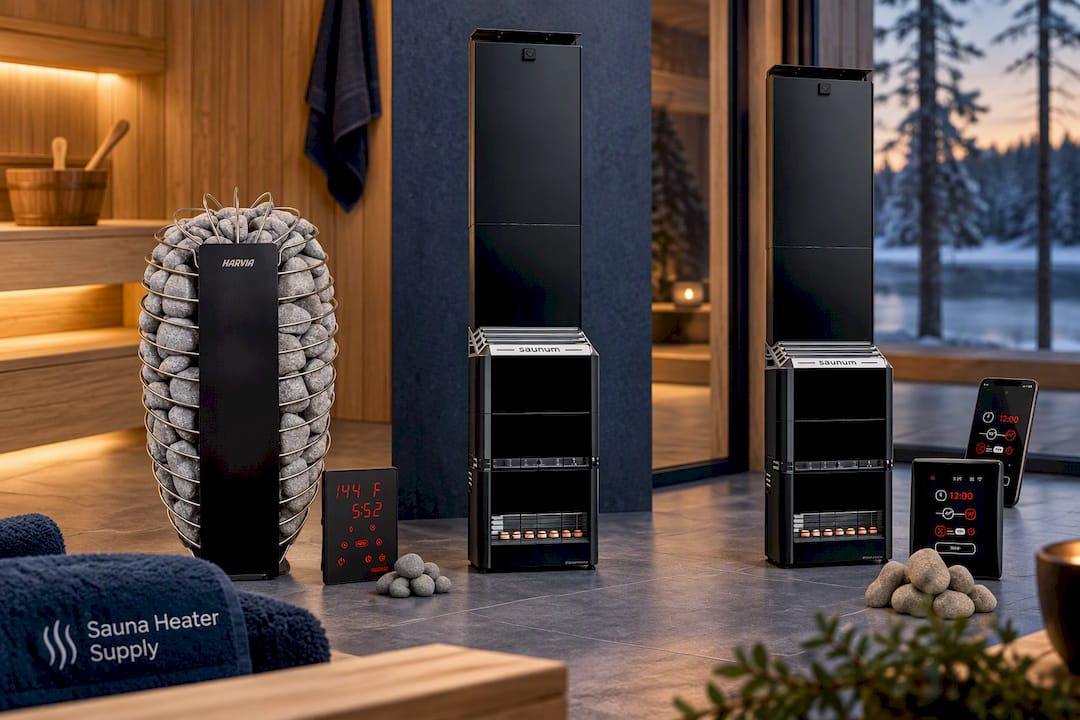
If you want a heater with smart controls built in, the Saunum AIR 5 CSB WiFi package pairs the same documented clearance profile with remote monitoring. Browse the full sauna heater collection or the broader sauna collection to compare models against your drawing. When you’re ready for professional help, bring your scaled layout and the heater’s manual to your installation and design consultation request, that pair of documents is exactly what the team needs to give you a fast, accurate quote.
Sources
Your heater’s manual and its UL listing remain the primary source for exact clearance distances. No third-party chart, including this one, overrides what’s printed for your specific model.
- Sauna Heater Clearance Guide: The Spec You Cannot Ignore
- Sauna Heater Installation: Wiring, Stones & Setup – The Sauna Place
- Sauna Installation Guide: Electrical, Ventilation, and Clearances (2026) | HomeSaunaUSA
- Sauna Heater Clearances & Safety: Rules That Matter (2026) | Sauna & Slate
FAQ
What Is the 200 Rule for Saunas?
There isn’t a single universal sizing rule recognized across manufacturer manuals; sizing formulas vary by source and often depend on specific heater models. Check your heater’s own manual for its sizing formula rather than applying a rule of thumb from a different product line.
What Are the Electrical Code Requirements for a Sauna Heater?
The National Electrical Code requires sauna heater circuits to be sized at 125% of the heater’s full-load current, since heaters are treated as continuous loads. Wiring inside the sauna room itself should use high-temperature-rated conductors rather than standard NM cable, and the work should be done by a licensed electrician.
How Far Should a Wood-Burning Sauna Stove Be From Combustible Walls?
Wood-burning stoves typically need 12 to 24 inches of clearance to combustible material, significantly more than electric heaters. The exact figure depends on the stove model, so check its manual for the tested minimum before finalizing your room layout.
Where Should Sauna Heater Stones Be Placed on the Heater?
Stones sit in the heater’s designated rock chamber or grate, arranged loosely enough to allow air to circulate between them rather than packed tightly. Follow your specific heater’s manual for the recommended stone size and quantity, since overloading the chamber can restrict airflow and affect heat output.
Can I Reduce My Sauna Heater’s Clearance With a Heat Shield?
Only if the manufacturer documents a tested reduced-clearance table for a specific shield or guard tied to your heater model. An improvised metal panel does not change the heater’s UL listing and won’t satisfy an inspector checking against the manual.
Does Sauna Heater Supply Offer Help Confirming My Layout?
Yes. Sauna Heater Supply provides personalized product guidance to help match heater models to your room’s clearance requirements, and the team can review layout questions before you finalize an order. Current pricing and package details are available directly on the product pages.