
















Sauna Ceiling Height: Exact Measurements for Builders
The ideal sauna ceiling height is between the practical minimum and an optimum range from the finished floor, suitable to keep the heat pocket at bench and head level and avoid wasting heat above bathers. That single number keeps the heat pocket where it belongs: at bench and head level, not wasted in dead air above the bathers.
Two numbers to hold onto before reading further: a 7’ minimum ceiling is the practical floor for most residential builds, and the top bench should sit 44 inches below the ceiling so bathers have two fists of clearance above their heads. Everything else in sauna design specifications flows from those two anchors.
Quick do/avoid checklist:
- Do target 7’–7.5’ finished interior height for a standard home sauna
- Do measure finished height after accounting for insulation, vapor barrier, furring strips, and paneling (subtract 2–3 inches from framed height)
- Do raise the top bench or build a dropped ceiling if your room is 8’ or taller
- Avoid leaving an 8’+ room as is — the heat pocket will sit above bathers’ heads
- Avoid going below 6’2" unless the layout is a single-bench compact sauna with no stove height conflicts
- Avoid framing with 2x6 walls unless code or structure requires it, since they increase interior volume and force a larger heater
Table of Contents
- Why ceiling height changes how your sauna feels and performs
- Concrete dimensions: room height, bench spacing, and clearances
- How stove height and bench placement work together
- Where to place vents and how ceiling height changes airflow
- Practical fixes when your ceiling is 8 feet or higher
- Framing, insulation, ceiling shape, and finish materials
- What manufacturer and contractor data actually show
- Key Takeaways
- A contractor’s perspective on what builders get wrong
- Saunaheatersupply has the heaters and kits that fit your ceiling plan
- Useful sources
Why ceiling height changes how your sauna feels and performs
Heat in a sauna does not distribute evenly. Hot air rises and stratifies, creating a warm layer near the ceiling and cooler air near the floor. The goal of sauna design is to position bathers inside that warm layer, not below it.
Finlandia Sauna’s temperature diagrams show that a taller hot room can leave the upper bench and head level noticeably cooler than a room with a lower ceiling built to the same plan. That gap is not subtle. A bather sitting on the upper bench in an 8’ room may feel noticeably less heat than one in a 7’ room running the same heater at the same wattage.
Taller ceilings also increase the volume the heater must warm before the room reaches bathing temperature. More cubic feet means longer warm-up times and higher energy use per session. Industry pre-planning guidance notes that an 8-foot ceiling wastes heat and increases heating time compared to a 7-foot ceiling, even when the floor plan is identical.
Very low ceilings create the opposite problem. Head clearance becomes a safety concern, and bench stacking gets awkward. The practical minimum for a comfortable, code-safe sauna interior is low but only viable for compact single-bench rooms with restricted head clearance.
Pro Tip: When reading manufacturer temperature charts, look at the temperature at the upper-bench level, not the ceiling. A chart showing 190°F near the ceiling in an 8’ room may show only 170°F at the bench — which is the number that actually matters for your session.
| Ceiling Height | Approximate Bench-Level Temp Effect | Warm-Up Impact |
|---|---|---|
| 6’2"–6’6" | Very concentrated heat; potential head discomfort | Fastest |
| 7’0" | Efficient heat at bench level; recommended minimum | Fast |
| 7’6"–8’0" | Good heat with proper bench placement; slight efficiency trade-off | Moderate |
| 8’0"+ (unmodified) | Heat pocket above bathers; bench level noticeably cooler | Slowest |
Concrete dimensions: room height, bench spacing, and clearances
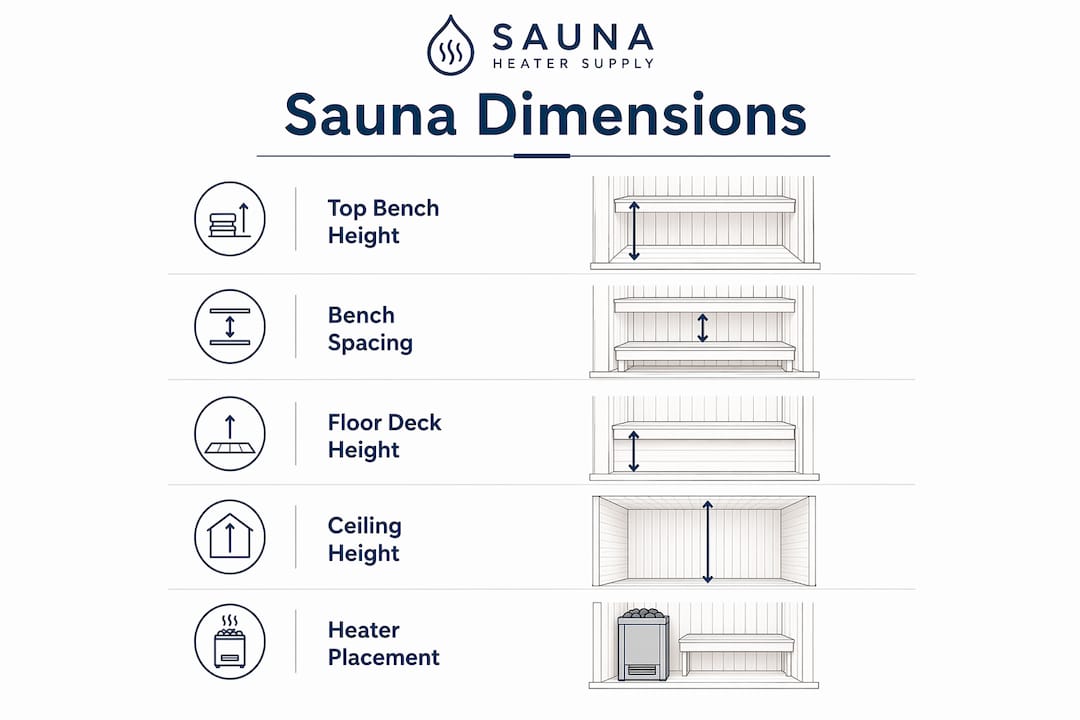
Getting the sauna interior height right is only half the job. The bench layout has to match. These are the numbers builders and installers actually use.
Interior ceiling height options:
- 7’0" (213 cm): The recommended minimum for most residential saunas. Works well with shorter, more compact stoves. Requires careful stove selection to satisfy the Law of Löyly (see Section 4).
- 7’6"–8’0" (229–244 cm): The sweet spot for home saunas, especially when using taller stoves or planning a three-bench layout. Gives more flexibility in bench stacking without the efficiency losses of a full 8’ unmodified room.
- 6’2" (188 cm): Acceptable only for compact single-bench saunas. Head clearance is tight, and bench options are limited.
Bench-to-ceiling and bench spacing:
The top bench should sit 43–44 inches below the finished ceiling surface. This gives a seated bather roughly two fists of clearance above the head, which is the empirically derived standard among experienced sauna builders. The middle bench drops a modest distance below the upper bench. Builders commonly select a spacing equivalent to comfortable chair height, with slightly less spacing beneficial for shorter users or children.
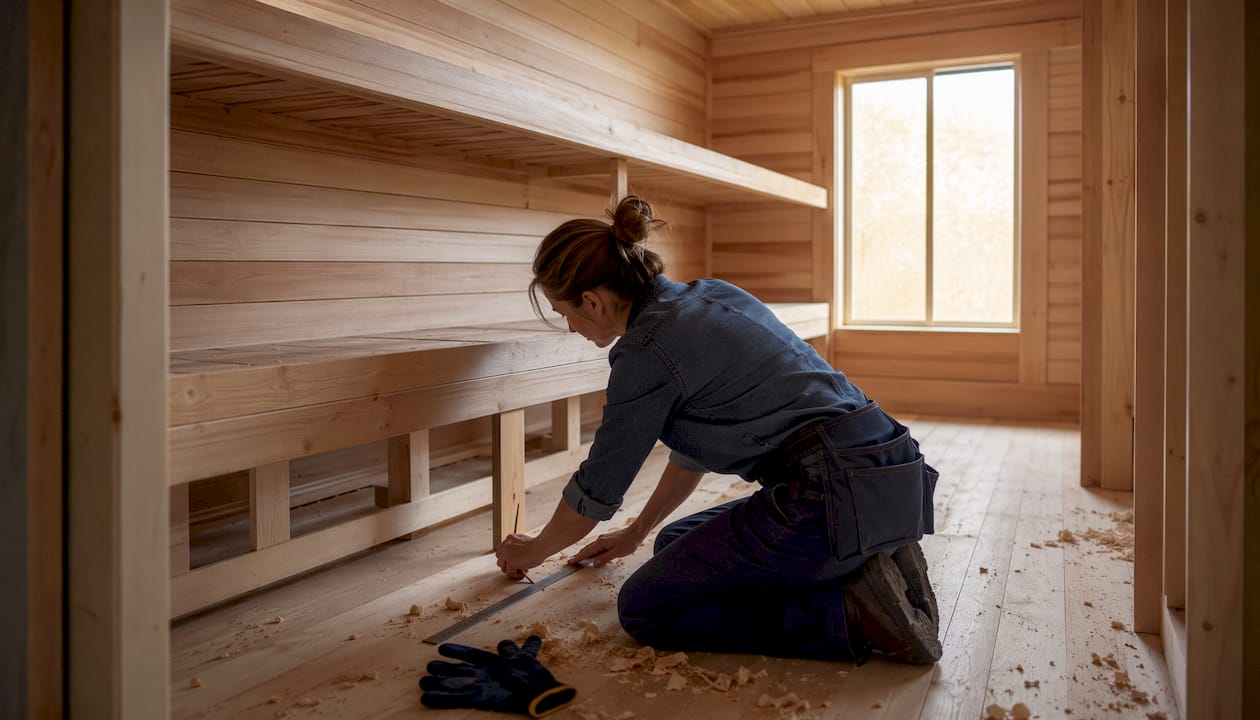
A small raised floor deck at the hot room entry keeps feet warm when sitting on the lower bench and creates a useful air gap from the cold floor slab.
Measurement callouts for on-site verification:
- Measure finished interior height after all ceiling layers are installed, not from the framed dimension
- Verify top-bench surface to ceiling with a tape measure before securing bench framing
- Check head clearance at the entry door as well as at the bench — door height and ceiling height can differ in sloped or converted rooms
- For tall or heavy stoves, confirm the stone-top height before finalizing bench heights (see Section 4)
Pro Tip: Build a simple story pole (a marked length of lumber) with your key dimensions marked: 44" from top, 18" below that, 18" below that, 6" for the raised deck. Hold it against the wall before cutting any bench lumber to confirm the layout works in your actual finished space.
How stove height and bench placement work together
Heater placement is not independent of ceiling height. The two are part of the same thermal system, and getting the relationship wrong produces a sauna that either fails the Law of Löyly or creates a stacking geometry so awkward it becomes a safety hazard.
The Law of Löyly states that a bather seated on the upper bench must have their feet at or above the height of the sauna stones. This is a functional rule, not a stylistic one. Feet below the stone level means the bather is sitting in cooler air, which defeats the purpose of the upper bench position.
The challenge is that stove heights vary significantly. A taller stove with stones sitting at a specific height off the floor requires a ceiling high enough to place the upper bench accordingly while maintaining the bench surface above the stone height. With a low ceiling, fitting the stove and bench correctly can be challenging, but increasing ceiling height eases those design constraints.
Checklist for verifying stove-bench relationships:
- Confirm the stone-top height of your selected stove (check the manufacturer spec sheet)
- Calculate upper bench height: ceiling height minus 44 inches
- Verify that the upper bench surface is at or above the stone-top height
- If the bench surface falls below the stone top, either raise the ceiling, choose a shorter stove, or raise the bench and accept a tighter head clearance
- Maintain required floor clearances around the heater per manufacturer specs (typically 4–6 inches minimum from combustibles on the sides, and specific floor clearance for wood-burning units)
- Keep bench ends at least the manufacturer-specified distance from heater sides
For a 7’ ceiling with a compact electric sauna heater that sits lower to the floor, the Law of Löyly is achievable. For taller wood-burning stoves, a 7.5’–8’ ceiling gives the geometry needed to satisfy both bench clearance and stone-top height requirements.
Where to place vents and how ceiling height changes airflow
Ventilation in a sauna serves two purposes: delivering fresh air to bathers and removing stale, humid air without destroying the heat pocket. Ceiling height directly affects how well a given vent placement achieves both.
Standard vent placement:
- Intake vent: Place near the heater at a low level, typically 4–6 inches above the floor or near the base of the heater wall. This draws fresh air in at the lowest, coolest point and allows it to be warmed by the heater before rising.
- Exhaust vent: Place on the opposite wall from the stove, near the ceiling, a few inches down from the ceiling surface. This pulls stale air out from the top of the room where it accumulates.
- Door gap: A 4-inch gap at the bottom of the hot room door supports continuous passive airflow and is standard Finnish practice.
How higher ceilings change the equation:
A taller room holds more air volume, so the same vent sizes that work in a 7’ room may under-ventilate an 8’ room. With higher ceilings, consider slightly larger vent openings or a secondary low exhaust to renew bench-level air more effectively. The goal is to cycle air through the bench zone without creating drafts at head level.
Pro Tip: Test airflow before finishing the walls by holding a lit incense stick near each vent opening with the heater running. Smoke should move steadily toward the exhaust vent. If it drifts erratically or stalls, reposition the exhaust before closing up the walls.
- For wood-burning stoves, the combustion air requirement adds a dedicated low intake near the stove base; electric stoves do not have this requirement
- Vent grills should be removable for cleaning and sized to match the vent opening without restricting flow
- Never place the exhaust vent directly above the heater — this short-circuits airflow and pulls heat out before it reaches bathers
Practical fixes when your ceiling is 8 feet or higher
Converting a standard room with an 8’ or 9’ ceiling into a sauna is one of the most common DIY scenarios, and it is also where the most heat efficiency is lost. Leaving the ceiling as-is means the heat pocket sits above the bathers’ heads for the entire session.
Options for high ceilings:
- Build a dropped ceiling: Frame a new ceiling at 7’–7.5’ inside the hot room. This is the most effective fix and the one most contractors recommend. It adds material cost but recovers full heat efficiency and allows standard bench layouts.
- Install a heat baffle: A horizontal panel positioned above the upper bench level can redirect rising heat back toward the bench zone. Less effective than a full dropped ceiling but significantly cheaper and faster to install.
- Raise the top bench platform: Build the upper bench on a raised deck so bathers sit higher in the room, closer to the existing heat pocket. This works but creates the “bleacher effect” — multiple elevated levels that can be awkward to navigate safely.
Options for low ceilings (under 6’6"):
- Single-bench layouts eliminate stacking geometry problems entirely
- A lower-stature bench plan with a single tier and a raised floor deck keeps bathers in the warmest zone without requiring head clearance for a second bench
- Confirm head clearance at the door and at the bench before finalizing any low-ceiling layout
| Fix | Heat Efficiency Gain | Relative Cost | Installation Difficulty |
|---|---|---|---|
| Dropped ceiling | High | Moderate | Moderate |
| Heat baffle | Medium | Low | Low |
| Raised bench platform | Medium | Low–Moderate | Low–Moderate |
| Single-bench layout | N/A (design choice) | Low | Low |
DIY builders can handle a heat baffle or raised bench platform with basic carpentry skills. A dropped ceiling that requires new framing, insulation, and vapor barrier is better suited to a contractor, particularly if the existing ceiling has mechanical or electrical elements above it.
Framing, insulation, ceiling shape, and finish materials
Construction decisions at the framing stage have a direct impact on finished interior height. Plan for these reductions before setting bench heights or ordering a heater.
Framing and insulation:
- 2x4 framing at 16" on center is sufficient for almost all residential saunas. Using 2x6 solely for structural heft increases interior volume, which forces a larger heater and higher energy use per session.
- Account for 2–3 inches of ceiling height reduction from insulation, vapor barrier, furring strips, and tongue-and-groove paneling combined. A framed ceiling at 7’3" will finish at approximately 7’0" after all layers are installed.
- The vapor barrier goes on the warm side of the insulation (facing the hot room interior) to prevent moisture from migrating into the wall and ceiling assembly.
Flat vs. sloped ceilings:
A flat ceiling is simpler to build and easier to insulate uniformly. A sloped ceiling can help condensation drain rather than drip onto bathers, but the slope must direct water away from the seating area, toward the back wall or corners. A slope toward the bench is worse than a flat ceiling.
Finish materials:
- Use clear, vertical-grain softwoods for ceiling paneling: western red cedar, Nordic spruce, and aspen are the standard choices. All handle heat and moisture cycling without warping or off-gassing at sauna temperatures.
- Avoid MDF, OSB, plywood, and any resin-heavy species. These materials degrade quickly in high-heat, high-humidity environments.
- Tongue-and-groove cedar is a reliable finish choice that installs cleanly and holds up well over years of use.
Lighting and electrical:
- Sauna-rated fixtures only. Standard residential light fixtures are not rated for the temperature and humidity levels in a hot room.
- Mount fixtures low on the wall or recessed into the bench fascia rather than in the ceiling. Ceiling-mounted fixtures in a sauna are exposed to the hottest air in the room and require fixtures specifically rated for sauna use.
- Keep all wiring inside conduit and route it through the cooler lower wall zones where possible.
What manufacturer and contractor data actually show
The numeric recommendations in this guide are not arbitrary. They come from temperature testing, contractor field experience, and manufacturer specifications that have been refined over decades of sauna building.
Temperature-by-height comparison (Finlandia-style data):
| Room Height | Approx. Ceiling Temp | Approx. Upper-Bench Temp | Efficiency Rating |
|---|---|---|---|
| 7’0" | 190°F | 190°F | High |
| 7’6"–8’0" | 190°F | Slightly below 190°F | Moderate |
| 8’0"+ (unmodified) | 190°F | ~20°F lower (170°F) | Low |
These ranges reflect Finlandia’s documented findings that a taller hot room leaves the bench zone up to 20°F cooler than a 7’ room running the same heater.
Contractor practice:
Tahoe Sauna Company’s contractor guidance recommends targeting 7.5’–8’ interior height as a practical compromise for new builds, acknowledging that finish layers will reduce framed height by 2–3 inches. For rooms where the framed height is already at 7’, the finished interior will land close to 6’10"–7’0", which is still within the functional range.
“Whether we choose an 8′ ceiling or a 7′ ceiling, or some height in between, our first definition is: upper bench height is 44 inches from the ceiling. This upper bench height allows for two fists above your head to the ceiling as you sit on the upper bench — giving access to the best heat without leaving anything on the table.” — SaunaTimes
Two build scenarios:
Small 4’×6’ sauna with a 7’ ceiling: Upper bench at 44" from ceiling, middle bench 18" below, raised floor deck at 6". A compact electric heater with a low stone-top height satisfies the Law of Löyly without requiring a ceiling change. Warm-up is fast, heat is concentrated, and the layout is straightforward.
Converted room with a 9’ ceiling: Without modification, the heat pocket can sit well above the upper bench. Building a dropped ceiling inside the hot room at a lower height recovers the heat pocket and allows a standard bench layout. This fix adds material and labor cost but is the most reliable approach for long-term performance.
Key Takeaways
The single most important rule in sauna design: set your ceiling height first, then build the bench layout and choose the heater to match — not the other way around.
| Point | Details |
|---|---|
| Target ceiling height | Aim for 7’–7.5’ finished interior height; 7.5’–8’ works with taller stoves and multi-bench layouts. |
| Top-bench clearance | Place the upper bench 44" below the finished ceiling for proper head clearance and heat access. |
| Bench spacing | Space the middle bench a comfortable chair-height distance below the upper bench; use a small raised floor deck at the entry. |
| High-ceiling fix | Build a dropped ceiling at 7’–7.5’ or install a heat baffle; never leave an 8’+ room unmodified. |
| Saunaheatersupply | Saunaheatersupply offers heaters, cabin kits, and cedar finish materials sized for these exact ceiling and bench dimensions. |
A contractor’s perspective on what builders get wrong
The most common mistake in residential sauna builds is treating ceiling height as a leftover decision, something to confirm after the room is framed and the heater is ordered. By that point, the geometry is locked in and the fixes are expensive.
Experienced installers approach ceiling height as the first structural decision, not the last. Pick the ceiling height, then derive the bench levels, then select a heater whose stone-top height satisfies the Law of Löyly for that bench configuration. That sequence prevents the two most common field problems: a heater that is too tall for the bench layout, and a bench layout that puts bathers below the heat pocket.
The second mistake is oversized framing. Contractors who default to 2x6 walls because they feel more substantial are inadvertently increasing the cubic volume of the hot room, which pushes heater sizing up and energy use per session higher. The extra wall depth rarely adds structural value in a sauna context.
Saunaheatersupply supports this planning process directly. The product catalog includes compact electric heaters suited to 7’ ceilings, taller wood-burning stoves for 7.5’–8’ rooms, and prefabricated cabin kits with pre-engineered ceiling heights that match these recommendations out of the box. Expert guidance is available to help match heater output to room volume before any lumber is cut.
Saunaheatersupply has the heaters and kits that fit your ceiling plan
Getting the ceiling height right is only useful if the heater and kit you order are sized for that space. Saunaheatersupply carries a curated selection of electric and wood-burning heaters, prefabricated cabin kits, and finish materials chosen specifically for residential and contractor builds.
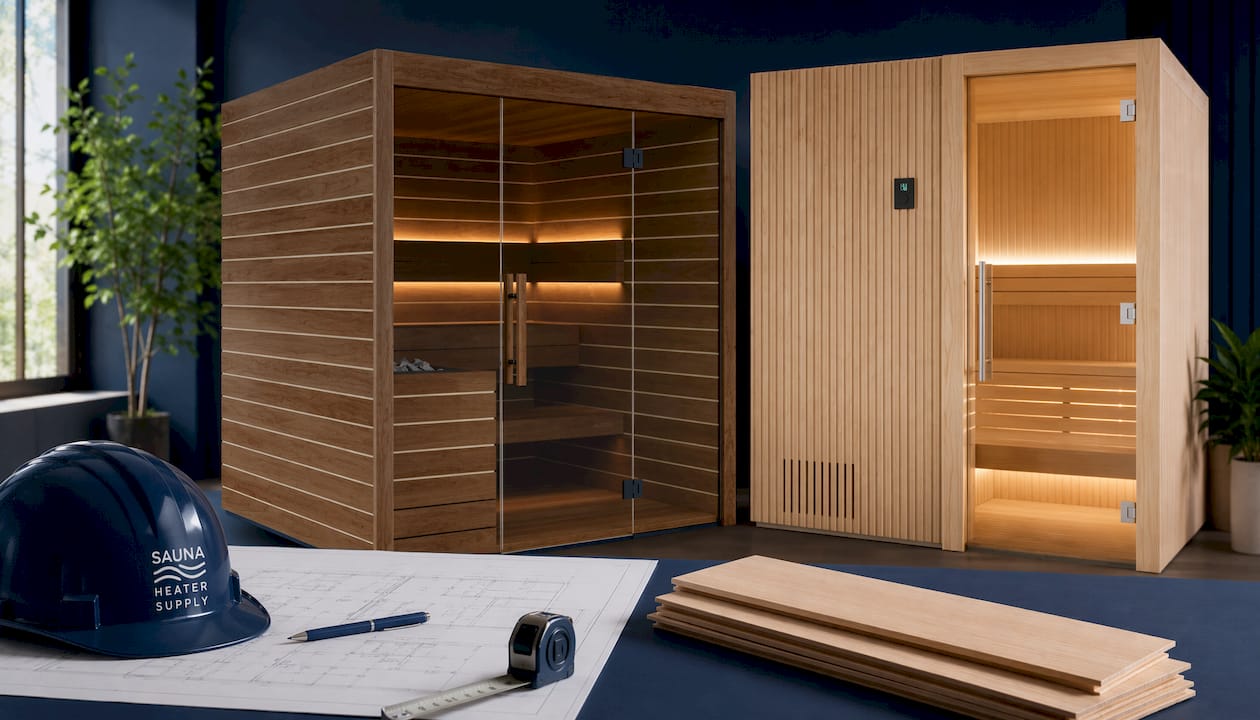
For turnkey builds where ceiling height and bench layout are pre-engineered, the Auroom Lumina Cabin Sauna and the Auroom Libera Wood Cabin Sauna Kit both arrive with interior dimensions that align with the 7’–7.5’ ceiling standard. For builders finishing their own framing, tongue-and-groove cedar paneling from Saunaheatersupply handles the ceiling and wall finish in one material. Every order includes access to expert planning support to confirm heater sizing against your room’s cubic footage and ceiling height. Browse the full catalog at Saunaheatersupply or contact the team directly for a sizing recommendation before you finalize your build plans.
Useful sources
- Finlandia Sauna: Ceiling Height — Temperature diagrams showing the ~20°F bench-level difference between 7’ and 8’ hot rooms; the primary source for heat stratification data in this guide.
- SaunaTimes: Sauna Ceiling Height — Detailed bench stacking math, the Law of Löyly explained with practical examples, and the 44" top-bench-to-ceiling standard.
- Sauna Guide: Home Sauna Size Guide — Practical ceiling height ranges (6’2" minimum, 7.5’–8’ ideal) and guidance for converting rooms with tall ceilings.
- Tahoe Sauna Company: Contractor’s Guide — Framing recommendations (2x4 at 16" O.C.), finish height reductions, and heater sizing implications of framing choices.
- Finnish Sauna Builders: Ceiling Material Guide — Guidance on sloped vs. flat ceilings, condensation drainage, and heat-resistant wood species for ceiling finishes.
- Country Saunas: Sauna Pre-Planning PDF — Industry pre-planning notes echoing the 7’ ceiling recommendation and the energy waste associated with 8’ ceilings.
- Saunaheatersupply — Heaters, cabin kits, cedar paneling, and expert planning support for residential and contractor sauna builds.