















Aim R-19–R-21 Walls, R-30+ Ceilings: Sauna Insulation for Homeowners
Aim for R-19 to R-21 in sauna walls, R-30 or higher in the ceiling, and R-13 to R-19 under the floor when it sits over unconditioned space. Mineral wool (Rockwool) is the material of choice for nearly every build, since it holds up at extreme temperatures and shrugs off moisture better than fiberglass. The vapor barrier, always aluminum foil rather than plastic sheeting, goes on the hot side of that insulation, with the ceiling getting priority attention before you worry about anything else.
TL;DR:
- Insulate sauna walls to R-19 to R-21 indoors and up to R-38 in the ceiling, especially for outdoor or cold-climate setups, to prevent heat loss.
- Mineral wool (Rockwool) is preferred for high-temperature stability, moisture resistance, and non-combustibility over fiberglass and rigid foam options.
- The vapor barrier should always be aluminum foil on the hot side with sealed seams and an air gap, to prevent moisture trapping and wall rot.
- Insulate only the end walls and floor of barrel saunas to avoid trapping moisture against the curved staves and causing wood rot.
- Prioritize insulation in the ceiling and ensure proper sealing and moisture control around fixtures to reduce long-term energy use and maintain heat.
Table of Contents
- What R-Value Should a Sauna Have?
- Which Insulation Material Handles Sauna Heat Best?
- Where Does the Vapor Barrier Go?
- Why the Ceiling and Door Deserve Extra Attention
- How Should You Insulate a Barrel Sauna?
- How Do You Choose the Right Insulation for Your Project?
- Where to Learn More and What to Buy
- Get the Right Materials for Your Build
- A Builder’s Take on Getting This Right
- Sources
What R-Value Should a Sauna Have?
Those numbers change depending on where the wall sits and what’s on the other side of it. An interior sauna built inside a heated basement needs far less insulation than a barrel sauna sitting on a deck in Minnesota, because the temperature gap the insulation has to fight is completely different.
Here’s a practical breakdown by surface and setting:
- Indoor sauna walls (adjacent to conditioned space): R-13 to R-19
- Indoor sauna ceiling: R-19 to R-30
- Outdoor sauna walls: R-19 to R-21
- Outdoor sauna ceiling: R-30 to R-38
- Floor over unconditioned space (crawl space, deck, unheated garage): R-13 to R-19
The ceiling always gets the higher number, and that’s not arbitrary. Heat rises, and pools at the top of the room, so the ceiling assembly experiences a steeper, more sustained temperature differential than the walls do for most of a session. Skimping there means your heater keeps working overtime just to hold the room at temperature.
Adjacency matters more than most builders expect. A sauna built into a finished basement, with conditioned space on the other side of every wall, can perform well at the low end of these ranges because the “outside” isn’t really outside. An outdoor barrel or cabin sauna, exposed to winter air on every surface, needs the higher end across the board, and in genuinely cold climates (sustained sub-zero winters), it’s worth pushing walls to R-21 and ceilings past R-38 if your cavity depth allows it.
Here’s the number that changes everything about how you should think about R-value: standard insulation is tested at a delta of roughly 24°C. Saunas routinely run at 60°C to 100°C temperature differentials, three to five times what the R-value label was measured against. That doesn’t mean the R-value is fake. It means the printed number understates how hard that insulation is actually working once your heater gets the room to 170°F, which is exactly why material stability at high heat matters as much as the number stamped on the bag.
For barrel saunas specifically, the quick reference is simpler: focus your insulation budget on the end walls and the floor rather than trying to hit these same wall targets around the curved staves. More on why in the barrel-specific section below.
Which Insulation Material Handles Sauna Heat Best?
Mineral wool wins this comparison on nearly every axis that matters for a sauna cavity and is often recommended as a starting point for almost any build. Here’s how the common options actually perform once temperatures climb.
Mineral wool (Rockwool) tolerates sustained heat past 200°C without degrading, stays dimensionally stable, and is naturally hydrophobic, meaning it resists soaking up ambient moisture rather than holding onto it. It runs roughly R-3.0 to R-4.3 per inch depending on density, according to Insulation Institute reference figures, and it’s non-combustible, which matters more in a sauna cavity than in almost any other part of a house.
Fiberglass batts are cheaper and widely available, but the binders that hold the fibers together start breaking down around 80°C, well within range of what a hot sauna wall cavity can see over time. Fiberglass also holds onto moisture rather than shedding it, which becomes a real problem the moment a vapor barrier fails or a seam opens. It’s acceptable in genuinely cold, low-heat-exposure zones (a mudroom-adjacent changing area, for instance) but it’s not the product you want against the heater wall.
Rigid foams split into a few different behaviors worth knowing before you buy:
- XPS (extruded polystyrene): decent moisture resistance, but service temperatures top out well below sauna interior temps; better suited to exterior perimeter applications than hot-side cavities.
- EPS (expanded polystyrene): similar temperature ceiling issues to XPS, lower cost, generally not recommended near the heater.
- Polyiso/PIR: higher R-per-inch than XPS or EPS, but its facer and core can be temperature-sensitive at sustained sauna heat; best reserved for cold-side exterior sheathing layers rather than direct interior cavity fill.
Spray foam air-seals better than any batt product on this list, which sounds appealing until you consider two problems: many formulations off-gas at temperatures a sauna reaches routinely, and once it’s in, it’s permanent. There’s no pulling it back out if you discover a moisture problem behind the wall five years later. Reserve it, if at all, for cold-side exterior applications, never the hot-side cavity.
Ceramic fiber or high-temperature blankets earn their place in very tight clearances right around flue penetrations or heater backing walls where standard mineral wool batts won’t fit or where service temperatures spike well past what any batt insulation is rated for. They’re specialty products, not whole-room solutions, and they cost accordingly.
The installation quality matters as much as the material choice. Energy is blunt about this: compressed batts, gaps around framing, and voids behind electrical boxes all quietly erode the effective R-value you paid for, regardless of what material you chose.
Where Does the Vapor Barrier Go?
The vapor barrier always goes on the hot side, meaning the side facing the interior of the sauna room, between the insulation and your interior paneling. Get this backward and you’re building a moisture trap.
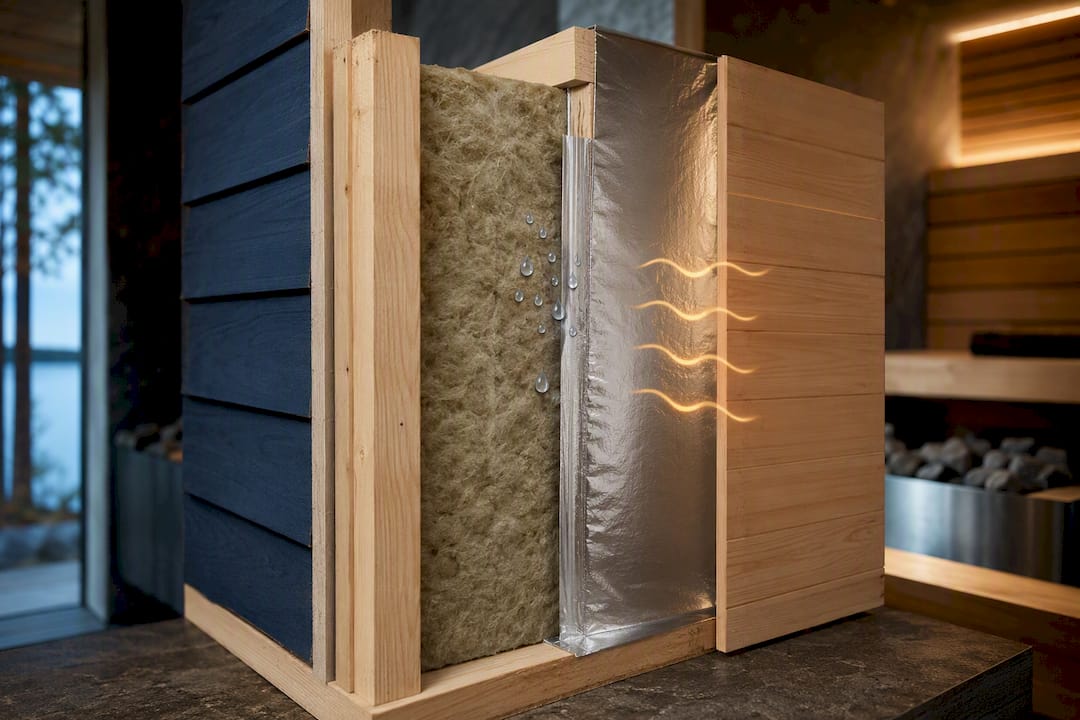
Aluminum foil is the recommended material here, not polyethylene sheeting. Foil does double duty: it blocks vapor migration into the insulation cavity, and when installed with an air gap behind the paneling, it acts as a radiant barrier that reflects heat back into the room rather than letting it bleed into the wall assembly. That air gap requirement isn’t optional. You need roughly three quarters of an inch of clearance between the foil and the interior wood for the radiant effect to actually work, achieved with vertical furring strips.
Here’s the installation sequence that avoids the most common failure points:
- Install mineral wool batts snugly in the cavity, avoiding compression.
- Staple or fasten aluminum foil across the hot side, overlapping seams by at least a few inches.
- Tape every seam and joint with foil-rated tape, and seal every penetration, light fixture boxes, vent openings, cable runs, individually.
- Attach furring strips over the foil to create the required air gap.
- Install interior paneling over the furring strips.
Skipping the seam tape is the single most common mistake builders make, and it’s also the most common root cause of long-term cavity rot in sauna walls. Steam finds every gap. Once moisture gets behind an unsealed seam, it saturates the mineral wool, kills its R-value, and starts feeding rot in the framing, often invisibly, until someone opens the wall years later.
Pro Tip: Never put foil or any vapor barrier on the cold (exterior) side of a sauna wall. That traps moisture inside the cavity with no way to escape, which is the fastest route to a wall full of wet, useless insulation.
Why the Ceiling and Door Deserve Extra Attention
Heat doesn’t distribute evenly in a sauna room. It stratifies, meaning the air near the ceiling runs significantly hotter than the air at bench level, which is exactly why the ceiling assembly takes more thermal punishment than any wall in the room and deserves the highest R-value in the build.
An underinsulated ceiling, especially one with an unconditioned attic above it, bleeds heat continuously and forces your heater to run longer and harder to maintain temperature. If there’s attic space above your sauna ceiling, treat that ceiling assembly like you would an exterior roof: full-depth mineral wool, a continuous foil vapor barrier, and careful air-sealing around any light fixtures or vent penetrations.
The door matters more than most builders budget for. A standard glass sauna door loses heat disproportionately compared to a solid, insulated wood door, simply because glass has almost no insulating value next to a filled wall cavity. That’s a legitimate design trade-off, not a mistake. Glass doors offer visibility and a lighter feel, but if heat retention and energy efficiency sauna performance top your priority list, a solid door insulates better.
Practical retrofits for an existing sauna with a weak ceiling:
- Add attic insulation above the sauna ceiling if accessible.
- Air-seal every visible gap around light fixtures, vents, and the ceiling perimeter before adding more insulation.
- Consider a secondary interior door or vestibule if your primary door is glass and heat loss has become a real problem.
How Should You Insulate a Barrel Sauna?
Insulate the end walls and the floor. Leave the curved stave walls alone.
Between-stave insulation sounds appealing in theory, more insulation everywhere should mean better heat retention, but in practice it traps moisture against the wood staves with no path to dry out. That combination of trapped humidity and wood contact is a rot accelerant, and it’s why most experienced builders and barrel sauna guides actively discourage it.
The end walls are a different story entirely, since they’re typically flat panel construction rather than curved staves, which makes them straightforward to insulate the same way you would a conventional wall: mineral wool batt, foil vapor barrier on the hot side, sealed seams. The floor benefits from the same treatment if the barrel sits on a deck, gravel pad, or anywhere else exposed to outdoor air from below.
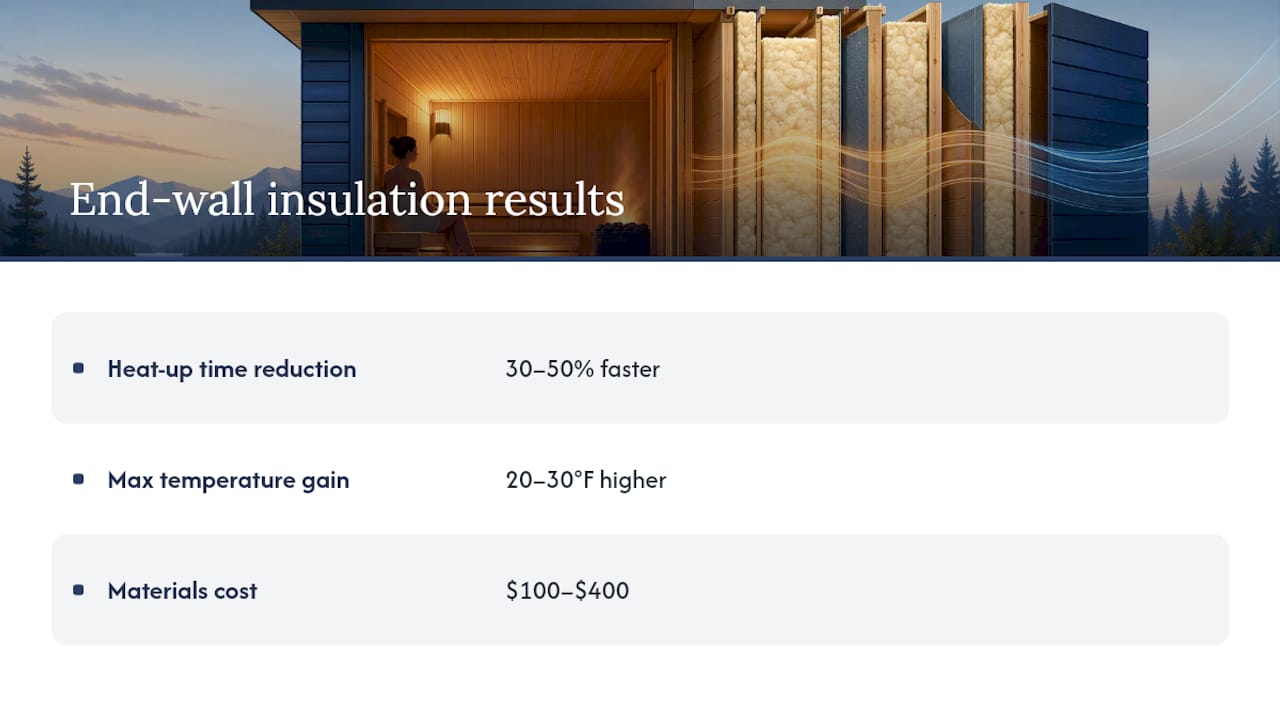
The performance gain is worth the modest cost. Insulating just the end walls of a barrel sauna can cut heat-up time by 30% to 50% and raise the achievable maximum temperature by 20°F to 30°F, for a materials cost typically running $100 to $400. That’s one of the better returns available in a sauna upgrade, and it’s a weekend project for most DIY-inclined owners rather than a multi-week renovation.
When can you skip it? If your barrel sauna sits in a genuinely mild climate, coastal California, the Gulf Coast, or similar, and you’re not chasing maximum heat-up speed, the end-wall upgrade becomes optional rather than necessary. The same goes for barrel units installed inside a conditioned garage or sunroom, where ambient temperature swings are already minimal.
How Do You Choose the Right Insulation for Your Project?
Work through these questions before you buy anything:
- What’s your cavity depth? A 2x4 wall gives you roughly 3.5 inches to work with; a 2x6 wall gives you 5.5. That depth caps your realistic R-value regardless of material.
- What’s the climate and site exposure? Outdoor, cold-climate builds justify the higher end of every R-value range discussed above.
- What’s adjacent to each wall? Conditioned space on the other side lowers your requirement; open air raises it.
- What’s your ventilation and drying plan? No insulation choice compensates for a wall that can’t dry out if moisture gets in.
When you’re talking to a supplier or contractor, ask directly about maximum service temperature, vapor permeance rating, and fire classification, not just price per square foot. Watch for red flags: fiberglass recommended for a heater-adjacent wall, no foil vapor barrier in the plan, no mention of an air gap, or penetrations left unsealed in the installation quote.
Pro Tip: Get the air-gap and seam-sealing details in writing from any contractor bid. Materials cost typically runs $200 to $600 for a small sauna’s full insulation package; labor adds $300 to $800 depending on your region, but a rushed installation costs you more in energy bills and repairs than the labor savings were ever worth.
Where to Learn More and What to Buy
Saunaheatersupply’s own step-by-step insulation guide walks through material selection and foil installation in more depth, alongside a dedicated vapor barrier guide covering exact foil, tape, and furring specs. Product categories available include insulation accessories, foil tape, sauna doors, and complete kits.
Get the Right Materials for Your Build
Choosing the right R-value is only half the job. Getting mineral wool, foil, tape, and furring that actually match your project’s cavity depth and climate is where most DIY builds either come together cleanly or run into trouble halfway through. Some suppliers stock insulation accessories and finishing materials that pair with the assemblies described above, reducing guesswork regarding product compatibility.
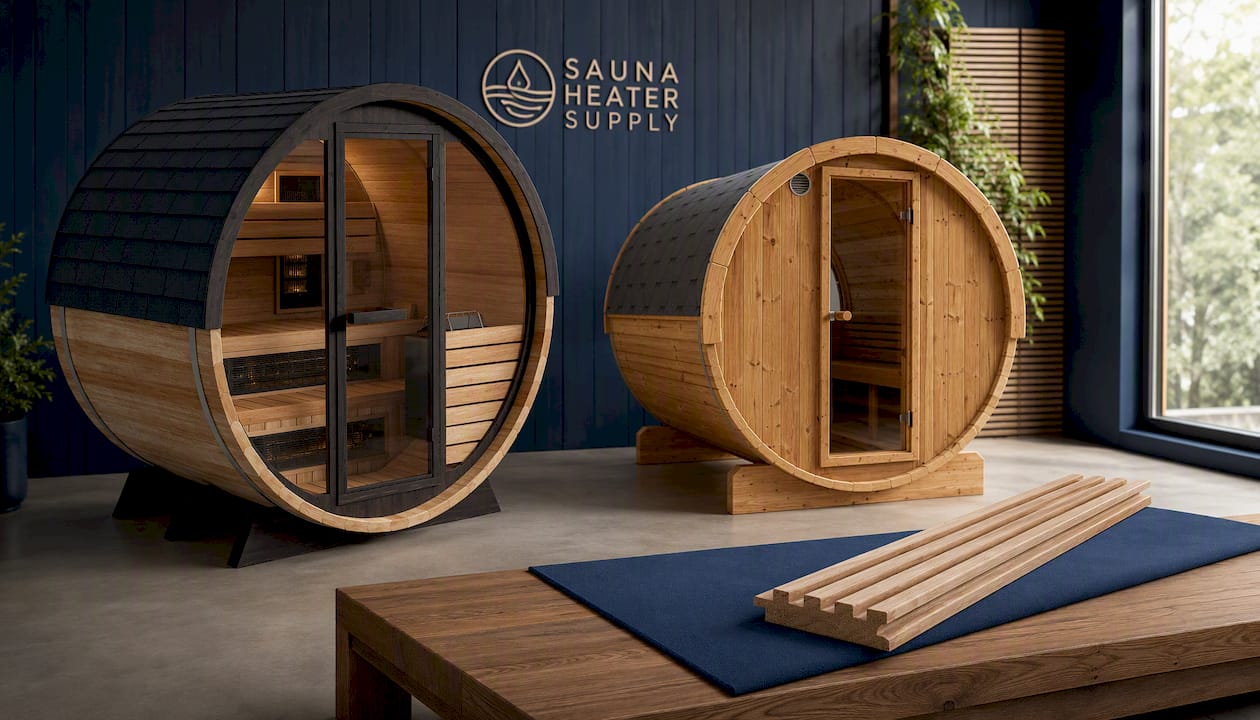
If you’re shopping for a barrel unit rather than building one from scratch, the Finnmark Thermo-Aspen Combination Barrel Sauna FD-7 comes as a factory-built barrel with the end-wall and floor considerations already engineered in. For builds where a window changes the heat-loss math discussed earlier, the SaunaLife Model E8W Sauna Barrel-Window is worth reviewing against a solid-panel alternative. And if you’re finishing the interior over your foil and furring strips, the PROSAUNAS THERMO-ASPEN GROOVE-S 1X3 T&G paneling is built for exactly that air-gapped installation method.
Check the specs on any of these products against your own cavity depth and climate numbers, or seek consultation from suppliers for your specific project.
A Builder’s Take on Getting This Right
If there’s one lesson worth carrying into your build, it’s this: the ceiling is where builds quietly fail. Walls get attention because they’re visible and easy to reason about. Ceilings get an afterthought batt because nobody’s looking up while the drywall goes on, and then the owner wonders why the heater runs forever to hit temperature.
Prioritize the ceiling, choose mineral wool over fiberglass without much second thought, and never let foil land anywhere but the hot side with sealed seams behind it. Those three decisions matter more than any other choice you’ll make in the build. For more detail on how ceiling geometry affects heat stratification, Saunaheatersupply’s ceiling height guide is worth a look before you frame anything.
— Teddy
Sources
- Sauna Insulation Guide: R-Values, Vapour Barriers & Foil Explained | ThermalFinn
- Barrel sauna insulation guide | Sauna Guide
- Sauna building envelope and moisture-resistant construction | HUUM