















DIY Sauna Vapor Barrier: Exact Foil, Tape, and Furring to Buy
Use non-perforated, reinforced aluminum foil, never standard polyethylene, as your sauna vapor barrier. Install it on the sauna (hot) side of the insulation, not the exterior side. Seal every seam and penetration with high-temperature foil tape, and leave an air gap behind the interior paneling. Skip any one of these and moisture will find the insulation eventually.
TL;DR:
- Reinforced, non-perforated aluminum foil is essential for sauna vapor barriers because it withstands temperatures above 180°F without degrading.
- The vapor barrier must be installed on the hot side of the insulation, directly facing the sauna interior, to prevent moisture from condensing within the wall cavity.
- Proper installation involves sealing every seam and penetration with high-temperature foil tape, with an air gap behind the interior paneling to enable long-term moisture management.
- Reinforced foil with higher mil thickness reduces tear risk and minimizes seams, which are critical for preventing moisture intrusion over decades of use.
- Regular inspection and patching of seams or tears are necessary to maintain vapor barrier integrity and avoid mold or wood rot.
Table of Contents
- What Makes Aluminum Foil the Right Sauna Vapor Barrier?
- Where Does the Vapor Barrier Go in the Wall Assembly?
- How Do You Install a Sauna Vapor Barrier Step by Step?
- How Do You Seal Seams and Penetrations for Good?
- How Big Should the Air Gap Behind the Paneling Be?
- Why Does Ventilation Matter as Much as the Vapor Barrier?
- What Are the Most Common Vapor Barrier Mistakes?
- Which Vapor Barrier Products Does Sauna Heater Supply Recommend?
- How Do You Maintain Vapor Barrier Integrity Over Time?
- What Safety Precautions Matter When Handling Vapor Barrier Materials?
- Shop Sauna Vapor Barrier Foil and Accessories
- Why Getting the Vapor Barrier Right the First Time Matters
- Sources
What Makes Aluminum Foil the Right Sauna Vapor Barrier?
Standard polyethylene sheeting works fine behind drywall in a normal room. Inside a sauna, it fails. Sauna cabin temperatures regularly climb past 180°F, and prolonged exposure at that heat causes plastic vapor barriers to degrade and off-gas rather than simply hold moisture back. Aluminum foil doesn’t have that problem. It stays chemically stable at sauna temperatures, blocks moisture migration into the wall cavity, and gives you a bonus most builders don’t think about: it doubles as a radiant barrier when you pair it with a proper air gap behind the paneling.
Not all foil is created equal, though. You’ll run into a handful of variants at the supply counter:
- Paper-backed foil — lighter duty, easier to tear, generally the budget option.
- Single-sided foil — reflective on one face only, adequate for most residential builds.
- Double-sided foil — reflective both directions, useful when you want radiant benefit on both the insulation and paneling sides.
- Scrim/reinforced foil — foil laminated to a fiberglass or polyester mesh backing that resists tearing at staple and nail points.
- Non-perforated vs. perforated — perforated foil has tiny holes meant for breathable wall systems elsewhere in construction. For a sauna vapor barrier, you want non-perforated, full stop.
Reinforced (scrim-backed) foil at higher mil thickness dramatically cuts down on tears where you staple it, and it lets you buy wider rolls, which means fewer seams and fewer places for moisture to sneak through over the life of the sauna. Look for foil rated compatible with high-temperature aluminum tape rather than standard duct tape, since ordinary adhesives lose their grip once the wall heats up repeatedly.
Pro Tip: Check the product spec sheet for a temperature rating and adhesive compatibility note before you buy. If neither is listed, assume it wasn’t designed for sauna use.
Where Does the Vapor Barrier Go in the Wall Assembly?
Get the layer order wrong here and you’ll be tearing out moldy insulation within a couple of seasons. The correct sequence, working from the exterior wall inward toward the sauna interior, looks like this:
- Exterior sheathing and siding — standard building envelope, unchanged by sauna construction.
- Structural framing with insulation packed between studs — this is where moisture control decisions start to matter.
- Vapor barrier (reinforced aluminum foil) — placed directly on the sauna side of the insulation, facing the interior.
- Air gap — created by furring strips, discussed in detail below.
- Interior paneling — typically cedar, aspen, or another low-resin softwood.
The reason for that order comes down to how moisture moves. Hot, humid air inside the sauna wants to migrate toward cooler, drier air outside. If the foil sits on the wrong side of the insulation, that moisture-laden air passes through the wood paneling, hits the insulation, and condenses right there because the barrier is now stopping vapor after it has already soaked the batt. Mold and rot follow. Put the foil on the hot side instead, and vapor never gets past that first line of defense.
For the insulation itself, mineral wool (often sold as Rockwool) is the better call over fiberglass. It handles incidental moisture and heat cycling without losing its insulating value the way fiberglass can, and it doesn’t off-gas at sauna temperatures. Aim for appropriate R-values in interior walls and ceilings, increasing insulation levels for outdoor-facing walls or freestanding outdoor builds to address ambient cold as well as heat retention. Our insulation guide walks through R-value selection by climate zone if you’re building somewhere with harsh winters.
How Do You Install a Sauna Vapor Barrier Step by Step?
Before you touch a single sheet of foil, walk the cavity and mark every electrical box, wiring run, and light fixture penetration you’ll need to work around. Planning this now saves you from cutting foil twice.
- Prep the cavity. Confirm insulation is fully seated with no gaps or compression, and vacuum out sawdust or debris that could puncture the foil once it’s stapled tight.
- Cut foil to length with margin. Add 2 to 3 inches beyond each stud bay for overlap onto the next panel. Horizontal runs generally mean fewer vertical seams on standard 8 foot walls, but vertical runs can work better in tight spaces or around obstructions. Either orientation works as long as your overlaps run consistently in one direction, like siding, so water (or in this case, vapor pressure) never hits a seam edge on.
- Staple the first sheet at the top of the wall, working outward from center to avoid wrinkles. Space staples roughly every 6 to 8 inches along the frame, and use narrow-crown staples that won’t tear the foil face.
- Overlap the next sheet by at least 2 inches over the first, stapling through both layers where they meet the framing.
- Tape every seam with high-temperature aluminum foil tape before you move to the next section. Don’t wait until the whole wall is covered. Once paneling goes up, you lose access.
- Work penetrations as you reach them, cutting a tight X pattern around electrical boxes and folding the flaps back before taping them flush.
- Move to the ceiling last. Ceiling installation is physically harder. Foil wants to sag before you get it stapled, so work in shorter sections and have a second person hold tension while you fasten.
Pro Tip: When working overhead, wear safety glasses. Staple guns kick back more debris than you’d expect when you’re firing upward into a ceiling cavity, and foil scraps have sharp edges.
Ceiling seams deserve somewhat more tape overlap compared to walls because gravity and heat exert more stress on horizontal seams over the sauna’s lifetime.
How Do You Seal Seams and Penetrations for Good?
This is where most DIY vapor barriers actually fail, not at the foil itself but at the joints. Use a foil tape specifically rated for high heat and long-term adhesive retention. Standard duct tape loses its bond within a season or two once it’s cycled through repeated heating and cooling. Sauna-rated aluminum tape products hold their seal far longer because the adhesive is formulated for that thermal cycling.
Around electrical boxes, cut foil flush to the box opening rather than leaving loose flaps, then tape the cut edges down tight so no gap remains between the box and the surrounding foil. Follow your local electrical code for box placement and clearances. This isn’t a place to improvise.
At inside and outside corners, overlap foil by at least 2 inches and tape both directions rather than relying on a single strip. If you find a tear during installation, patch it immediately with a foil tape piece extending at least an inch past the damage on all sides. Small tears left unaddressed are exactly the kind of gap that leads to moisture damage years down the line.
Before paneling goes up, run a quick visual pass: check every seam for full contact, confirm no staples are backing out, and hold a bright work light behind suspect areas to catch pinholes you might have missed.
How Big Should the Air Gap Behind the Paneling Be?
The air gap is not optional trim work. It’s what lets the foil actually function as a radiant barrier instead of just a moisture stop, and it’s what keeps your interior wood dry over the long run. Without it, paneling sits flush against the foil, trapping any residual moisture directly against the wood and inviting rot.
Build the gap using 1x2 or 1x3 furring strips run vertically over the studs, attached through the foil into the framing with screws long enough to bite solid wood. This creates a recommended minimum air gap, often close to one inch when space allows. That gap gives residual humidity somewhere to go and move, rather than sitting stagnant against the cladding.
- Space furring strips on 16 to 24 inch centers to match your paneling’s fastening needs.
- Fasten paneling to the furring strips, never directly through to the foil or studs, so the gap stays uncompressed.
- In ceilings, use shorter furring strip runs and check for sag before final attachment, since ceiling gaps are harder to inspect once boards go up.
- In narrow cavities like bench aprons, a 1x2 strip is often the practical minimum that still preserves airflow.
Get this gap right and the wood paneling in your sauna wall system stays dry and stable for years instead of cupping and staining within a season or two.
Why Does Ventilation Matter as Much as the Vapor Barrier?
A vapor barrier stops moisture from migrating into your walls. It does nothing about the humidity sitting inside the cabin air itself, that’s ventilation’s job, and you need both working together. One without the other leaves a gap in your moisture strategy.
Most residential sauna builds use a low intake vent near the heater and a high exhaust vent on the opposite wall, letting fresh air pull across the room and push humid air out. Some builders add mechanical downdraft exhaust in tighter or windowless spaces where passive airflow won’t cut it. Placement matters more than most people assume: an intake too close to the exhaust short circuits the airflow path and leaves stagnant pockets elsewhere in the room.
- Run the vent fan or leave the door cracked for 20 to 30 minutes after each session to flush residual humidity.
- In humid climates or heavy-use saunas, consider forced drying between sessions rather than relying on passive airflow alone.
- Watch for condensation beading on interior surfaces or a persistent damp smell days after a session. Both point to inadequate exhaust.
- If damp smell persists after adjusting ventilation, check the vapor barrier seams before assuming the ventilation design is at fault.
Our ventilation guide covers intake and exhaust sizing by cabin volume if you’re still finalizing your layout.
What Are the Most Common Vapor Barrier Mistakes?
Most vapor barrier failures trace back to a handful of repeat offenders, and they’re avoidable once you know to watch for them.
- Using polyethylene sheeting instead of aluminum foil. It degrades under sauna heat and was never rated for this environment.
- Installing the barrier on the cold side of the insulation. This traps condensation right in the batt, a mistake builders frequently flag in online communities after the fact.
- Skipping or skimping on seam tape. Gaps wider than a hairline let vapor through over time.
- Skipping the air gap entirely. This traps moisture against the paneling and shortens the wood’s life.
- Leaving penetrations unsealed. Electrical boxes and wiring holes are the easiest spots to forget.
Before paneling, do a basic visual and touch test on every seam, and if you have access to a smoke pen or incense stick, hold it near suspect seams with a small fan running inside the cabin to check for airflow through gaps. Any noticeable draft through a taped seam is a fail, patch it before moving forward. If you find recurring failures across multiple seams despite careful taping, it’s worth having a contractor inspect the assembly before you close up the walls.
Which Vapor Barrier Products Does Sauna Heater Supply Recommend?
We recommend ProSaunas Vapor Barrier Foil for most DIY builds because it meets the reinforced, non-perforated spec this guide covers, without requiring readers to cross-reference three different manufacturer spec sheets to confirm heat rating and tape compatibility. For builders who want a heavier scrim-backed option, PROSAUNAS 128938 offers the added tear resistance that matters most on ceiling installations, where the foil takes the most stress during install.
- ProSaunas Vapor Barrier Foil: standard-duty, non-perforated, suited to typical wall runs.
- PROSAUNAS 128938: reinforced construction for ceilings and high-stress seams.
- High-temperature foil tape and 1x2 furring strips, sold as installation accessories alongside both products.
If you’re planning a full build rather than a retrofit, the Finnmark Thermo-Aspen Combination Barrel Sauna FD-7 ships with insulation and vapor barrier considerations already engineered into the barrel design, worth a look if you’re deciding between a custom-built room and a factory kit. For deeper background on insulation choices before you buy, our insulation guide is a good next stop.
How Do You Maintain Vapor Barrier Integrity Over Time?
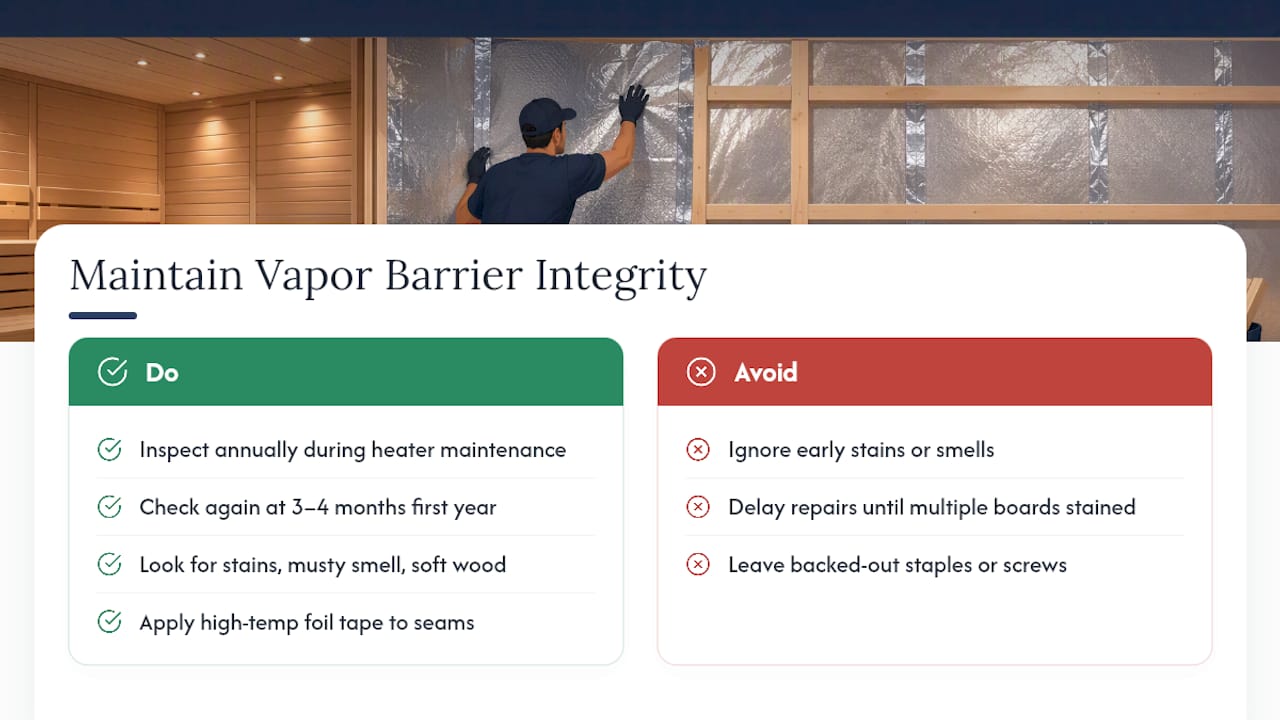
A properly installed vapor barrier isn’t a set-it-and-forget-it component, though it does need far less attention than your heater or benches. Check it once a year, ideally when you’re already doing seasonal maintenance on the heater or door seals.
Start by looking for warning signs on the interior paneling: dark staining, a musty smell that lingers well after ventilation, or wood that feels soft or spongy to the touch. Any of these usually means moisture is getting past the barrier somewhere, and it’s worth pulling a panel to inspect the foil behind it before the problem spreads.
If you catch a failing seam early, a strip of high-temperature foil tape applied directly over the gap usually solves it without pulling more than one panel. Waiting until staining shows up on multiple boards means you’re likely dealing with insulation that’s already wet, which is a bigger repair.
Pay closer attention in the first year after installation. Staples can back out slightly as wood paneling expands and contracts through its first few heating cycles, and that movement can loosen tape adhesion at stress points near corners and ceiling seams. A quick check after the first three or four months of regular use catches most of these early.
Keep an eye on furring strip attachment too. If paneling ever feels like it’s flexing more than it used to, a furring strip screw may have backed out, compressing the air gap in that spot and reducing the drying path behind the wood. Tightening it is a five-minute fix if caught early, and a wall teardown if ignored for a few seasons.
What Safety Precautions Matter When Handling Vapor Barrier Materials?
Aluminum foil and foil tape are low-hazard materials compared to a lot of construction supplies, but a few precautions still matter, especially during a multi-hour installation session.
Cut edges on aluminum foil are sharp enough to slice skin easily, more so than most people expect from something this thin. Wear work gloves while cutting and handling sheets, particularly on ceiling installs where you’re maneuvering material overhead and more likely to brush against an edge.
Wear safety glasses throughout the install, not just during stapling. Foil scraps and staple debris can kick up unexpectedly, and ceiling work puts your face directly in the path of falling material.
If you’re cutting reinforced or scrim-backed foil, the mesh backing can fray into small fibers. A basic dust mask is worth wearing if you’re cutting a lot of material in an enclosed space, and it’s cheap insurance against inhaling fine particulate over a long install session.
Standard construction polyethylene, if you’re removing an old, incorrect vapor barrier from a previous sauna build, can off-gas after prolonged heat exposure, so ventilate the space well during removal and avoid lingering in the cabin while pulling out degraded plastic sheeting.
Finally, if your project involves working near existing electrical wiring or boxes, treat every wire as live until you’ve confirmed otherwise at the breaker. Foil is conductive, and a stray staple through a live wire is a real risk during installation, not just a theoretical one.
Shop Sauna Vapor Barrier Foil and Accessories
ProSaunas Vapor Barrier Foil covers standard wall runs efficiently thanks to its roll width, cutting down on the seam count you’d get from narrower, generic foil rolls.
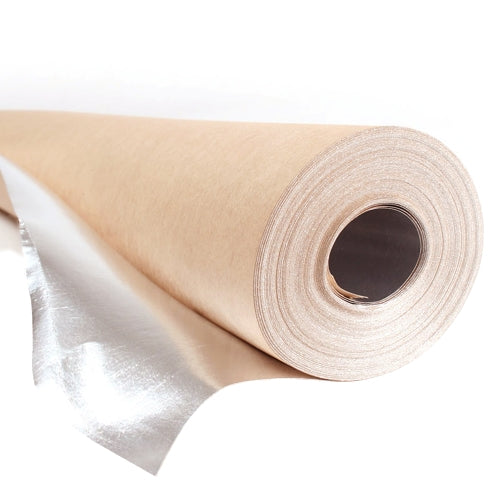
For ceilings and other high-stress areas, PROSAUNAS 128938 gives you the reinforced backing that resists tearing where staples take the most abuse. Pair either product with high-temperature foil tape for seams and 1x2 furring strips for your air gap, both sold as companion accessories so you’re not hunting down compatible materials from three different suppliers. If you’re starting a build from scratch rather than retrofitting, the Finnmark Thermo-Aspen Combination Barrel Sauna FD-7 shows what a finished, factory-engineered assembly looks like when insulation and vapor control are handled from the start.
Not sure how much coverage your specific layout needs, or which foil grade fits your build? Visit the product pages directly or reach out to our team for help matching quantities to your wall and ceiling dimensions before you order.
Why Getting the Vapor Barrier Right the First Time Matters
Most sauna failures we hear about don’t start with the heater. They start with a wall that was closed up too fast, with a vapor barrier installed on the wrong side or seams that were never taped properly. By the time anyone notices, the fix means tearing out paneling and insulation that looked fine a year earlier.
The frustrating part is that getting it right doesn’t cost more or take dramatically longer. It just requires doing the sequence in order and taping every seam before you move on to the next section, instead of rushing to see paneling go up. A sauna built with a correct barrier and a proper air gap should give you decades of use without ever touching the wall assembly again.
If you’re mid-build and unsure whether your current setup meets spec, our team can walk through your plan and point you toward the right materials before you close up the walls.
— Teddy
Sources
- Sauna Vapor Barrier Installation: Why Aluminum Foil, Not Plastic | Tahoe Sauna Company
- Sauna insulation guide: R-values, vapour barriers & foil explained | ThermalFinn
- Sauna Foil Vapor Barrier Buyer’s Guide: Stop Moisture Damage
- Vapour barrier - Finnsauna
- If sauna walls could talk: insulate with vapor barrier or let them breathe? | SaunaTimes