















Homeowners: Sealed Base and Duckboards Make Sauna Floors Last a Decade
The best sauna floor pairs a sealed, non-porous base, either concrete or tile, with removable thermally modified wood or cedar duckboards on top. Solid wood alone traps moisture and rots. Bare tile or stone works but runs cold underfoot. Synthetic mats belong in infrared rooms or outdoor pop-up tents, not traditional hot rooms. The tradeoff is simple: durability and hygiene come from the base, comfort comes from what you put on top of it.
TL;DR:
- A sealed, non-porous concrete or tile base with proper slope and drainage is essential for long-lasting sauna floors.
- Thermally modified wood and cedar duckboards are the best options for comfort and durability, with removable sections simplifying maintenance.
- Correct specification of slip-resistant, textured porcelain tile with epoxy grout ensures safety and longevity in high-moisture conditions.
- Synthetic mats and rubber flooring are suitable only for infrared or outdoor saunas, as heat exposure can cause warping or off-gassing.
- Proper installation sequence, including sealing the substrate and establishing airflow underneath wood surfaces, prevents early deterioration and costly repairs.
Table of Contents
- What Makes Sauna Flooring Different From Any Other Room
- Wood Options: Cedar, Thermally Modified Wood, and Duckboards
- Tile and Natural Stone: Specifying Slip Resistance and Grout
- Concrete and Sealed Surfaces: When Concrete Works and How to Finish It
- Synthetics and Mats: Use Cases and Safety Limits
- Subfloor, Drainage, and Waterproofing That Actually Last
- Installation Order and Mistakes That Cost You Later
- Indoor vs. Outdoor Sauna Flooring: What Changes Outside
- Maintenance, Cleaning, and How Long Each Floor Actually Lasts
- How Saunaheatersupply’s Resources Back These Recommendations
- What Sauna Flooring Actually Costs, Material by Material
- The Environmental Trade-offs Behind Each Material
- A Few Non-negotiables Before You Commit
- Building Your Floor With the Right Heater and Accessories
- Sources
What Makes Sauna Flooring Different From Any Other Room
A sauna floor lives through heat swings, standing water, and bare feet several times a week, sometimes several times a day. Few other rooms in a house get subjected to that combination, and it changes what “good flooring” means.
Temperatures inside a hot room routinely reach high levels at bench height, while the floor itself absorbs splashed water from bucket pours, melting snow tracked in from outside, and condensation as the room cools. That cycle of heat, moisture, then cool-down is exactly the environment mold and wood rot need to thrive. Untreated lumber sitting directly on a damp subfloor will start breaking down within a season or two in a heavily used sauna.
Barefoot use adds a second set of demands. Floors need enough texture to prevent slipping when wet, but not so much roughness that it’s uncomfortable to sit or kneel on. And because sauna-goers walk across the floor barefoot at 180 degrees Fahrenheit ambient temperature, surface material affects comfort as much as walls or benches do.
That’s why the substrate matters more than the finish. A gorgeous cedar floor installed straight onto plywood is a slow-motion failure. The same cedar, arranged as removable duckboards over sealed concrete, can last for years. Before choosing a material, homeowners need to think through:
- How often the sauna will be used, and by how many people
- Whether it’s an indoor build with controlled humidity or an outdoor structure exposed to ground moisture
- How water gets off the floor (a drain, or just evaporation)
- Whether comfort underfoot or minimal maintenance matters more
Get the substrate and drainage right first. Everything else, including which wood or tile you like the look of, is a secondary decision.
Wood Options: Cedar, Thermally Modified Wood, and Duckboards
Wood is what makes a sauna feel like a sauna, but not all wood performs the same way under repeated heat and moisture exposure.
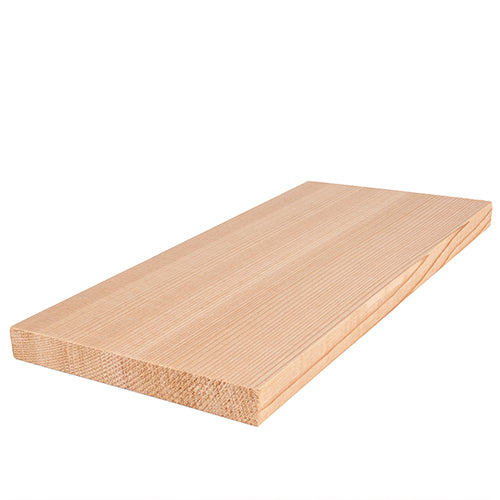
Thermally modified wood, often thermo-treated spruce or aspen, is processed at high temperatures without chemicals, which changes the wood’s cell structure. This process gives it greater dimensional stability and moisture resistance than untreated wood, meaning it resists warping, cupping, and rot far longer than a standard softwood plank. It’s become the default recommendation for sauna walking surfaces because it holds up to the exact stress cycle a hot room floor endures.
Cedar brings the aroma most people associate with a traditional sauna, along with natural oils that resist decay better than pine or fir. It costs more than thermally modified spruce, and the fragrance fades over years of heat exposure and cleaning. Cedar duckboards need more frequent inspection for soft spots than thermally modified alternatives, but plenty of sauna owners consider the scent worth the extra upkeep.
Here’s how the two typically compare in practice:
- Thermally modified wood costs less, resists moisture longer, and stays dimensionally stable, but has little to no scent.
- Cedar delivers the classic aroma and warm color, costs more up front, and requires closer monitoring for wear.
Duckboards themselves, the slatted wood grates you stand on, are the mechanism that makes either wood choice viable long-term. The trade-tested approach is to build them as removable sections that sit on a non-permeable substrate like sealed concrete or tile, rather than fastening wood directly to the floor. That single design choice is what separates a sauna floor that lasts a decade from one that needs replacing in two years.
When building or buying duckboards, look for:
- Slat spacing around three-eighths to half an inch, tight enough to be comfortable but wide enough to let water and steam pass through
- Small rubber feet or spacers underneath, lifting the wood slightly off the substrate so air circulates and water doesn’t pool against the underside
- Sections light enough for one person to lift out for cleaning, typically no larger than 2 feet by 3 feet
- A finish-free surface, since sealants and stains can get slippery and release odor when heated
Cedar Heater Supply’s sauna wood types guide breaks down species performance in more depth if you’re deciding between wall wood and floor wood for the same build.
Pro Tip: Pull your duckboards out and lean them against a wall or rack after each use, especially in a shared or commercial sauna. Even a few hours of standing water underneath a slat is enough to start rot that won’t show on the surface until it’s advanced.
Tile and Natural Stone: Specifying Slip Resistance and Grout
Porcelain tile is the closest thing to a set-and-forget sauna floor, provided you specify it correctly. Get the slip rating or grout wrong, and it becomes the opposite.
Porcelain and ceramic tile look similar, but porosity separates them. Porcelain is fired at higher temperatures and absorbs far less water than ceramic, which matters directly in a room where the floor gets soaked several times a week. Natural stone, like slate or travertine, offers a distinct look but needs sealing more often than porcelain since it’s naturally more porous.
Slip resistance isn’t a matter of opinion. Tile is rated using the Dynamic Coefficient of Friction, or DCOF, and floors in wet-barefoot environments should carry a minimum slip rating appropriate for safety. Ask for that number specifically when shopping tile for a sauna floor; a showroom sample that looks textured enough by eye can still fail that threshold when wet.
A few specification details make the biggest difference in real-world performance:
- Choose a textured or matte finish over polished or glossy tile, which becomes dangerously slick once wet
- Use epoxy grout instead of standard cement grout, since epoxy resists moisture penetration and won’t crumble under repeated heat cycles
- Confirm the tile carries a slip rating suited for wet barefoot traffic, not just a general residential rating
Porcelain tile with a textured finish and epoxy grout is repeatedly recommended as the low-maintenance choice for high-use home saunas and commercial installations, largely because it needs no resealing and shrugs off standing water that would ruin standard grout within a couple of seasons.
The one real drawback to tile is thermal comfort. Stone and porcelain conduct heat efficiently, but they don’t retain warmth the way wood does, so bare feet register tile as cold even in a 180 degree Fahrenheit room. That’s the exact problem removable duckboards solve. Lay cedar or thermally modified wood duckboards over the tile, and you get hygienic, durable tile doing the structural work while wood handles comfort. Saunaheatersupply’s guide to tiling a sauna covers which tile types and adhesives actually hold up to repeated heat cycling, since not every product marketed as “sauna-safe” performs the same at bench-level temperatures.
Concrete and Sealed Surfaces: When Concrete Works and How to Finish It
Concrete plays two roles in a sauna: it’s almost always the structural base, and it can also serve as the finished floor if sealed and treated correctly.
As a base, poured concrete or a cement board underlayment gives you a rigid, non-combustible surface that won’t flex, rot, or absorb moisture the way plywood does. That’s why concrete slabs are the standard recommendation under tile, under duckboards, or as a stand-alone sealed finish. As a finished floor on its own, concrete needs the right sealer, or it will absorb water, stain, and eventually spall under repeated heat and moisture cycles.
Three sealer types show up most often in sauna applications:
- Epoxy sealers create a hard, glossy or textured surface with strong chemical and moisture resistance
- Polyurethane sealers offer more flexibility than epoxy, which helps resist cracking as the slab expands and contracts with heat
- Penetrating silicone sealers soak into the concrete itself rather than sitting on top, preserving a more natural look while still blocking water absorption
Reseal cycles vary by product, but most sealed concrete sauna floors need attention roughly every two to seven years, depending on the sealer type and how heavily the sauna gets used.
Bare concrete without insulation underneath will feel cold and, in an outdoor build, can crack under freeze-thaw stress if moisture gets trapped beneath the slab. Rigid foam insulation under the slab addresses both problems at once, keeping the surface warmer and reducing the thermal shock that causes cracking.
Grip is the other consideration. Smooth troweled concrete gets slick when wet, so a broom finish, light acid etch, or textured sealer additive gives bare feet something to grip. Even with a good texture treatment, most owners still add duckboards on top for the same reason they add them over tile: sealed concrete is durable and easy to clean, but it doesn’t feel warm underfoot the way wood does.
Synthetics and Mats: Use Cases and Safety Limits
Vinyl, PVC, and rubber flooring products show up in sauna marketing constantly, but they belong in specific rooms, not every hot room.
The core issue is heat tolerance. Standard vinyl and PVC flooring is rated for normal indoor temperatures, often well under 120 degrees Fahrenheit, and can soften, warp, or off-gas volatile organic compounds when exposed to the 150 to 190 degree Fahrenheit range typical of a traditional sauna. That off-gassing risk is the reason synthetic sheet flooring is a poor match for wood-fired or electric hot rooms.
Where synthetics genuinely work well:
- Infrared sauna cabins, which run at lower ambient temperatures than traditional steam or dry saunas, making standard vinyl or rubber tile a workable, budget-friendly floor
- Temporary or pop-up outdoor sauna tents, where a rugged interlocking rubber mat protects grass or gravel underneath without a permanent installation
- Entry mats just outside the sauna door, where a heat-rated rubber mat catches water and debris before it tracks onto the main floor
If you do want a synthetic surface inside a hotter traditional sauna, specify heat-rated rubber duckboards or high-temperature composite mats explicitly built for hot-room service, not general-purpose flooring pulled from a garage or gym supply catalog. Check the manufacturer’s maximum temperature rating against your sauna’s actual operating range before buying, since the gap between “heat-resistant” marketing language and an actual tested rating can be significant.
Subfloor, Drainage, and Waterproofing That Actually Last
Everything above the subfloor is cosmetic compared to what happens underneath it. Get the base wrong, and no amount of premium tile or cedar will save the floor from failing early.
The preferred approach is a poured concrete slab, or cement board over a wood-framed subfloor, topped with a waterproof membrane before any finish material goes down. That membrane is what actually stops water from migrating into framing or subflooring below, which is the failure mode behind most rotted sauna floors that looked fine on the surface for years before problems appeared.
Slope matters just as much as the membrane. A sauna floor should pitch 1 to 2 percent toward a drain, a subtle grade that’s barely visible but enough to move water instead of letting it pool. Some installers achieve this by cutting and setting sleepers to establish the slope, then filling between them with a smooth grout or concrete mix free of large aggregate before the backer board and tile go on top, a method sometimes called the sleeper or “Ben Square” approach.
A step-by-step build sequence looks roughly like this:
- Frame and pour the slab or install cement board over a properly supported subfloor
- Set sleepers or shims to establish the 1 to 2 percent slope toward the drain location
- Fill and level with a fine concrete or grout mix, avoiding large aggregate that creates an uneven bed
- Apply a waterproof membrane across the entire surface, extending it up the walls a few inches
- Install the finish material, tile or sealed concrete, then add removable duckboards last
Whether you actually need a floor drain depends on use. A sauna that gets an occasional bucket pour can often get by with slope alone, letting water evaporate or wick toward the low point. A sauna in daily or commercial use benefits from an actual drain connection.
If you do install a drain, keep a few details in mind:
- A stainless steel grate resists corrosion far better than plastic or standard steel in a hot, humid environment
- P-trap placement needs enough clearance below the slab, which matters most in retrofit projects with limited depth
- Outdoor builds need the drain line insulated or run below the local frost line to avoid freeze damage
Saunaheatersupply’s floor drain guide walks through drain selection and slope planning in more detail if you’re working with a contractor on a new build.
Installation Order and Mistakes That Cost You Later
Sequence matters in a sauna build almost as much as material choice, and getting it backward creates problems that are expensive to fix after the fact.
Benches go in before duckboards, not after. Bench framing often needs to anchor into wall studs or floor structure in ways that are far easier to access before a wood floor surface is sitting in the way. Duckboards, being removable and modular, are meant to go in last, dropped into place around the finished bench legs and heater clearance.
The single most common and costly mistake is placing solid wood directly onto a porous or untreated underlayment instead of a sealed, non-porous substrate. It looks fine on installation day and starts failing within a year, usually from underneath where nobody notices until the wood feels soft or starts smelling musty.
Other errors that show up repeatedly in real installations:
- Using standard cement grout instead of epoxy, which absorbs moisture and crumbles under repeated heat cycling
- Skipping the slope calculation and pouring a dead-flat floor, leaving water with nowhere to go but a slow evaporation
- Installing standard vinyl or low-temperature-rated flooring inside a traditional hot room where it can soften or off-gas
- Under-ventilating the space beneath raised wood surfaces, trapping moisture instead of letting it escape
Pro Tip: If you’re retrofitting an existing sauna and unsure whether the subfloor underneath is sealed properly, pull one duckboard section and inspect the surface directly. A few extra minutes checking now beats discovering rot after the whole floor needs to come out.
Indoor vs. Outdoor Sauna Flooring: What Changes Outside
An outdoor sauna faces every challenge an indoor one does, plus ground moisture, freeze-thaw cycling, and no climate-controlled room buffering temperature swings.
Frost-protected footings matter more here than material choice. A slab poured without accounting for frost depth in colder climates can heave and crack over a few winters, taking whatever floor sits on top of it along with it. Rigid insulation under the slab, combined with drainage that actively moves water away from the structure rather than just off the floor’s surface, is what keeps outdoor concrete floors performing the way indoor ones do.
That’s also why insulated concrete or exterior-rated tile generally outperforms wood outdoors: both resist the freeze-thaw damage and ground moisture that wood is far more vulnerable to in an unconditioned structure.
Wood floors still work outside, but they need more protection than an indoor build requires:
- Raised framing with real airflow underneath, not wood sitting flush against damp ground or a non-ventilated slab
- Thermally modified wood over standard cedar in climates with significant freeze-thaw cycling, given its superior moisture stability
- A roof overhang or covered entry that keeps rain and snow off the floor before anyone even opens the door
- More frequent inspection, since outdoor builds see faster wear from weather exposure that indoor saunas simply don’t face
Maintenance, Cleaning, and How Long Each Floor Actually Lasts
Maintenance needs vary sharply by material, and mismatching your cleaning routine to your floor type is how otherwise good materials fail early.
Sealed concrete and tile need periodic resealing rather than daily attention, with epoxy or polyurethane sealers typically holding up for two to seven years before recoating. Grout lines deserve a closer look during that same inspection, since failing grout is usually the first sign a reseal is overdue. Wood duckboards need a different rhythm entirely: pull them out after use when possible, let them air dry fully, and store them off the wet substrate rather than leaving them flat against standing moisture.
A practical inspection checklist to run every few months:
- Check duckboard slats for soft spots, dark discoloration, or a musty smell, all early signs of rot
- Look at grout lines for cracking, gaps, or a chalky texture that signals sealer breakdown
- Run a hand along sealed concrete or tile for rough patches where the sealer has worn through
- Confirm the drain, if you have one, is running clear and not backing up water under the floor
Thermally modified wood duckboards can often be lightly sanded and left unfinished to extend their life by a few more seasons, while cedar tends to need full slat replacement once soft spots appear, since sanding doesn’t restore the natural oils that gave it rot resistance in the first place. Saunaheatersupply’s commercial sauna maintenance guide offers a more detailed schedule if your sauna sees near-daily use.
How Saunaheatersupply’s Resources Back These Recommendations
The floor system recommended throughout this guide, sealed non-porous base plus removable wood duckboards, isn’t a theoretical ideal. It’s the same approach documented across a technical library and product catalog.
The tile-in-sauna guide, floor drain guide, and sauna wood types breakdown each cover one layer of this system in more technical depth than a single flooring overview can. Together they explain why the recommendation holds up across indoor, outdoor, home, and commercial builds alike.
On the product side, Pre-configured floor kits solve the sequencing problem this article covers in the installation section, including kits that pair a substrate-ready base with removable duckboard sections, duckboard sections sized for common sauna footprints, and accessory bundles suited to the same maintenance routine.
What Sauna Flooring Actually Costs, Material by Material
Budgeting for a sauna floor comes down to three cost layers: the substrate, the finish material, and ongoing upkeep, and skipping the first to save money almost always costs more in repairs later.
Sealed concrete is typically the least expensive finished option per square foot, especially if the slab is already poured as part of the structure. Add a quality epoxy or polyurethane sealer and texture treatment, and the total stays modest, with resealing every few years as the only recurring cost.
Porcelain or ceramic tile runs a wide range depending on the tile grade chosen, plus labor for a properly sloped, membraned installation. Materials cost more up front than sealed concrete, but epoxy grout and porcelain’s low absorption mean tile floors go years without needing rework, which lowers the effective lifetime cost.
Cedar duckboards sit at the higher end of the wood options, both for the lumber itself and the labor to build removable sections correctly. Expect to replace individual slats periodically rather than the whole floor, which keeps ongoing costs manageable even though the initial material price is higher than other wood choices.
Thermally modified wood duckboards usually cost less than cedar for comparable lumber grades, while lasting longer thanks to better moisture resistance, making the cost-per-year often more favorable than cedar over a floor’s lifespan.
Synthetic mats and rubber flooring carry the lowest upfront cost of any option here, but that math only holds for infrared rooms or temporary outdoor use. Using budget synthetics inside a high-heat traditional sauna leads to replacement well before wood or tile would need attention, erasing any initial savings.
The pattern across every material is consistent: spending more on the substrate and drainage upfront reduces the total dollars spent over the life of the sauna.
The Environmental Trade-offs Behind Each Material
Sustainability in sauna flooring comes down to two questions: how the material is sourced, and how long it lasts before it needs to be replaced or torn out.
Cedar and thermally modified wood both come from renewable forestry, and thermally modified wood in particular is processed with heat rather than chemical preservatives, which keeps it from introducing treated-wood waste into the environment at the end of its life. Both woods, being biodegradable, break down naturally rather than sitting in a landfill indefinitely if replaced.
Porcelain tile carries a heavier upfront manufacturing footprint, since firing clay at high temperatures is energy-intensive, but that cost gets offset by an exceptionally long service life. A well-installed porcelain floor with epoxy grout can outlast several cycles of a cheaper material, which means fewer total replacements and less material sent to landfill over decades of use.
Concrete has a similarly heavy production footprint from cement manufacturing, but as a sauna substrate it’s rarely replaced at all. It typically outlasts the structure built around it, and reseals rather than full tear-outs handle most maintenance needs.
Synthetic vinyl and rubber products are the weakest link environmentally. They’re petroleum-derived, don’t biodegrade, and in a high-heat traditional sauna application, they tend to need replacement far sooner than wood, tile, or concrete, multiplying the material waste over a floor’s realistic lifespan. That’s one more reason synthetics work best in lower-heat, lower-stakes applications like infrared cabins rather than as a primary hot-room floor.
A Few Non-negotiables Before You Commit
If you take one thing from this guide, make it this: never let wood touch a porous surface directly. Everything else is preference, but the substrate is not.
My checklist for any sauna floor project has three fixed points. First, a non-porous base, sealed concrete or tile, no exceptions. Second, real slope toward a drain or at minimum toward a low point where water can evaporate. Third, airflow under any raised wood surface, because trapped moisture is what turns a good floor into a rotted one within two seasons.
Pick your substrate first, add removable duckboards if you want wood underfoot, and follow drainage guidance to the letter. Skip any of the three, and the floor becomes a maintenance problem waiting to surface.
— Teddy
Building Your Floor With the Right Heater and Accessories
Getting the substrate and drainage right solves half the equation. The other half is choosing a heater and accessories that match how you’ll actually use the space, since floor traffic, water use, and ventilation all shift depending on whether you’re running electric, wood-fired, or steam. A selection of heater packages, controls, and floor-related accessories pair directly with the systems covered in this guide.
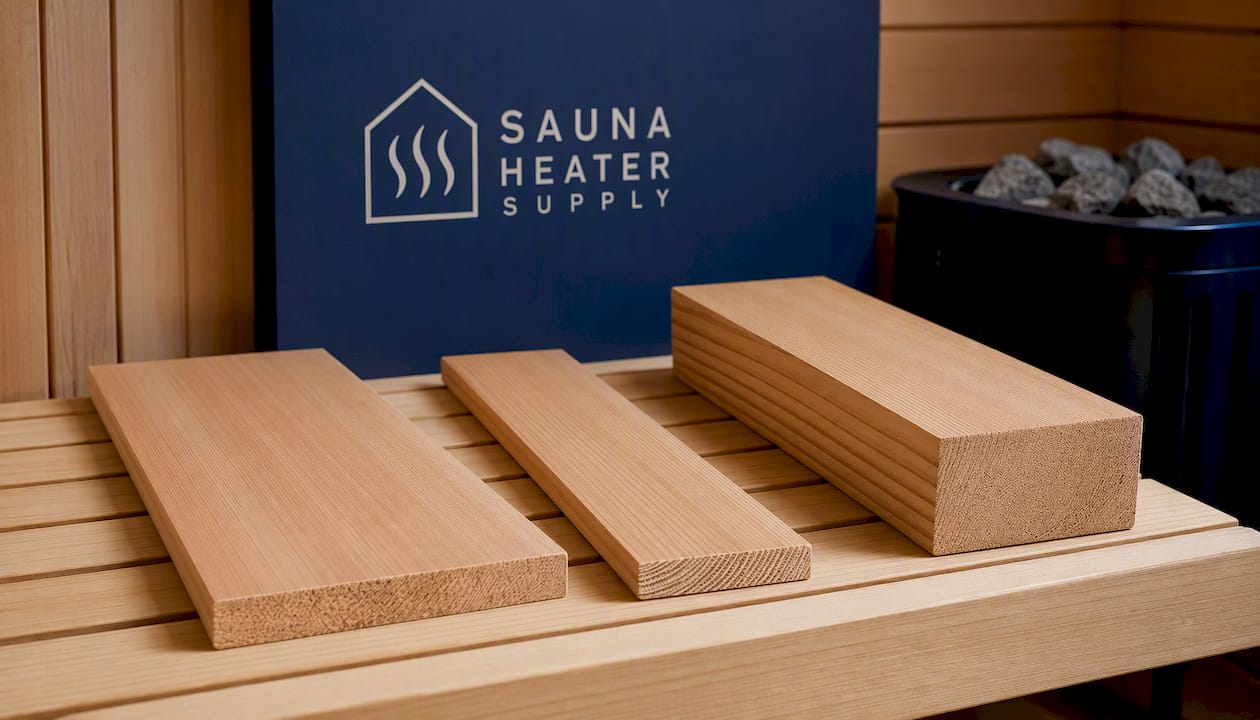
If your build calls for a modern electric package with wifi control, the Harvia Kip45W Heater Package and Saunum Air 7 Sauna Heater Package both suit rooms sized for a family sauna with a duckboard-over-tile or duckboard-over-concrete floor. For a full pre-built option that already accounts for floor and structure together, the Finnmark Cedar Combination Barrel Sauna and Finnmark Thermo-Aspen Combination Barrel Sauna come with wood types already matched to the flooring principles covered above. If a steam setup is part of your plan, the iSteamX Steam Shower Control and Steamhead works with a properly sloped, drained floor built to handle steam’s higher moisture load. Reach out to Saunaheatersupply’s technical support team before you order if you’re unsure which heater or floor kit fits your specific room dimensions.
Sources
The technical claims in this guide draw on the following sources, each covering a specific piece of sauna floor performance in more depth than a general overview allows:
- What Are the Best Sauna Flooring Options in 2026? (Revealed)
- Sauna Floor Options: Concrete, Tile, Cedar & Drainage | Tahoe Sauna Company
- Sauna Flooring Kit | Duckboard Flooring By The Foot | Cedarbrook Sauna + Steam
For installation-level detail, the internal guides linked throughout this article cover drainage, tile selection, and wood types specific to Saunaheatersupply’s product lineup.