
















How to Get Rid of Mold in a Sauna (and Keep It Away)
Most mold in a sauna is surface-level and removable. Stop using the sauna until it’s clean, dry the space completely, and work through a straightforward remediation process before you touch a single cleaner. That order matters: cleaning a wet surface just spreads spores around instead of killing them.
Immediate steps once you spot mold:
- Open the sauna door and all vents right away.
- Remove towels, mats, or anything wet and hang them outside the room.
- Prop up benches and duckboards so air reaches both sides.
- Run a fan, or briefly run the heater on low if your unit’s manual allows it, to pull moisture out of the wood.
Pro Tip: If the smell of mildew lingers after a full dry cycle, or the discoloration keeps returning after wiping, that’s your signal to stop DIY cleaning and bring in a remediation professional. Sensitive lungs, asthma, or compromised immune systems are also good reasons to call for help rather than scrub it out yourself.
Key Takeaways
Mold in a sauna is almost always a moisture problem first and a cleaning problem second, so fixing airflow and drying habits prevents far more regrowth than any cleaner does.
| Point | Details |
|---|---|
| Dry before you clean | Open vents, remove wet items, and run a fan or low heat before applying any cleaner. |
| Use peroxide, not bleach | A 3 to 5 percent hydrogen peroxide solution kills mold without weakening wood fibers or off-gassing. |
| Check for hidden growth | Inspect under benches and duckboards, where moisture pools out of sight. |
| Fix airflow, not just symptoms | Low intake and high exhaust vents create the crossflow that keeps wood dry between sessions. |
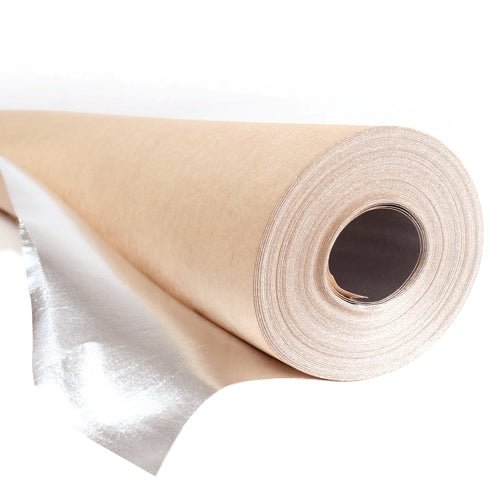
| Address structural moisture | A vapor barrier like Sauna Heater Supply’s ProSaunas Vapor Barrier Foil and a ventilation-focused heater like the Saunum Air 7 tackle moisture at its source. |
Table of Contents
- Two-Minute Checklist Before You Touch Anything
- Is It Mold or Just a Sauna Stain?
- Step-by-Step Mold Removal for Sauna Wood
- Which Cleaners Are Safe for Sauna Wood?
- What Ventilation Setup Actually Stops Mold?
- How Often Should You Deep Clean a Sauna?
- Where Sauna Heater Supply Fits In
- What Most Mold Advice Gets Wrong
- Ready to Fix the Root of Your Sauna’s Moisture Problem
- Sources
Two-Minute Checklist Before You Touch Anything
Before you grab a brush or a bottle, spend two minutes protecting yourself and setting up airflow. This short sequence keeps spores from spreading into the rest of your home and gets the room ready for real cleaning.
- Gear up first. Put on gloves, and add an N95 mask if the mold is visible or you’re prone to allergies.
- Open everything. Prop the door wide and open every vent to start air moving through the cabin.
- Clear the wet stuff. Pull out towels, bath mats, robes, anything damp, and dry them outdoors, not in a hamper.
- Prop the wood. Lift benches and duckboards off their resting position so air reaches undersides where moisture pools.
- Add movement. A box fan pointed into the doorway, or a brief low-heat run if your sauna’s manufacturer recommends it, speeds up drying before you clean.
Pro Tip: Skipping the drying step and jumping straight to scrubbing is the single most common mistake homeowners make. Wet wood plus cleaning liquid equals a soggier problem, not a solved one.
Is It Mold or Just a Sauna Stain?
Wood inside a sauna darkens naturally from heat and steam. That’s a tannin stain, and it’s harmless. Mold looks and behaves differently, and telling the two apart saves you from sanding down perfectly good cedar or, worse, ignoring a real problem.
Visual clues that point to mold:
- A fuzzy or slightly raised texture, rather than a flat, smooth discoloration.
- Black, green, or gray patches that spread in an irregular, blotchy pattern.
- Heat and tannin stains, by contrast, tend to be uniform and follow the wood grain evenly.
The smell and wipe test. A musty odor, especially one that hangs around after the sauna has cooled and dried, is one of the clearest signs a sauna needs cleaning. Wipe the spot with a damp cloth. A stain smears and fades. Mold often leaves a faint residue behind and reappears within a day or two, because the colony sits below the surface you just touched.
Where it hides. Mold rarely starts where you can see it easily. Check the underside of benches, the back of duckboards, door frame joints, and any floor seams near a drain. Under-bench surfaces and the back side of slats are among the most common hidden habitats, since they trap moisture and get almost no airflow between sessions.
Timing matters here too. Mold can begin colonizing wood within 24 to 48 hours when humidity lingers after a session, which is why a single skipped drying routine after a weekend of heavy sauna use is often enough to start a colony.
Step-by-Step Mold Removal for Sauna Wood
Once you’ve confirmed it’s mold and not a stain, work through this sequence in order. Skipping steps, especially the drying step, is how a small patch turns into a bigger repair job.
1. Dry it first. Before any chemical touches the wood, open the door and vents and either run a fan or, if your heater manual allows, run it on low for 20 to 30 minutes to pull residual moisture out of the grain. Cleaning wet wood just smears spores rather than removing them.
2. Choose a sauna-safe biocide. Hydrogen peroxide diluted to 3 to 5 percent is an effective mold treatment for sauna wood and is considerably gentler on wood fibers than bleach. Citric acid diluted in water, or a light vinegar solution for very minor spots, works for early-stage or faint discoloration. Skip bleach entirely; more on why in the next section.
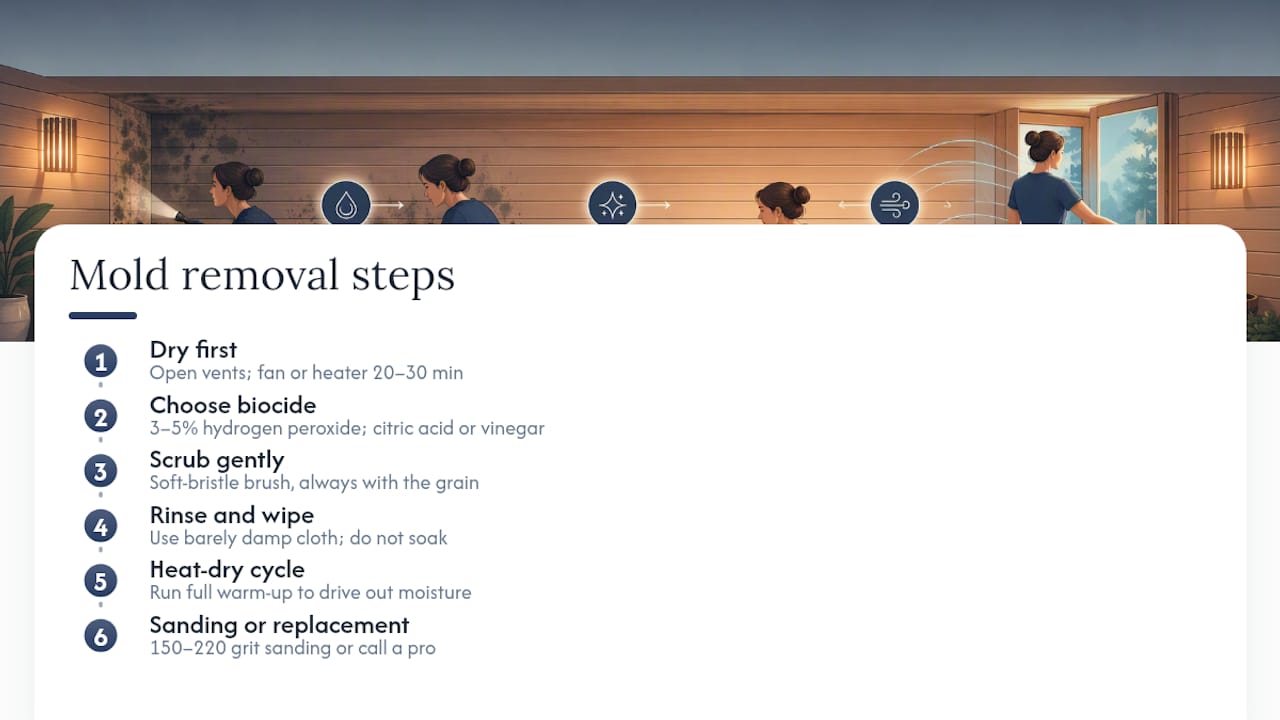
3. Scrub gently, with the grain. Use a soft-bristle brush, not steel wool or an abrasive pad, and always move in the direction of the wood grain. Aggressive scrubbing opens up the wood’s pores, which just gives future moisture more places to settle.
4. Rinse and wipe thoroughly. Go over the treated area with a clean, barely damp cloth to lift cleaner residue. Don’t soak the wood. Sauna cedar and aspen are porous, and oversaturating them defeats the purpose of the drying you just did in step one.
5. Run a heat-dry cycle. After cleaning, run the heater through a full warm-up cycle to drive out any remaining moisture and kill lingering spores. Conventional saunas typically need a longer, hotter cycle than infrared units; infrared saunas run at lower humidity during use but still need the same inspection and drying attention afterward, and heater panels should never be wiped down while wet or cleaned with liquid at all.
Pro Tip: Skip a heat-dry cycle after cleaning and you’ve likely left spores alive in the grain. The heat step isn’t optional, it’s what actually finishes the kill.
When sanding or replacement is the answer. If the discoloration has soaked into the wood rather than sitting on top of it, sanding with 150 to 220 grit paper after full drying often restores the surface, followed by a thorough vacuum before the next heat cycle. But if the smell persists after a complete clean and dry, if staining covers a wide area, or if the mold has clearly penetrated below the surface, professional remediation or slat replacement is the right call. That’s also the moment to stop and call a pro if anyone using the sauna has a compromised immune system or respiratory condition. Persistent exposure to mold spores in a small, enclosed, heated space is not a risk worth managing yourself.
Which Cleaners Are Safe for Sauna Wood?
The cleaner you reach for matters almost as much as the technique. Sauna wood is untreated and porous by design, which means it absorbs whatever you put on it, residue included.
What actually works:
- Hydrogen peroxide (3 to 5 percent) for general mold spots, applied and left for a few minutes before gentle scrubbing.
- Citric acid diluted in water as a milder option for light surface growth.
- A 1:1 vinegar and water mix for faint, early-stage spots only, not deep or widespread growth.
- Tea tree oil diluted 1:10 as an antifungal spot treatment for early growth. Never use it undiluted, and keep it away from heater elements entirely.
What to avoid entirely:
- Bleach. Repeated use weakens wood fibers over time and can leave residues that off-gas when the sauna heats up again, which means you’re inhaling chemical fumes along with your steam.
- Ammonia, for similar off-gassing reasons.
- Mixing cleaners. Combining peroxide with vinegar, or any two products at once, can create harmful fumes in a small enclosed space.
- Soaking infrared panels or any electrical component. Wipe dry surfaces only, never spray or pour liquid near a heater.
Always finish with a dry wipe to remove residue, and for a purpose-built option, the SaunaLife sauna wood cleaner is formulated specifically for wood surfaces that need to stay breathable rather than sealed.
Pro Tip: Sealants and heavy wood finishes might sound like a fix, but coating sauna interiors traps moisture underneath rather than letting it escape, which sets up the exact conditions mold needs. Building science around low-VOC materials backs this up: breathable, minimally treated surfaces off-gas less and manage moisture better than sealed ones.
What Ventilation Setup Actually Stops Mold?
Cleaning solves today’s problem. Ventilation solves next month’s. Poor airflow is the root cause behind most recurring sauna mold, because a wet, sealed box gives spores exactly the conditions they need to establish.
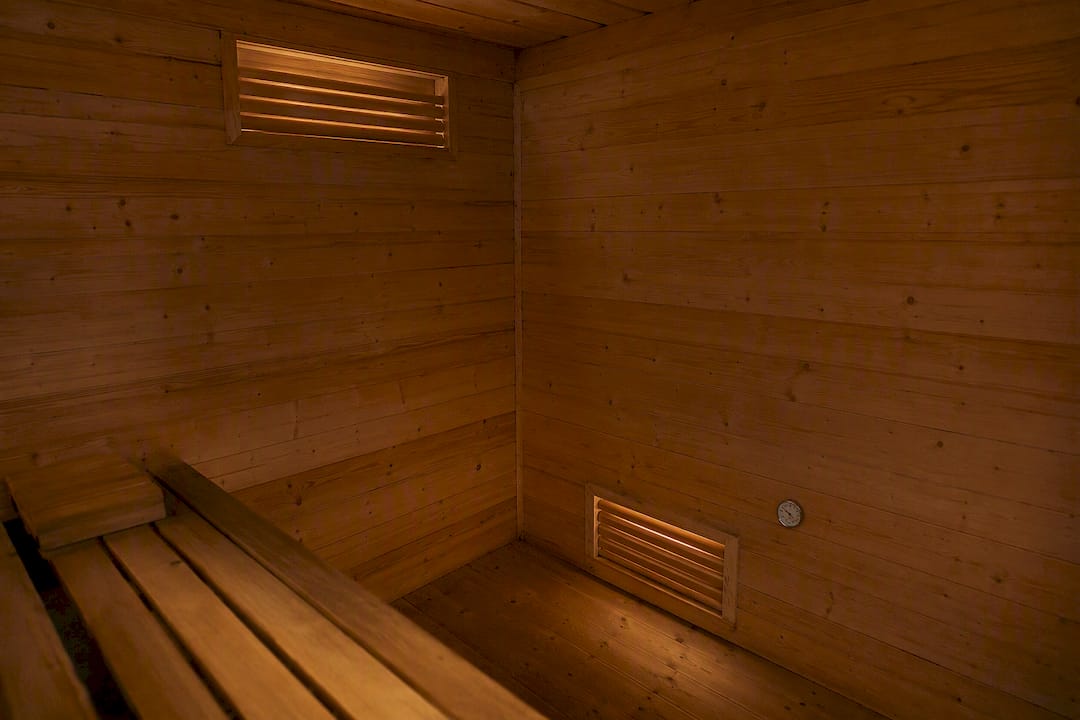
Vent placement matters more than most owners realize. The basic layout is a low intake vent near the heater and a high exhaust vent on the opposite wall. That diagonal path pulls fresh air in low, lets the heater warm it, and pushes it out high, creating a real crossflow instead of a stagnant pocket of humid air in a corner.
Your after-session routine should take five minutes. Wipe down benches while they’re still warm, prop the duckboards, open the door and vents, and either run the heater on low for 30 to 60 minutes or switch on an exhaust fan. Opening both the intake and exhaust vents while leaving the door slightly ajar creates a convection effect that dries the room faster than heat alone.
A hygrometer mounted at bench height gives you a real read on the room’s idle humidity between sessions. If it consistently sits high, an exhaust fan or a small dehumidifier in the anteroom helps bring it down before moisture has time to soak into the wood.
| Feature | Why It Matters for Mold Prevention |
|---|---|
| Low intake / high exhaust vents | Creates crossflow that clears humid air instead of letting it settle |
| Hygrometer at bench height | Tracks idle humidity so you know when extra drying is needed |
| Removable duckboards | Lets both sides of the flooring dry between sessions |
| Untreated cedar or aspen | Breathable wood species that resist trapping moisture |
| Non-wood flooring near drains | Prevents standing water where wood would otherwise stay damp |
For owners building or upgrading a heater setup with airflow in mind, a package like the Saunum Air 7 sauna heater is engineered around consistent air circulation rather than just raw heat output, which directly supports the drying routine above.
How Often Should You Deep Clean a Sauna?
Consistency beats intensity here. A five-minute habit after every session prevents the deep clean nobody wants to do later.
- Daily: Wipe down benches and props, remove anything wet, and open vents and the door once you’re done.
- Weekly: Vacuum or brush the floor, check lower slats and door frames for early spotting, and launder any bench towels or mats.
- Monthly: Spot-treat the faintest discoloration before it spreads, and inspect ventilation paths and heater guards for dust or blockage.
- Yearly: Do a full deep clean, check the vapor barrier and wall insulation for moisture intrusion, and sand or replace any slats that show persistent staining.
Good daily habits are the fastest, most effective defense against mold, since consistent wiping, propping, and venting close the same 24 to 48 hour window mold needs to take hold in the first place.
Where Sauna Heater Supply Fits In
Sauna maintenance advice is only useful if it accounts for how the sauna was actually built. Sauna Heater Supply works daily with homeowners and contractors on exactly this kind of moisture management, from framing choices through heater selection, which shapes the recommendations here.
- A vapor barrier foil installed behind the wall panels stops moisture from migrating into the framing itself, which matters more than any surface cleaner if your walls are the real source of recurring dampness.
- A heater and ventilation package like the Saunum Air 7 supports the drying airflow described above rather than just heating the room.
- For day-to-day upkeep, a dedicated wood cleaner and a quality birch ladle round out a basic maintenance kit.
Pro Tip: If your sauna gets recurring mold in the same spot every few months, look at the wall construction before you blame your cleaning routine. A missing or damaged vapor barrier behind the panels will beat any cleaning schedule you throw at it.
What Most Mold Advice Gets Wrong
Generic mold advice treats every surface the same way, and that’s where most sauna owners get into trouble. Bleach is the standard recommendation for mold almost everywhere else in the house, and it’s the wrong answer for sauna wood specifically. Wood that gets heated to over 150 degrees on a regular basis needs a cleaner that doesn’t leave residue behind to off-gas, and that single distinction gets buried in most general cleaning guides.
The bigger miss, though, is treating mold removal as the finish line. A clean sauna with the same vent layout and the same after-session habits will grow mold again, usually within a season. The homeowners who never deal with recurring mold aren’t the ones with the fanciest cleaning products. They’re the ones who prop the duckboards and crack the door every single time, without exception, and who looked at their vent placement once and fixed it instead of fighting the symptom over and over.
If you take one thing from this, prioritize the five-minute after-session routine over any deep clean. Drying consistently beats scrubbing occasionally, every time.
— Teddy
Ready to Fix the Root of Your Sauna’s Moisture Problem
A better cleaner only gets you so far if the wall behind your bench is holding onto moisture with nowhere to go. Sauna Heater Supply specializes in exactly that gap: sourcing vapor barriers, heaters, and ventilation packages that stop moisture at the framing stage instead of leaving you to fight it every week with a spray bottle.
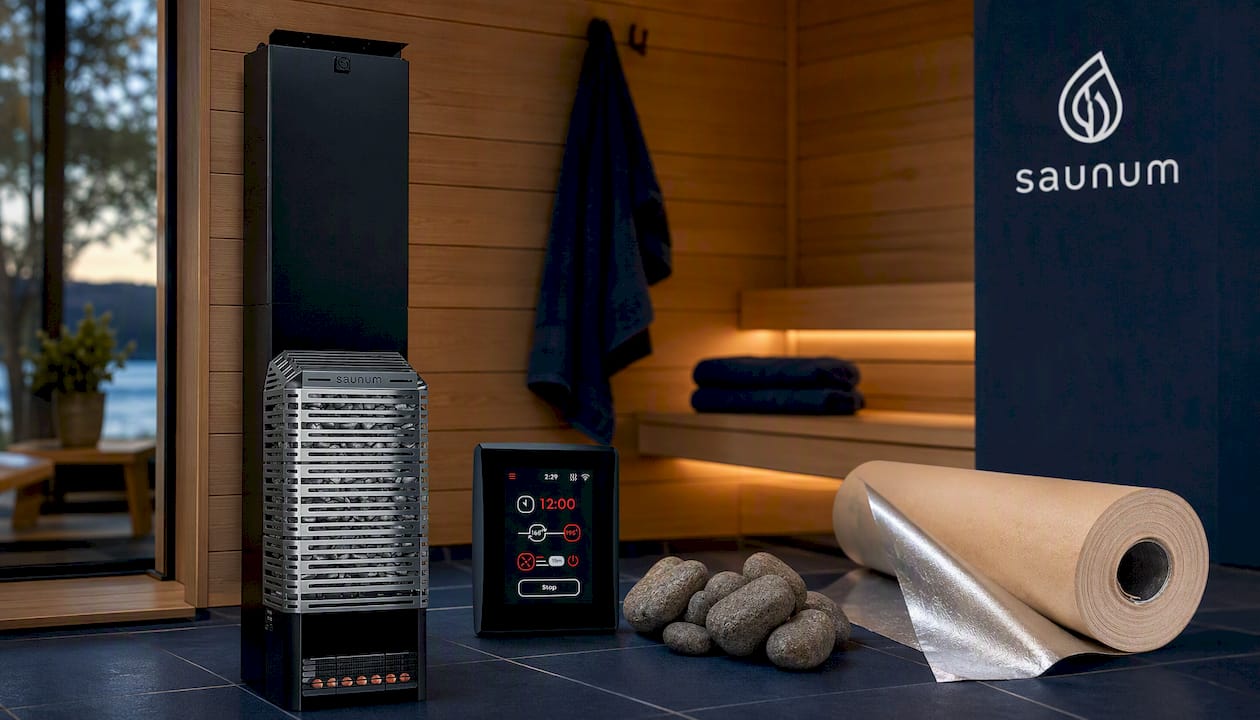
If your sauna keeps growing mold in the same corner no matter how often you clean it, that’s usually a sign the build itself needs attention, not your routine. The ProSaunas Vapor Barrier Foil stops moisture from migrating into wall framing during installation or a renovation, and the Saunum Air 7 heater package is built around the kind of consistent airflow that keeps humidity from settling into wood between sessions. Sauna Heater Supply’s team works with both homeowners tackling a first sauna and contractors managing multiple installs, and can help you match a vapor barrier and heater setup to your specific room before moisture becomes a recurring problem. Browse the current selection at Sauna Heater Supply and get a recommendation suited to your space.
Sources
This article draws on step-by-step remediation guidance from SaunaGeek and UseSauna, cleaning checklists from Better Homes & Gardens, moisture-control principles from the EPA, and ventilation guidance from Saunum.
- Sauna mold removal - How to Clean and Prevent Mold in Your Sauna · saunageek
- How to Clean an Infrared Sauna - Safe Methods 2026 | UseSauna
- How to clean a sauna (Better Homes & Gardens)