















4 Sauna Room Templates: Sauna Bench Layouts & Exact Dimensions for DIY
The safest default is a two-tier straight or L-shaped bench, with the upper bench set 36 to 42 inches off the floor and 24 inches deep for reclining, and a lower bench 16 to 20 inches high and 16 to 18 inches deep for sitting. Plan on roughly two feet of bench length per person. Before you cut a single board, confirm your heater manufacturer’s clearance specs and keep at least 40 inches between the top bench surface and the ceiling.
TL;DR:
- Heater clearance should be confirmed from the top of the stones, and the upper bench kept 4 to 8 inches above them for safety.
- A minimum of 20 square inches of bench space per person is recommended, with at least 28 inches of depth for lying comfortably.
- Straight benches suit narrow rooms best, while L-shaped and U-shaped layouts require careful planning to avoid dead space and knee collisions.
- Ceiling height should leave roughly 40 inches of space above the upper bench, and doors should be at least 28 inches wide for larger rooms.
- Use low-resin cedar or similar durable woods, with slat gaps of 3/8 to 1/2 inch for moisture drainage and airflow.
Table of Contents
- Standard Bench Heights, Depths, and Seating Width
- Straight, L-Shaped, or U-Shaped: Which Layout Fits Your Room?
- Heater Clearances, Ceiling Height, and Door Rules
- Choosing Bench Wood and Building It to Last
- Considerations for Accessibility and Ease of Entry and Exit
- Custom Bench Shapes for Irregular Rooms
- How Sauna Heater Supply Helps You Plan the Right Bench Layout
- Four Buildable Layout Templates by Room Size
- Construction Sequence and Final Checklist
- What the Data Actually Tells You to Prioritize
- Order Bench Materials Built to These Exact Dimensions
- Sources
Standard Bench Heights, Depths, and Seating Width
Every sauna bench layout starts with the heater, not the wall. The DIY Sauna Bench Plans guide from Tahoe Sauna Company recommends measuring bench clearance from the top of the heater stones rather than from the heater’s floor mount. That single habit keeps your upper bench out of the hottest convection zone in the room, and it lines up with how most heater manuals define their own safety margins.
Once you have that reference point, the rest of the sauna bench design follows a fairly predictable set of numbers.
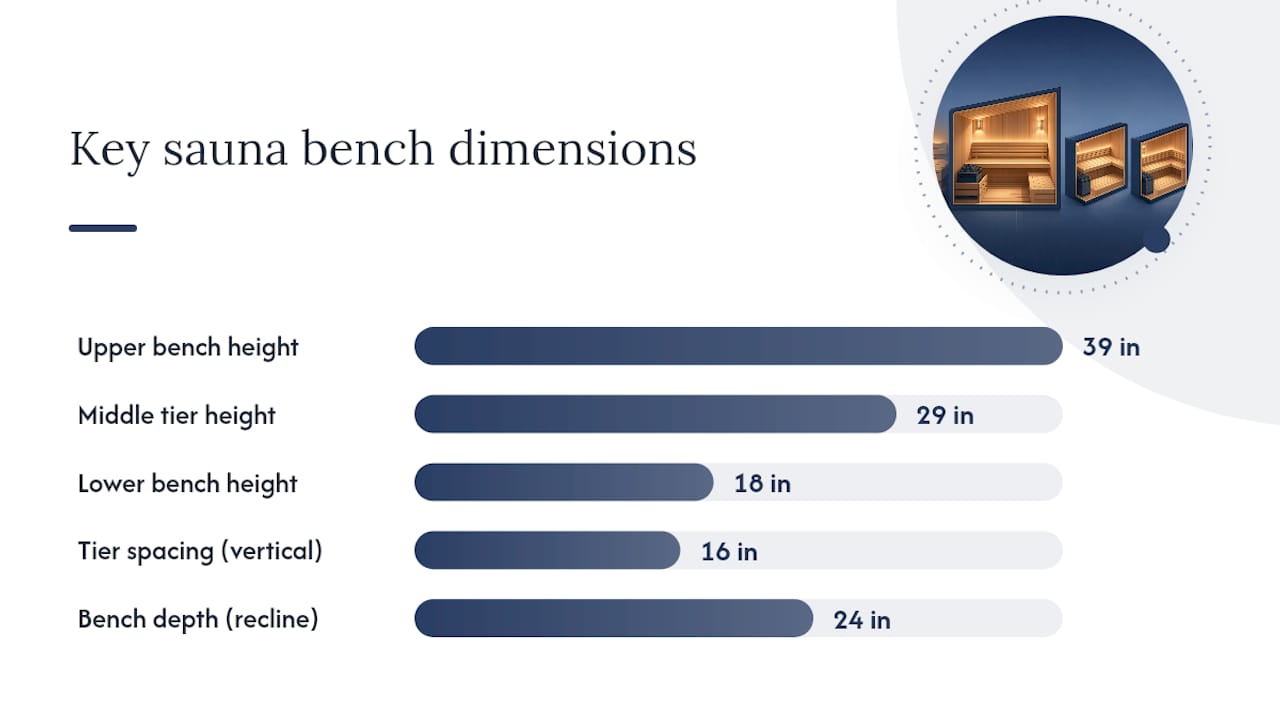
- Upper bench height: 4 to 8 inches above the heater stone tops, which usually lands between 36 and 42 inches off the floor in a room with a 7 to 8 foot ceiling.
- Lower bench height: 16 to 20 inches, close to a normal chair height, with an optional middle tier at 26 to 32 inches if your ceiling allows it.
- Tier spacing: 14 to 18 inches of vertical clearance between tiers, enough for a comfortable seated posture without brushing the tier above.
- Bench depth: 16 inches minimum for a sitting-only lower bench, 24 inches standard for an upper bench meant for reclining, and 28 to 36 inches if you want full-length lying room.
- Seating width: budget 20 to 24 inches per person, which works out to roughly 2 feet of bench length for each seated guest.
- Slat gaps: space bench boards 3/8 to 1/2 inch apart to let moisture drain and air circulate, and round the front edge of every board so the back of a knee doesn’t rest on a sharp corner.
Two feet of bench length per person is the seating math that governs almost every sauna bench layout, according to Home Stratosphere’s catalog of sauna dimensions and layouts. A 6 foot bench run seats three adults comfortably; squeeze in a fourth and elbows start colliding.
Depth matters more than most first-time builders assume. An 18 inch deep bench is fine for sitting upright, but anyone who wants to lie down during a longer session needs at least 28 inches, and closer to 36 if they’re over six feet tall. Mixing depths between tiers, a deeper reclining bench up top and a narrower sitting bench below, is one of the more efficient ways to serve both preferences in a single room.
Straight, L-Shaped, or U-Shaped: Which Layout Fits Your Room?
Straight benches win in narrow rooms. A single run along the longest wall is the simplest structure to build, uses the least lumber, and gives at least one person enough length to lie down flat, which is hard to pull off in a tight L or U configuration.
L-shaped layouts add linear seating without expanding the footprint, since the second run wraps around a corner instead of eating new floor space. But that efficiency comes with a catch that a lot of layout diagrams gloss over. A SaunaTimes analysis of L-bench design points out that the corner where the two runs meet often becomes dead space nobody wants to sit in, and that L layouts can create a “knee knock” problem where a seated user’s legs collide with the perpendicular bench edge. Before you commit to an L, sketch out where people will actually stand up, turn, and move through the room, not just where they’ll sit.
U-shaped benches suit social or small commercial settings where you want to seat four to eight people facing each other. They need real square footage to work, generally 8 by 8 feet or larger, and the heater has to be positioned carefully so no bench run sits too close to it on either side.
Adding a third tier changes the room’s personality as much as its capacity. A middle or upper tier gives you a temperature gradient, hotter air up top for seasoned users, cooler air near the floor for beginners, but it also demands a taller ceiling and sturdier framing to carry the extra load, as the Tahoe Sauna Company build guide notes in its discussion of multi-tier construction.
Pro Tip: Before finalizing any L or U layout, stand in the room (or tape the footprint on your garage floor) and walk the path from the door to the heater and back. If you catch yourself sidestepping around a corner or a bench edge, that layout will feel cramped once the walls go up.
Whichever shape you choose, keep a clear path from the door to a spot where someone can stand and cool off, and never let a bench run place a seated user in direct contact with the heater guard.
Heater Clearances, Ceiling Height, and Door Rules
Bench height is really a heater clearance question wearing a different hat. Heater manufacturers publish side, front, and top clearance ranges that vary by model and wattage, and those numbers should always override any generic rule of thumb. That said, the working default across most residential heaters is to keep the upper bench surface 4 to 8 inches above the stone tops, a margin that keeps sitting and reclining users out of the most intense heat plume.
Ceiling height sets the outer boundary. Leave roughly 40 inches of open air between the top bench surface and the ceiling, and check your heater’s own top clearance spec separately, since some units need more overhead room than the bench-to-ceiling gap alone would suggest.
Door sizing follows occupancy. Small one or two person saunas can get by with a 24 inch wide door, while rooms built for four or more people need at least 28 inches, according to guidance in Home Stratosphere’s layout diagrams. Every sauna door should swing outward, never inward, so a user who feels light headed can push their way out without fumbling with a pull handle.
A few clearance rules that get overlooked until inspection day:
- Keep a wooden heater guard 2 to 3 inches off the heater face, close enough to prevent contact but far enough to avoid choking off convection.
- Route a fresh air inlet low on the wall near the heater, and place the exhaust vent high on the opposite wall.
- Never let bench framing or a lower tier’s support structure block either vent.
- Verify local building code on door swing and egress width before you finalize the room, since some jurisdictions set their own minimums.
Occupancy is the variable that ties all of this together. As Build-Construct’s planning guide explains, a viable sauna can be as small as 3 by 4 feet for one person, but bench configuration, heater placement, and circulation space all have to scale together as you add seats. Skipping that math during framing is the single most expensive mistake to fix later.
Choosing Bench Wood and Building It to Last
Clear cedar, aspen, and hemlock dominate sauna bench construction for a reason: low resin content, a naturally cool touch even in high heat, and enough dimensional stability to handle repeated wet and dry cycles. Skip treated lumber entirely, and keep knotty boards off any surface a bare shoulder or thigh will touch, since knots trap heat and can leave marks on skin.
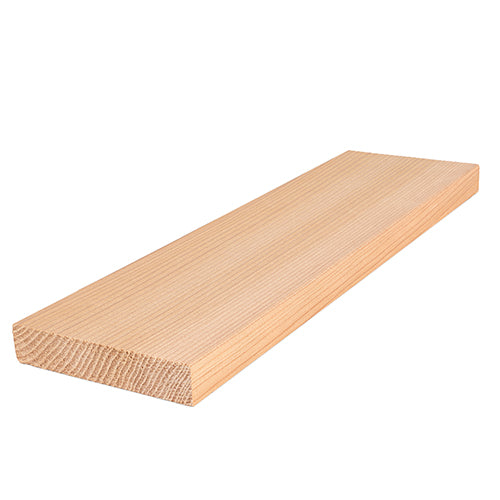
Surface boards typically run as 1x3 or 1x4 slats, or 2x4 stock laid flat for a wider seating surface. Whatever profile you pick, hold the gap between boards to 3/8 to 1/2 inch. That spacing lets moisture drain through instead of pooling, and InfraredSaunaLab’s building guide specifically warns against boxing in the bench front, since a solid panel there can block a heater’s radiant panel and cut off warmth to a seated user’s lower body.
Framing needs to match the load. Wall cleats should anchor directly into studs, not just drywall or paneling, and the Tahoe Sauna Company build sequence calls for cross-members every 16 to 20 inches inside the frame, with additional front supports every 24 to 32 inches on any bench wider than 4 feet. Skimping on supports is how benches develop a spring or a sag within a year.
- Use stainless steel screws throughout, and countersink or hide fasteners wherever a bare hand or leg might touch a bench top.
- Never leave exposed metal on a seating surface. It heats up fast and holds that heat.
- Set backrests at a 10 to 15 degree angle off vertical for a natural recline, and mount them with a small air gap behind so the back surface can breathe.
Considerations for Accessibility and Ease of Entry and Exit
A lower bench height that works for a fit adult can be a real obstacle for someone with limited mobility, an older parent, or a guest recovering from surgery. Dropping the lower tier closer to 16 inches, rather than pushing it to the 20 inch ceiling, makes standing up from a seated position noticeably easier, since it’s closer to a standard chair height most people are used to.
Grab points matter as much as bench height. A sturdy wall-mounted rail near the entry, positioned at a comfortable arm height, gives anyone unsteady on a hot, humid floor something solid to hold while transitioning in or out. Keep the path from the door to the nearest bench as short and unobstructed as possible. Every extra step across a wet floor is another chance to slip.
Bench depth plays a role too. A bench that’s 24 inches deep gives a person more surface to brace against while lowering into a seated position, compared to a narrow 16 inch ledge that offers little support. If you’re building for a household with a wide age range or a commercial space serving the public, consider making at least one bench run shallower and lower than the rest, purpose-built as the easiest entry point in the room.
Door width factors in here as well. The 28 inch minimum recommended for larger saunas gives a wheelchair or a walker enough clearance that a 24 inch door simply doesn’t. If accessibility is a priority from the start, size the door for the widest likely user, not the average one.
Custom Bench Shapes for Irregular Rooms
Not every sauna gets built in a perfect rectangle. Attic conversions, basement corners, and converted closets often hand you a room with an angled wall, a support column, or a sloped ceiling that a standard straight or L-shaped bench layout won’t fit cleanly.
The fix is usually modular framing rather than one continuous bench run. Build shorter, independent bench sections, each with its own frame and supports, and butt them together or step them at slightly different depths to follow the room’s actual walls. A 5 foot section along one wall and a 3 foot return along an adjacent angled wall can seat nearly as many people as a full L, without forcing lumber into a corner that doesn’t sit at 90 degrees.
Sloped ceilings call for asymmetric tier planning. Put the lower bench under the lowest part of the slope, where headroom is tightest, and reserve the taller side of the room for your upper bench, where a seated or reclining user actually needs the vertical clearance. This flips the usual “upper bench near the heater” assumption, but it keeps everyone’s head clear of the ceiling.
Columns and mechanical chases can often be built into the bench structure itself rather than worked around. Framing a bench section that wraps a support post, with the post concealed behind a slatted panel, turns an obstacle into a design feature and preserves usable seating you’d otherwise lose. For an irregular room, sketch the walls to scale first, then work the bench sections backward from whatever clean rectangular space remains.
How Sauna Heater Supply Helps You Plan the Right Bench Layout
Saunaheatersupply carries ready-built and component options sized to the dimension rules covered above. The Sauna Cedar Bench matches standard reclining depth, and the Golden Designs 2-Person Ergonomic Sauna Back Rest in Red Cedar Wood mirrors the 10 to 15 degree backrest angle builders rely on for comfort. For a deeper walk-through of bench height measurement, see Sauna Heater Supply’s guide to measuring bench height from the ceiling down.
Four Buildable Layout Templates by Room Size
1. The 4x4 compact single-person room. A single straight bench 48 inches long and 20 to 24 inches deep, set at 20 inches high for easy sitting, is about all this footprint can hold. Keep the ceiling as tall as your space allows, since a 4 by 4 room already limits how much vertical clearance you have to work with above the heater.
2. The 4x6 two-person layout. Run the upper bench 72 inches along the long wall at 36 to 42 inches high and 24 inches deep, and step a shorter lower bench beneath it for seating variety. This comfortably seats two people, with an optional short return on one end if you want a modest L instead of a straight run.
3. The 6x8 family layout. A two-tier bench along the long wall, upper at 24 inches deep and lower at 16 inches, with an optional short return to form an L, seats three to five people. This is the most common configuration for a home installation, since it balances capacity against a footprint most homeowners can actually carve out of a basement or garage bay.
4. The 8x10 large or small-commercial layout. A U-shape, or two long parallel bench runs with a middle tier between them, opens up dedicated lying zones and seats six to ten people. This size gives you room to separate a hotter upper tier from a cooler lower one without cramping anyone’s knees.
For heater sizing across any of these templates, a common rule of thumb is roughly 1 kilowatt of heater output per 50 cubic feet of room volume, according to Homesauna’s layout guidance for modern home saunas. Rooms with heavy glass walls or exterior-facing walls need to size up from that baseline, since both lose heat faster than an insulated interior wall. Treat that number as a starting point, then confirm against your specific heater model’s published specs before ordering.
Each template above should carry a matching door width (24 inches for the 4x4 and 4x6, 28 inches for the 6x8 and 8x10), a low fresh air inlet near the heater, and a high exhaust vent on the far wall, regardless of which bench shape you build around it.
Construction Sequence and Final Checklist
Before any lumber gets cut, verify your heater model’s exact clearance specs, measure the height of the stone tops, confirm your actual ceiling height, and mark every stud location behind the future bench walls.
- Mark bench heights on the wall using the heater stone top as your reference point, not the floor.
- Install wall cleats directly into studs to carry the bench frame’s weight.
- Build the rectangular bench frames with cross-members spaced 16 to 20 inches apart.
- Add front supports every 24 to 32 inches for any bench run wider than 4 feet.
- Attach surface boards with 3/8 to 1/2 inch gaps between slats.
- Test all clearances against the heater guard and ceiling before mounting backrests.
- Install backrests at a 10 to 15 degree angle with a small air gap behind them.
Watch for the mistakes that show up most often on a first build: boxed-in bench fronts that trap heat and block airflow, undersized supports that let a bench sag within months, exposed screw heads that get hot enough to burn skin, slat gaps cut too tight to drain moisture, and bench framing that accidentally blocks a vent.
Pro Tip: Do a full dry run before the first heat cycle. Sit on every bench tier, check the ceiling clearance with a tape measure in hand, confirm the door swings freely outward, and isolate power at the breaker until you’ve verified every clearance twice.
What the Data Actually Tells You to Prioritize
Most sauna bench layout advice online treats bench shape as the first decision. It isn’t. The heater clearance and ceiling height numbers should come first, because they set a hard ceiling on how tall your upper bench can be and how much headroom you have left for a middle or third tier. Pick a shape before locking those numbers, and you risk designing a bench that looks right on paper but sits too close to the stones or too near the ceiling once it’s built.
The conventional wisdom on L-shaped benches also deserves more skepticism than it usually gets. Diagrams make an L look like free extra seating, but the corner dead space and knee knock issues are real enough that a straight bench in a slightly smaller room often delivers a better experience than a cramped L in a larger one.
If you take one thing from this guide, measure from the heater stone tops first, then choose your shape. Everything else, depth, tier count, backrest angle, follows from that single number.
— Teddy
Order Bench Materials Built to These Exact Dimensions
Saunaheatersupply gives you a shortcut past the guesswork this guide just walked you through: cedar bench components already sized to the depth, height, and slat-gap rules that matter for comfort and safety, so you’re not hand-cutting test boards to find out what works.
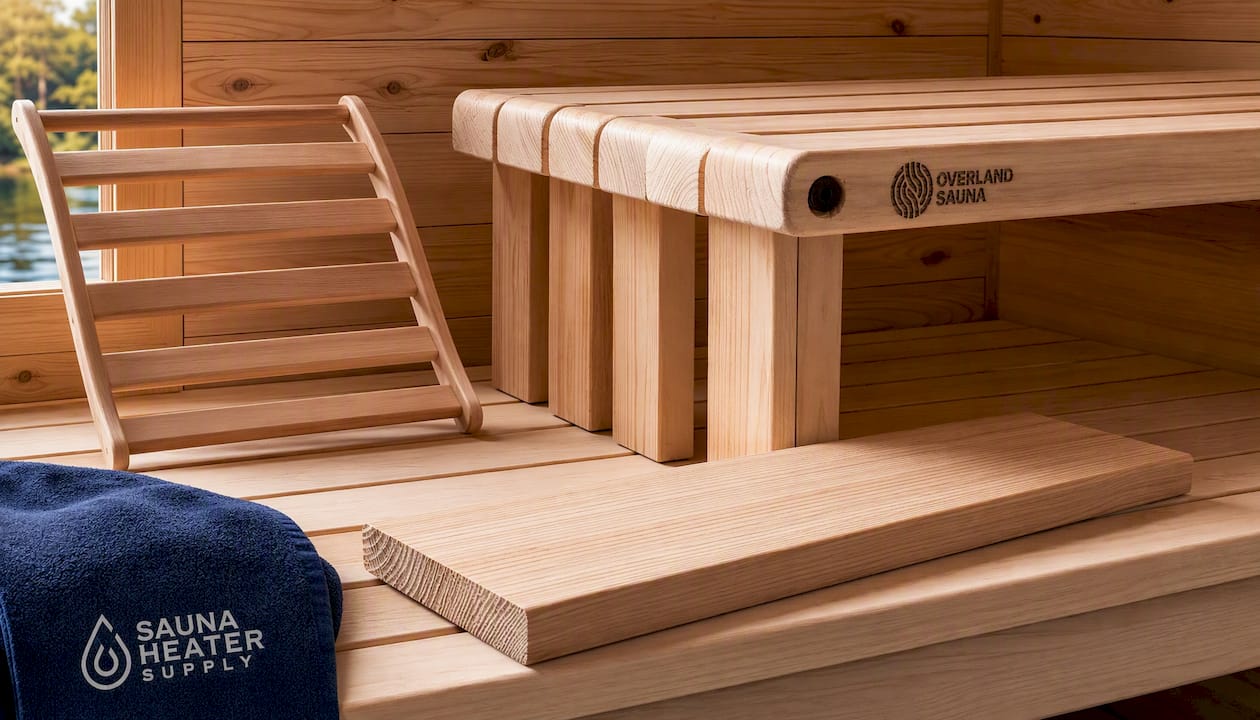
The Sauna Cedar Bench ships ready to install at standard reclining depth, saving a DIY builder the framing and fitting work covered in the construction sequence above. Pair it with the Golden Designs 2-Person Ergonomic Sauna Back Rest in Red Cedar Wood for a backrest already set at the ergonomic angle builders aim for, or order PROSAUNAS CEDAR 1X4 VG S4SEE boards directly if you’re building bench frames from scratch and want low-resin cedar that won’t need to be second-guessed for knots or treatment chemicals. Contractors and vacation rental operators planning wellness amenities for guests can find related layout thinking in this vacation rental interior design guide. Whether you’re outfitting a single home sauna or sourcing materials for a small commercial build, browse the current bench and accessory catalog and place an order sized to the room you just planned.
Sources
- 11 Sauna Dimensions, Sizes and Layouts (Illustrated Diagram) – Home Stratosphere
- Sauna Room Dimensions and Layout Planning for Home Construction
- Building DIY Sauna Benches: Sizes and Wood