















Sauna Bench Height: Measure Down 40–48 in from Ceiling, Then Test
The recommended upper bench height falls between 36 and 48 inches (915 to 1220 mm) above the finished floor, but the safer way to plan is to work backward from two fixed points instead. Measure down from the finished ceiling and target 40 to 48 inches (100 to 120 cm) of clearance above the top bench. Then check that the same seat puts a bather’s feet 4 to 8 inches above the heater stones. Whichever number comes out lower wins, and for most two-tier saunas that means a ceiling of at least 7 feet.
TL;DR:
- Measure your ceiling height and heater stone height, then compare the two to determine the optimal upper bench height, usually around 40 inches.
- Build the upper bench between 20 and 24 inches deep for comfortable sitting, with reclining requiring about 24 inches of depth.
- Keep seat-to-ceiling clearance between 40 and 48 inches and ensure the ceiling height is at least 7 feet for effective two-tier layouts.
- Always physically test your planned bench height with a mock seat before cutting final materials to ensure comfort and safety.
- Use moisture-stable materials like cedar and leave small gaps between boards to accommodate expansion and prevent warping.
Table of Contents
- What Is The Right Sauna Bench Height For Comfort And Heat?
- How Do You Calculate Bench Heights For Your Ceiling And Heater?
- How Deep Should Sauna Benches Be For Sitting And Reclining?
- How Do Two-Tier And Three-Tier Bench Layouts Differ?
- What Construction Details Change Your Final Bench Height?
- A Builder’s Final Checklist Before You Cut Any Boards
- Why Most Bench-Height Advice Skips The Part That Actually Matters
- Order The Right Bench Materials For Your Measured Height
- Sources
What Is The Right Sauna Bench Height For Comfort And Heat?
Sauna bench height is not one number. It is a relationship between three fixed points: your ceiling, your heater’s stone bed, and the human body sitting between them. Get the relationship wrong, and you either roast your shoulders against the ceiling or waste half your heat sitting below the warm layer that makes a sauna worth building.
Finnish sauna tradition calls this the law of löyly, and it drives nearly every credible bench-height recommendation. The principle: heat and steam rise and stack near the ceiling, so the closer your head sits to that hot zone, the more intense the session. Builders who measure bench placement from the ceiling down rather than from the floor up consistently land on more comfortable, more evenly heated seating. That is the standard the rest of this guide follows.
The table below compiles the reference numbers most sauna specifications converge on, in both imperial and metric units. Treat the “minimum” column as a hard floor, not a target.
| Measurement | Minimum | Recommended | Notes |
|---|---|---|---|
| Upper bench height (from floor) | 36 in / 915 mm | 40–42 in / 1050 mm | Finnmark’s spec lists 1050 mm as a common target |
| Seat-to-ceiling clearance | — / 100 cm | 40–48 in / 100–120 cm | Stay under roughly 48 in / 120 cm |
| Lower/middle bench height | 17 in / 430 mm | 20–24 in / 600 mm | Often doubles as a step |
| Bench-to-bench spacing | 14 in / 350 mm | 16–18 in / 40–45 cm | Needed for knee and foot clearance |
| Upper bench depth (sitting) | 20 in / 500 mm | 24 in / 600 mm | 24 in preferred for reclining |
| Lower bench depth | 14 in / 350 mm | 16–20 in / 400–500 mm | Narrower is fine if used as a step |
| Seat width per person | 20 in / 500 mm | 24 in / 600 mm | Saunologia’s guidance for shared benches |
| Step rise (multi-tier) | — / 250 mm | 12–14 in / 350 mm | Matches typical stair rise for safety |
| Minimum ceiling height | 84 in / 7 ft | 90–96 in / 7.5–8 ft | Below 7 ft, bench options shrink fast |
How Do You Calculate Bench Heights For Your Ceiling And Heater?
Every sauna is a slightly different math problem. Your ceiling height, your heater model, and whether that heater sits on the floor or mounts to the wall all shift the final number. Here is the sequence Saunaheatersupply walks customers through when they are laying out a new build or retrofit.
- Measure your finished ceiling height. Not the rough framing dimension. Measure after drywall, tongue-and-groove paneling, or whatever finish material you are using, floor to ceiling, at the spot where the upper bench will sit.
- Mark a centerline at 40 to 48 inches below that ceiling measurement. This is your ceiling-based target for the top of the upper bench surface, based on the seat-to-ceiling clearance guidance most Nordic-style specifications use.
- Measure your heater’s stone-top height. This varies by model and whether the unit sits on the floor, on a stand, or mounts to the wall. Check the heater’s product specs before you cut a single board.
- Add 4 to 8 inches to the stone-top height. That gives your löyly-based target, the seat height that keeps a bather’s feet in the heat layer without hovering directly over the hottest stones.
- Compare the two targets and use the lower one. If the ceiling rule says 45 inches but the löyly rule says 40 inches, build to 40. Underbuilding by a few inches costs you nothing. Overbuilding puts someone’s head in a scalding pocket of air.
Worked example, 7-foot ceiling: A ceiling at 84 inches puts your ceiling-based target at 36 to 44 inches (84 minus 40 to 48). A floor-standing heater with stones topping out at 30 inches gives a löyly-based target of 34 to 38 inches. The overlap, roughly 36 inches, is your build height. This is also why 7 feet is treated as the practical minimum for two-tier layouts. Go lower and the two rules stop overlapping at all.
Worked example, 8-foot ceiling: At 96 inches, the ceiling rule alone would allow an upper bench as high as 56 inches, but almost no heater setup supports feet sitting that far above the stones without losing the löyly effect entirely. In tall rooms, the heater becomes the limiting factor, not the ceiling.
What if your ceiling comes in under 7 feet? Drop to a single-tier layout instead of forcing a compressed two-tier design, or lower the heater onto a recessed stand so the stone-top height drops with it. What if the heater itself is unusually tall? Look at units with a lower stone-bed profile, or shift the upper bench a few inches lower than the ceiling rule suggests. Comfort loses to safety every time these two rules disagree.
Pro Tip: Dry-fit your bench framing before you cut finish boards, then sit on a temporary plank at your calculated height with the heater running on a low test cycle. Ten minutes of real sitting tells you more than any tape measure.
How Deep Should Sauna Benches Be For Sitting And Reclining?
Bench height gets most of the attention, but depth and width decide whether the sauna actually feels good to sit in. A bench that is tall enough but too shallow leaves you perched on the edge, which gets uncomfortable fast once the room heats up.
The upper bench, where people spend the most time and where reclining is common, needs more depth than the lower tier. Finnmark’s specifications call for at least 600 mm (about 24 inches) of depth on the top bench to let someone lie back with knees bent, which is the position most sauna traditions consider optimal for even heat exposure.
- Upper bench depth: 20 to 24 inches (500 to 600 mm) minimum for sitting; 24 inches preferred if reclining matters to you.
- Lower bench depth: 14 to 20 inches (350 to 500 mm) is fine when this tier mainly functions as a step or overflow seat.
- Seat width per person: roughly 24 inches (600 mm), per Saunologia’s spacing guidance, so shoulders don’t collide on a shared bench.
- Reclining length: 180 to 200 cm (about 71 to 79 inches) if you want at least one bench long enough to lie down fully.
- Accessibility seating: 17 to 19 inches works well for single-level, easier-access benches, closer to standard chair height for anyone who has trouble with a taller step-up seat.
A backrest changes the depth math slightly, since it adds a few inches of vertical support without eating into usable seat depth. Products like ergonomic sauna backrests let you keep a shallower bench while still supporting a full recline, which matters in smaller cabins where you cannot spare the full 24 inches on every level.
If you are designing for a household member with limited mobility, skip the multi-tier climb entirely and build a single accessible level at 17 to 19 inches. This mirrors the seat height range used in ADA-style accessible seating and avoids forcing anyone to step up onto a second tier just to use the sauna at all.
How Do Two-Tier And Three-Tier Bench Layouts Differ?
Most home saunas fall into one of three layout patterns, and your ceiling height usually decides which one is realistic before your floor plan does.
- Single-level layout. Best for small footprints (roughly 4 by 4 feet or fewer) or ceilings under 7 feet. One bench at 24 to 32 inches high with 24 inches of depth gives you a usable, code-simple seat without fighting for vertical clearance. Compact cabins often use this layout out of necessity, and it works well for space-constrained builds where every inch matters, a lesson yacht interior designers apply constantly when fitting seating into tight cabins.
- Two-tier layout. The most common configuration for 5 by 7 foot and 6 by 8 foot rooms with 7.5 to 8 foot ceilings. Lower bench at 20 to 24 inches, upper bench at 40 to 48 inches, with 16 to 18 inches of vertical gap between them so knees and feet clear the tier below.
- Three-tier layout. Only practical with 8-foot-plus ceilings and enough floor depth (typically 6 by 8 feet or larger) to stagger three benches without cramping legroom. A common spread: bottom tier around 18 inches, middle tier around 32 inches, top tier at 44 to 48 inches, each with roughly 16 inches of separation. The bottom tier in this configuration usually sits closest to the door and cooler air, which makes it a good spot for anyone easing into a session gradually.
For a 4 by 6 foot room, a single L-shaped bench at 32 to 36 inches high, 24 inches deep, is usually the most efficient use of the space. A 5 by 7 foot room supports a proper two-tier bench along the back wall with a shorter perpendicular bench on the side. A 6 by 8 foot room has enough width to run two-tier benches on two walls, or to add that third tier if the ceiling clears 8 feet.
What Construction Details Change Your Final Bench Height?
The numbers on a spec sheet assume finished dimensions, and finished dimensions depend on choices you make weeks before anyone sits down. Framing thickness, board selection, and heater clearance all nudge the final surface height up or down from your plan.
- Account for framing and decking thickness before you finalize bench height. A 2x4 ledger plus 1.5-inch decking boards can add nearly 4 inches to your planned surface height if you calculated from subfloor instead of finished floor.
- Ventilation intake and exhaust placement change how hot each bench tier feels in practice, even at identical heights, so plan vents before locking in your top bench elevation.
- Heater clearance requirements dictate how close a floor-standing unit can sit to the lower bench, which in turn affects how much depth you have left for that bottom tier.
- Choose moisture-stable timber like cedar or thermally treated aspen for bench tops, and leave a small gap, generally 1/8 to 1/4 inch, between boards so the wood can expand and contract without cupping.
- Round or bullnose the front edge of every bench board. A square edge digs into the back of the knee on a 24-inch-deep seat, and it is one of the most common complaints in DIY builds.
Pro Tip: The single most common framing mistake is cutting bench supports to the rough ceiling height instead of the finished ceiling height. Always frame after your ceiling material is installed, or build in an adjustment allowance before you cut a single ledger board.
A Builder’s Final Checklist Before You Cut Any Boards
Sauna Heater Supply has walked enough customers through bench layouts to know where projects actually go wrong, and it is rarely the math. It is skipping the physical check before the lumber gets cut.
Before finalizing any bench height, Teddy recommends running a laser level from the finished ceiling down to your marked bench line, not up from the subfloor, since floor irregularities throw off floor-based measurements more often than ceiling ones. Then do a mock seating test: clamp a scrap board at your calculated height and actually sit on it with the heater running on a low cycle. Confirm the stone-top-to-foot clearance one more time with a tape measure before committing.
Measuring down from the ceiling catches problems early, because ceiling height rarely changes mid-project while subfloor prep, insulation thickness, and paneling choices often do. When you order prefabricated bench boards or cedar bench kits, confirm actual board thickness and width against your calculated depth. A quarter-inch difference across several boards adds up fast on a 24-inch-deep bench.
Why Most Bench-Height Advice Skips The Part That Actually Matters
Most guides hand you a single number, 42 inches or thereabouts, and call it done. That number is not wrong, but treating it as universal is the conventional-wisdom failure that gets builders into trouble. The ceiling rule and the löyly rule frequently disagree, and no generic spec sheet can tell you which one to follow for your specific heater and room.
What the research actually supports is a hierarchy, not a fixed answer: measure your real ceiling, measure your real heater’s stone height, then take the lower of the two resulting targets. Builders who skip this comparison tend to overbuild the upper bench and end up with a scalding hot seat nobody wants to use for more than five minutes.
If you prioritize one thing before touching a saw, prioritize the physical mock-seating test over any spec sheet number. Paper measurements assume standard body proportions and standard heater output. Your sauna has neither, not exactly. A ten-minute test run at your calculated height will tell you more than another hour spent comparing bench-height charts.
— Teddy
Order The Right Bench Materials For Your Measured Height
Once you have your target bench heights calculated, the material you build with matters almost as much as the number itself. Saunaheatersupply is the direct source for the cedar boards and framing stock that support the exact dimensions covered in this guide, without the guesswork of matching mismatched lumber from a general hardware store.
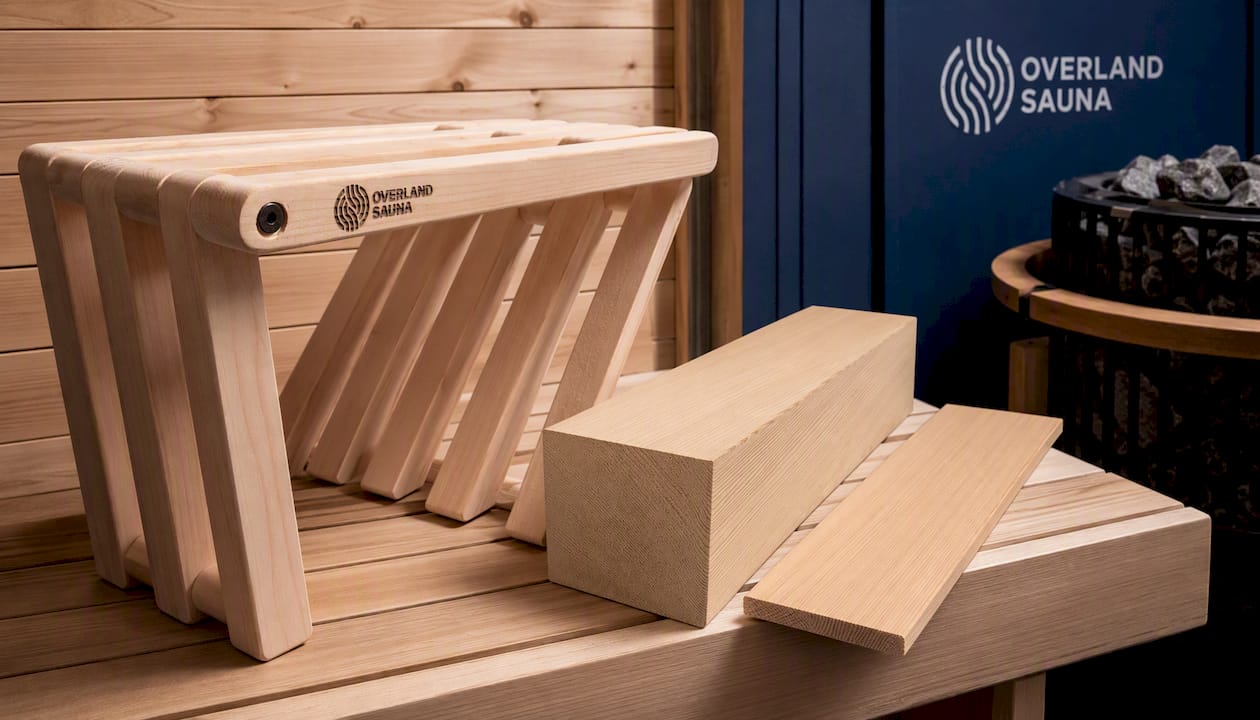
The Sauna Cedar Bench kit is built to the depth and width ranges outlined above, with surface boards sized for both sitting and reclining configurations. For framing and structural supports that hold up in high-heat, high-humidity conditions, Cedar 4x4 stock gives you the ledger and post material to frame benches at your calculated height without warping over time. For the visible bench top itself, 1x4 vertical-grain cedar boards provide the smooth, moisture-stable surface that holds up to repeated seating.
Stock sizes ship fast, and custom cuts are available for nonstandard bench depths or reclining-length tiers. Call Saunaheatersupply for current pricing and installation guidance before you finalize your cut list.