















Can You Convert a Garage Into a Sauna? Yes, With 3 Conditions
Yes, most garages can become a functional sauna if they clear three technical gates: adequate electrical capacity, exterior-wall ventilation, and continuous vapor control. Miss any one of these, and you risk nuisance breaker trips, mold in the framing, or worse. A garage sauna conversion typically runs $3,000 to $12,000 depending on heater type and finish level.
Before you buy a single cedar board, do these five things:
- Check your electrical panel for available capacity (240V circuits need real headroom)
- Confirm you have an exterior wall for intake and exhaust venting
- Plan a continuous vapor barrier, not a patchwork one
- Size the heater to your exact room volume in cubic feet
- Clear out paint, solvents, gas cans, and anything flammable
Call an electrician and your local building department before you frame a single wall.
Key Takeaways
A garage sauna conversion succeeds when electrical capacity, exterior ventilation, and a continuous vapor barrier are all confirmed before framing begins.
| Point | Details |
|---|---|
| Three gates decide feasibility | Electrical capacity, exterior-wall ventilation, and vapor control all need to check out before you build. |
| Size the heater to volume | Use roughly 1 kW per 45 to 50 cubic feet, adding 15 to 25% buffer in cold garages. |
| Vapor barrier continuity is critical | Untaped seams let moisture reach framing, causing rot that shows up a year or more later. |
| Budget with a contingency | Costs range from $2,000 for infrared to $12,000+ for custom builds, plus a 10 to 20% buffer for panel upgrades. |
| Match the heater to the room | Saunaheatersupply’s Saunum Air 7, IKI Pillar 9kW, and Harvia Kip45W packages cover compact, large, and Wi-Fi preheat needs respectively. |
Table of Contents
- Garage Sauna Conversion Suitability: What to Check First
- How Do You Plan the Layout and Choose a Sauna Type?
- Insulation and Vapor Barrier: Stopping Rot Before It Starts
- Where Should Vents Go for Proper Garage Sauna Ventilation?
- Electrical Requirements and Heater Installation Safety
- Flooring, Benches, and Material Choices That Last
- Keeping Moisture Under Control Long-Term
- Permits and Codes: What Building Departments Expect
- What Does a Garage Sauna Conversion Cost and How Long Does It Take?
- Which Tasks Should You DIY and Which Need a Pro?
- The Step-by-Step Garage Sauna Conversion Checklist
- Common Mistakes in a Garage Sauna Conversion
- Long-Term Safety and Maintenance Checklist
- Which Heater and Kit Fit a Garage Conversion Best?
- Fire, Carbon Monoxide, and Structural Safety in a Converted Garage
- When Is a Garage a Genuine Yes for Sauna Conversion?
- Lessons From Garage Sauna Builds That Actually Worked
- Get the Right Heater Before You Frame a Single Wall
- Sources
Garage Sauna Conversion Suitability: What to Check First
A garage sauna conversion lives or dies on measurements you can take in twenty minutes. Ceiling height matters most: traditional saunas need at least 7 feet, while infrared setups tolerate 6.5 feet. Measure your footprint against the smallest workable box (5 by 6 feet fits one or two people) and confirm the door swing won’t collide with a bench or your car.
Structural checks come next. Look at the slab for major cracks or heaving, note any overhead obstructions like garage door tracks or opener rails, and relocate stored fuels, paint thinners, or propane tanks immediately. These items don’t belong anywhere near a heat source.
Moisture risk deserves its own inspection pass. A garage with a history of dampness, visible mold, or poor natural ventilation needs a moisture mitigation plan before framing starts, not after. Controlling moisture means fixing leaks and improving airflow, and a converted garage sauna adds a concentrated humidity source on top of whatever moisture problem already exists.
- Measure ceiling height, footprint, and door clearance
- Inspect the slab for cracks and check for overhead obstructions
- Relocate any flammable liquids or fuel containers
- Look for prior water stains, musty odor, or condensation marks
Pro Tip: Run a 10-minute garage health check: measure the space, inspect the slab, do a quick smell test for gasoline or chemical fumes, and confirm exactly where your electrical panel sits relative to the planned sauna wall.
How Do You Plan the Layout and Choose a Sauna Type?
The choice between traditional and infrared comes down to what you want out of the experience versus how much installation friction you can tolerate. Traditional heaters deliver real steam, higher humidity, and the classic löyly sensation, but they demand 240V power and tighter ventilation planning. Infrared cabins run on standard 120V circuits with far less moisture to manage, making them the easier retrofit for a one-car garage corner.

Heater sizing follows a dependable rule: roughly 1 kW for every 45 to 50 cubic feet of sauna volume for most traditional electric units. If your garage sits in a cold climate or the sauna shares a wall with unheated space, add 15 to 25 percent to that baseline so the heater doesn’t struggle on winter mornings.
Common footprints include 5x6 for a compact two-person build, 6x6 for a comfortable three-person room, and 6x8 when you want a proper two-tier bench layout. Place your heater on an exterior wall so venting runs are short, and keep at least 3 feet of clearance for the door swing.
| Factor | Traditional Electric | Infrared |
|---|---|---|
| Power needed | 240V, 30 to 60 amp circuit | 120V, 15 to 20 amp circuit |
| Moisture level | High, requires vapor barrier | Low, minimal moisture |
| Installation complexity | Higher, licensed electrician required | Lower, often DIY-friendly |
| Typical heat-up time | 30 to 45 minutes | 10 to 15 minutes |
Insulation and Vapor Barrier: Stopping Rot Before It Starts
Garage sauna ventilation gets most of the attention, but a failed vapor barrier is what actually rots framing. Insulating and air-sealing correctly reduces heat loss and, in a sauna, keeps moisture from migrating into the surrounding structure. Walls typically need R-13 to R-19 fiberglass or mineral wool batts, with the ceiling bumped up to R-19 or higher since heat rises and concentrates there.
Build the assembly in this order:
- Frame the interior sauna walls, leaving room for insulation depth
- Install batt insulation snugly between studs with no gaps
- Apply a continuous, taped aluminum foil vapor barrier on the warm (interior) side
- Add furring strips over the barrier to create an air gap
- Install tongue-and-groove cedar cladding over the furring strips
Seam continuity is everything. A single untaped seam or a stapled-through puncture gives steam a path into the wall cavity, where it condenses against cold garage sheathing and feeds rot over a season or two. In colder climates, insulating the surrounding garage walls and floor assembly rather than just the sauna box itself pays off in both comfort and structural safety.
Pro Tip: Leave a small air gap behind the cedar by using thin furring strips (roughly 1/4 to 3/8 inch). That gap lets any residual moisture dry out instead of sitting against the wood.
Where Should Vents Go for Proper Garage Sauna Ventilation?
Airflow inside the cabin follows a simple pattern: intake low on the heater wall, exhaust high on the opposite wall. This creates a natural convection loop that pulls cool air across the floor and pushes heated, humid air out near the ceiling. Vent openings usually run 4 to 6 inches square, adjustable so you can dial airflow up or down by season.
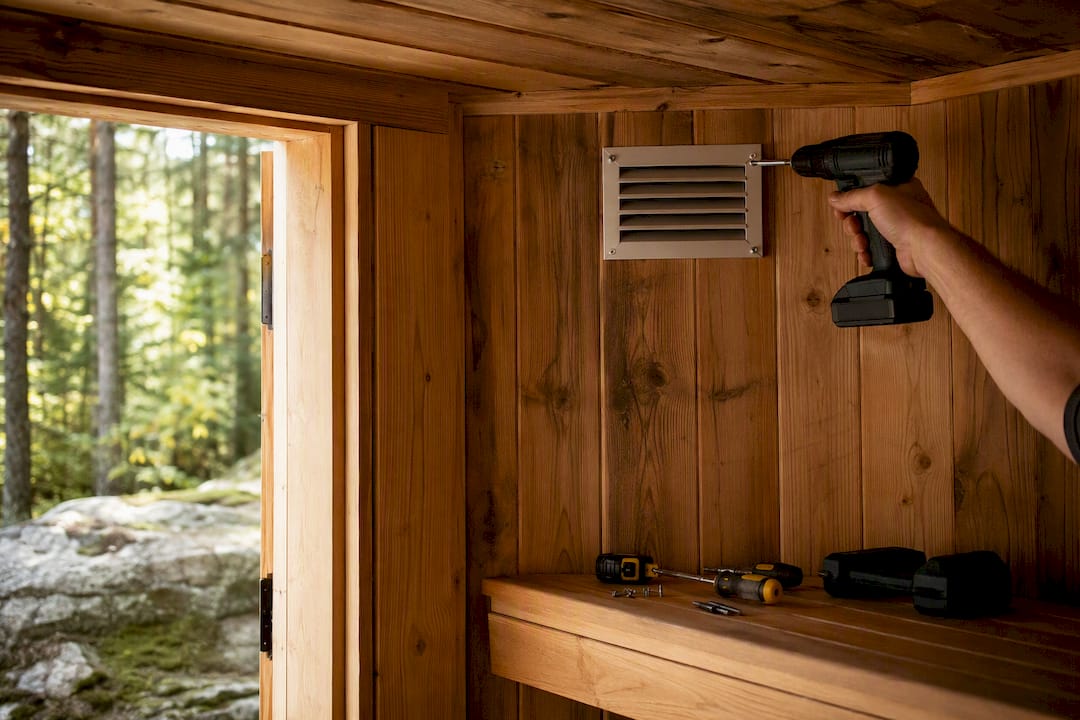
Whether that exhaust vents into the open garage or all the way outdoors depends on your garage’s own air quality. If the garage stores a car, gas cans, or a workbench with solvents, ducting exhaust outdoors is the safer call. Drawing garage fumes back into the sauna through a poorly placed exhaust is a real risk, not a theoretical one.
Test the system before your first real session:
- Run a smoke pencil or a handheld steam source near each vent to confirm directional flow
- For larger cabins, target roughly 30 to 50 CFM of mechanical exhaust if natural convection feels sluggish
- Balance the vents so you’re not bleeding heat faster than the heater can replace it
After each session, prop the door and run the vent fan for 15 to 20 minutes, wipe down benches, and let the heater run empty for a few minutes to dry residual moisture.
Electrical Requirements and Heater Installation Safety
This is the section where DIY ambition needs to meet a licensed electrician, especially for anything beyond 120V. Infrared units typically draw on a dedicated 120V, 15 to 20 amp circuit. Traditional electric heaters need 240V and anywhere from 30 to 60 amps depending on the heater’s kW rating, and that circuit has to be dedicated, not shared with a garage door opener or shop tools.
Your wiring checklist should include a dedicated circuit sized to the heater’s spec sheet, correctly rated breaker, proper grounding, and a disconnect or control panel mounted outside the sauna itself so nobody has to reach into a hot, humid room to adjust settings. This is standard practice covered in detail in sauna electrical requirement guides, and it’s worth reading before you call an electrician so you can ask informed questions.
Clearances matter as much as wiring. Combustible materials, including your cedar cladding itself, need to sit at the manufacturer’s specified minimum distance from the heater’s hot surfaces and guard rails.
Always confirm exact numbers against the manufacturer’s spec sheet since guard design varies by model.
- Never plug a traditional heater into a standard 120V outlet
- Keep the control panel outside the sauna’s hot zone
- Confirm GFCI protection where your local code requires it
- Mount the heater on a heat-resistant base, never directly on cedar decking
Flooring, Benches, and Material Choices That Last
Sealed concrete is the simplest, cheapest floor finish and holds up well to repeated moisture exposure. Tile over cement backer board looks more finished and handles water just as well, while a raised sleeper floor with rigid foam underneath adds comfort and thermal buffering in colder garages. If you’re building a larger cabin or expect heavy use, a floor drain is worth the extra plumbing cost.
Benches should follow the classic two-tier layout: a lower bench around 17 to 19 inches high for cooler air, and an upper bench near 33 to 36 inches for those who want more heat. Depth should run at least 18 to 24 inches so a person can sit comfortably or stretch out. Cedar remains the standard choice for both benches and wall cladding because of its resistance to warping and decay in humid conditions.
- Choose sealed concrete, tile, or a sleeper floor based on budget and comfort
- Add a floor drain if the sauna sees frequent, heavy use
- Build two-tier benches in cedar with rounded edges for comfort
- Finish thresholds with a non-slip strip and confirm the door swings outward for safe exit
Keeping Moisture Under Control Long-Term
A sauna that gets used regularly needs a maintenance rhythm, not a one-time build-and-forget approach. After every session, prop the door, run the exhaust fan, and wipe down benches before humidity has a chance to settle into the wood grain.
Seasonally, inspect vapor-barrier seams for any lifting tape, check exterior vent caps for debris or nesting insects, and look at exposed framing edges for the first signs of discoloration, which usually shows up before visible mold does.
- Weekly: wipe benches and walls, prop door after use
- Monthly: inspect vent screens and test airflow direction
- Seasonally: check vapor-barrier tape and framing for moisture staining
- Annually: re-tape any compromised seams and reseal the door threshold
Permits and Codes: What Building Departments Expect
Any new 240V circuit almost always triggers a permit requirement, and many jurisdictions also require a permit for the structural framing of an interior room, even inside an existing garage. Some localities treat a sauna as a “wet room” addition, which pulls in additional inspection criteria around ventilation and vapor sealing.
Inspectors typically verify that wiring matches the panel schedule, breakers are correctly sized, GFCI protection is in place where required, the door provides safe egress, clearances match the heater’s listed spec, and vapor-barrier seams are properly sealed if humidity control is part of your jurisdiction’s review.
- Budget for permit fees separately from material costs
- Schedule your electrical inspection before closing up walls
- Bring the heater’s spec sheet and wiring diagram to your electrician’s first visit
- Ask your building department directly whether a sauna room requires a distinct permit category
What Does a Garage Sauna Conversion Cost and How Long Does It Take?
Costs split cleanly by route. A portable infrared cabin lands on the low end, often $2,000 to $5,000 installed, since it skips heavy electrical work and vapor barrier construction. A prefab traditional kit with a full vapor barrier and cedar interior typically runs $5,000 to $9,000. A fully custom build with upgraded electrical, insulation, and finish carpentry can reach $12,000 or more.
Timeline runs in phases: site assessment and permitting take one to three weeks, framing and insulation another one to two weeks, electrical rough-in and inspection about a week, and finishes plus commissioning a final few days. Total project time typically spans four to eight weeks depending on permit turnaround.
- Portable infrared: $2,000 to $5,000
- Prefab traditional kit: $5,000 to $9,000
- Custom build: $9,000 to $12,000+
Always add a 10 to 20 percent contingency for panel upgrades or hidden moisture remediation. Garages with older 100-amp panels frequently need a service upgrade before a 240V heater circuit is even possible.
Which Tasks Should You DIY and Which Need a Pro?
Framing the inner room, installing insulation, running furring strips, and hanging cedar paneling are all reasonable DIY tasks if you’re comfortable with basic carpentry. Bench construction falls into this category too.
Hire a licensed electrician for any 240V circuit work, final heater hookups where wiring penetrates the vapor barrier, structural modifications to the garage, and complex exhaust ducting runs. When vetting a contractor, ask for their license number, proof of insurance, familiarity with your local inspector’s expectations, and references from similar high-humidity projects.
- DIY: framing, insulation, cedar cladding, bench building
- Hire a pro: 240V wiring, heater hookup, structural changes, exhaust routing
The Step-by-Step Garage Sauna Conversion Checklist
Building a sauna in a garage goes smoothest when you respect the dependencies between phases. Skipping ahead on electrical before framing is done, for instance, means redoing wire runs later.
Phase 1: Site prep
- Clear all storage and relocate flammable materials
- Measure the space and confirm electrical panel access
- Call your local building department to ask about permit requirements
Phase 2: Framing and insulation
- Build the inner room framing
- Install insulation and a continuous vapor barrier with taped seams
- Route electrical penetrations and vent openings, sealing each one carefully
Phase 3: Electrical and heater
- Have your electrician pull the permit and install the dedicated circuit
- Mount the control panel outside the sauna
- Set the heater on a heat-resistant base
Phase 4: Finishes and commissioning
- Install benches, flooring finish, and the door
- Run the heater empty for 30 minutes to burn off manufacturing residue
- Test ventilation airflow and confirm all safety devices function correctly
Common Mistakes in a Garage Sauna Conversion
The most expensive mistakes are the invisible ones. Skipping the vapor barrier entirely, or leaving seams untaped, lets moisture soak into framing where you won’t see damage until it’s advanced. Undersizing the heater for a cold, uninsulated garage leaves you with a sauna that never quite reaches temperature. Plugging a traditional 240V-rated heater into a 120V outlet, whether by mistake or a shortcut, simply won’t work and can damage the unit.
To diagnose problems on-site: if the room won’t heat, check circuit voltage and breaker size before assuming the heater is faulty. If walls feel damp after sessions, suspect a vapor-barrier gap rather than “normal” humidity. If air feels stagnant, check for blocked or undersized vents before adding more insulation.
Do: tape every vapor barrier seam, verify heater kW against room volume, confirm circuit voltage before mounting the heater. Don’t: cut corners on electrical work, ignore a musty smell during construction, block the exhaust vent to “save heat.”
Long-Term Safety and Maintenance Checklist
Monthly, check that vents move freely, inspect vapor-barrier edges for lifting tape, and test the GFCI and control switches to confirm they trip and reset properly.
Quarterly, run a high-heat cycle with the door closed to help dry out any residual moisture in the wall cavity, and inspect visible surfaces for early mold or mildew spotting. Reseal door thresholds or worn flooring finish as needed.
- Monthly: test GFCI, inspect vents and vapor-barrier seams
- Quarterly: run a dry-heat cycle, check for mold, reseal thresholds
- Annually: have an electrician spot-check the circuit and connections, verify exterior vent caps are clear and exhaust terminates properly outdoors
Which Heater and Kit Fit a Garage Conversion Best?
Matching the heater to your footprint saves you from an underpowered room or an oversized unit tripping breakers unnecessarily. For a compact 1 to 2 person corner sauna, the Saunum Air 7 Sauna Heater Package offers efficient heating without demanding a massive electrical upgrade. For a 6x8 footprint or a colder climate needing that extra buffer, the IKI Pillar 9kW with Wi-Fi controller glass delivers the higher kW output the sizing formula calls for.
If Wi-Fi preheat matters to you, meaning you want the room warm before you walk out to the garage, the Harvia Kip45W Heater Package with Wi-Fi and stones covers that need directly. Readers drawn to a hybrid steam and infrared experience should look at the Finnmark Thermo-Aspen Combination Barrel Sauna FD-7 or the Finnmark Cedar Combination Barrel Sauna FD-6, while a larger custom build might call for the Saunum Air L 15 Package.
- Compact corner sauna: Saunum Air 7
- Larger or cold-climate footprint: IKI Pillar 9kW
- Wi-Fi preheat priority: Harvia Kip45W
Pro Tip: Always cross-check the heater’s listed breaker requirement against your spec sheet before ordering. A kW rating that looks right on paper can still need a bigger circuit than your panel currently supports.
Fire, Carbon Monoxide, and Structural Safety in a Converted Garage
A converted garage sauna carries risks that a purpose-built outdoor cabin doesn’t, mostly because it shares a structure with a space that may store fuel, run a car engine, or house a gas water heater. Fire risk centers on clearances: any combustible material, cedar included, needs to sit at the heater manufacturer’s specified minimum distance from hot surfaces and stones. Loose towels or robes left near the heater are a more common ignition risk than people expect.
Carbon monoxide becomes a concern specifically when the garage itself houses a gas-fired appliance, like a water heater or a car left running, and your sauna’s exhaust or intake path pulls air from that same garage volume. This is the strongest argument for ducting exhaust to the exterior rather than venting into the open garage, particularly if the garage isn’t a detached, well-ventilated structure. A carbon monoxide detector installed near the sauna entrance is inexpensive insurance.
Humidity’s structural impact shows up slower but does more cumulative damage. A traditional sauna generates significant water vapor with every session, and if that moisture finds its way past the vapor barrier into garage framing, wood rot and mold growth follow, sometimes over a year or more before it’s visible. Reducing indoor humidity and fixing any moisture path is the same principle that EPA guidance applies to whole-home moisture control, just concentrated into one small, high-humidity room. Treat the vapor barrier as a life-safety detail, not a finishing touch.
When Is a Garage a Genuine Yes for Sauna Conversion?
A clear yes requires all three technical gates to check out simultaneously, not just one or two. Your electrical panel needs verified spare capacity for either a 120V dedicated circuit or a 240V circuit rated to your chosen heater, confirmed by an electrician rather than assumed from the panel’s total amperage. Your garage needs at least one exterior wall accessible for proper intake and exhaust venting, ideally the same wall where the heater sits.
Local code is the third gate, and it’s the one homeowners skip most often. If your municipality requires a permit for new 240V circuits or interior room construction, and most do, a yes on suitability still needs a yes from your building department before framing starts. A structurally sound garage with a damp history and no moisture mitigation plan is a conditional yes at best.
If your garage has cracked slab, active roof leaks, insufficient panel capacity with no room for a service upgrade, or an interior layout that can’t fit even a compact 5x6 footprint with proper clearances, that’s a genuine no until those conditions change. Everything else, meaning a structurally sound garage with an accessible panel, an exterior wall, and adequate ceiling height, is very likely a workable project once you follow the phased approach outlined above.
Lessons From Garage Sauna Builds That Actually Worked
Every successful project we’ve reviewed shares one trait: the builder sized the heater for the coldest month, not an average day. Garages attached to unheated space lose heat faster than a bedroom-turned-sauna ever will, and undersizing there means a room that never quite gets there in January.
Insulating the floor, not just the walls, pays off more than most builders expect, especially over an uninsulated slab. Expect to trade something: a bigger sauna footprint usually means less garage storage or a tighter parking fit, and there’s no way around that math.
Get the Right Heater Before You Frame a Single Wall
Guessing at heater size after the walls are already up is how garage sauna conversions end up disappointing. Saunaheatersupply gets you the right-sized package before construction starts, with spec sheets that show exact breaker requirements so your electrician can quote the job accurately on the first visit.

Beyond the heater itself, a few accessories make the difference between a functional sauna and a genuinely comfortable one. The Temperature Probe for iSteam, AirTempo, iTempo, and iTempoPlus controls gives you precise readings instead of guesswork, and the iSteamX Steam Shower Control and Steamhead is worth a look if you’re weighing a steam feature into the same room. If you want to round out your wellness space, Just Move Supplements’ sauna tank is a popular accessory pairing among cold-and-hot contrast enthusiasts.
Browse the full heater and sauna kit catalog and contact Saunaheatersupply’s team to confirm your panel capacity and get a spec sheet matched to your exact garage footprint before you order.
Sources
- What are the main ways to control moisture in your home? | US EPA
- Energy
- Sun Home Saunas | BBB profile