















Basement Sauna Kit: Complete Buyer's Installation Guide
A basement sauna kit is the right call for most U.S. homeowners who want a permanent home sauna without sacrificing above-grade living space. The short verdict: if your basement has a clear path to duct exhaust outdoors and your electrical panel has capacity for a 240V circuit, a traditional electric kit delivers the full steam experience. If either of those conditions is uncertain, start with an infrared kit. Infrared cabins run on standard 120V circuits and produce minimal moisture, making them the lowest-risk basement default.
Before you order anything, take three immediate steps:
- Confirm an exterior vent path. Locate a rim joist, utility chase, or bulkhead that gives you a direct route to the outside. If no realistic path exists, choose infrared.
- Check your electrical panel. Traditional electric heaters require a dedicated 240V circuit, typically 30A–60A depending on heater size. If your panel is already near capacity, budget for an upgrade or go infrared.
- Measure usable room volume and headroom. You need at least 7’ of clear ceiling height and enough floor area to fit your target kit footprint before you can size a heater accurately.
| Basement condition | Best first choice |
|---|---|
| Dry basement + clear exterior vent path + panel capacity | Traditional electric kit |
| Limited vent path OR marginal panel capacity | Infrared kit |
| Low headroom (under 7’) | Compact infrared or folding model |
Pro Tip: Run a dehumidifier in the target space for one week and log the readings before you buy anything. A basement that holds above 60% relative humidity without the sauna running needs moisture remediation before any sauna installation.
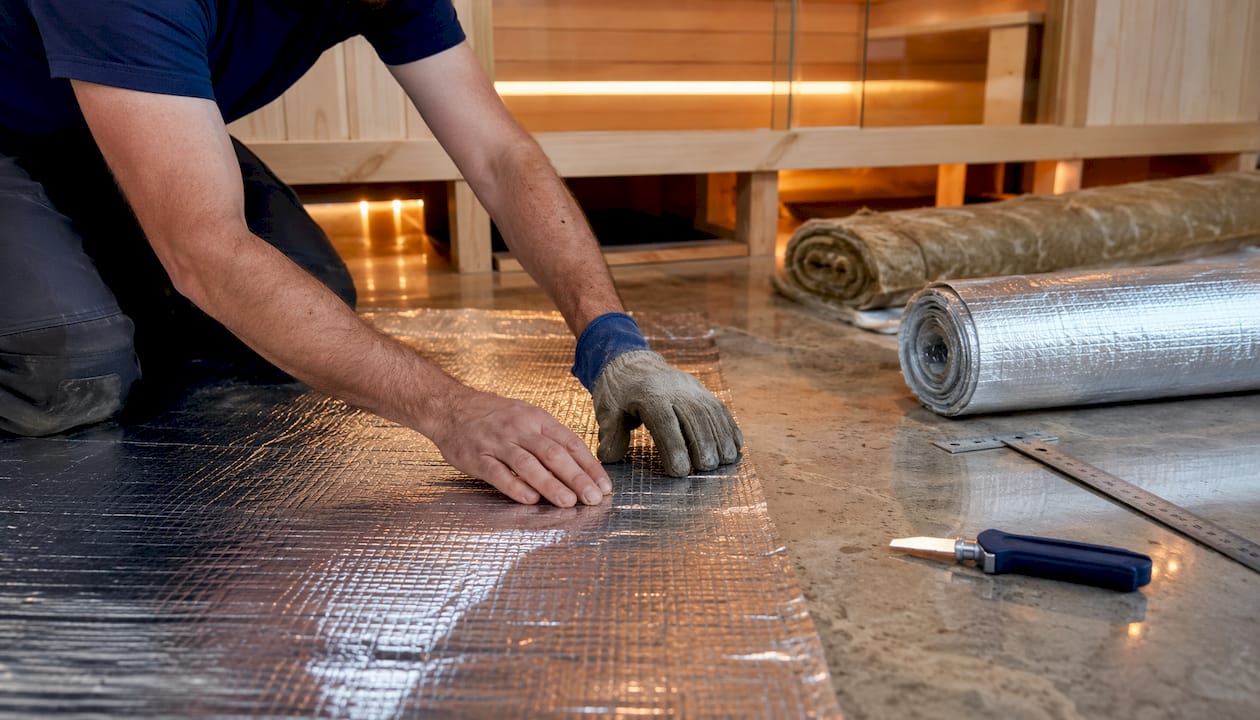
Table of Contents
- What basement sauna kit types and sizes work best?
- What basement-specific challenges do you need to solve before installing?
- How do you size a heater for a basement sauna?
- What does a typical basement sauna kit include?
- What does the installation timeline look like, and when do you need permits?
- What does a basement sauna project realistically cost?
- How do you maintain a basement sauna and keep it safe?
- Which heaters does Saunaheatersupply recommend for basement kits?
- Key Takeaways
- What experienced installers know that most guides skip
- Saunaheatersupply has the heaters, kits, and support your basement build needs
- Useful sources for your basement sauna project
What basement sauna kit types and sizes work best?
Sauna kits for basements fall into four practical categories, each with a different profile for moisture risk, electrical demand, and installation complexity.
Infrared cabin kits are self-contained, pre-cut wood enclosures with infrared heating panels built in. They run on 120V in many configurations, produce no steam, and require no external ducting. Assembly typically takes 4–6 hours for two people. These are the easiest basement install by a wide margin.
Prefab traditional electric kits ship as pre-cut tongue-and-groove panels, benches, a door, and trim. You supply the heater separately or as a bundle. They require a vapor barrier, a 240V dedicated circuit, and ducted ventilation to the exterior. The payoff is the authentic high-heat, high-humidity sauna experience.
Modular panel kits are similar to prefab kits but offer more flexibility in layout, including corner configurations and non-standard footprints. They suit basements with irregular dimensions or structural obstructions.
Compact and folding models are purpose-built for tight spaces. Some designs fold flat against a wall when not in use, which can work well in a finished basement or even a large bathroom. They are worth considering when floor space is genuinely constrained.
Typical basement-appropriate footprints:
- 3’×3’ (single-seat): fits in a utility corner; best for one person; infrared only at this size
- 4’×4’ (two-person): the most common basement starter size; works with infrared or a compact electric heater
- 5’×6’ (three-person): mid-size; needs a proper traditional electric heater and full vapor barrier
- 6’×7’ (four-person): full-size basement build; requires solid electrical and ventilation planning
Pro Tip: When headroom is tight or a beam cuts across the space, choose a single-bench or corner-bench layout. Corner kits use the same floor area more efficiently and keep the bench away from low structural elements.
What basement-specific challenges do you need to solve before installing?
Basements present two problems that above-grade rooms do not: they are moisture sinks and heat sinks. Concrete walls and floors absorb both heat and humidity, which means a sauna that performs perfectly on the first floor may underperform and develop mold problems in the same footprint below grade.
Moisture and vapor barrier
Traditional electric saunas require a continuous vapor barrier and dedicated ventilation ducted to the outside. The vapor barrier goes on the warm side of the insulation, meaning between the insulation and the sauna’s interior wall panels. Foil-faced insulation with taped seams is the standard approach. Every seam, corner, and penetration must be sealed. A single gap allows humid sauna air to migrate into the concrete cavity, where it condenses and feeds mold.
Ventilation
The intake vent should be low on the wall near the heater; the exhaust vent should be high on the opposite wall and ducted directly to the building exterior. Venting a traditional sauna into the rest of the basement relocates the moisture problem rather than solving it and commonly leads to mold and structural damage. Route the exhaust line through a rim joist, a utility chase, or a bulkhead to reach the outside. Avoid routing through the ceiling plenum.
Floor and headroom
Concrete slab floors handle heat, weight, and moisture without complaint and are the preferred sauna base. If your slab is uneven, use adjustable floor risers or leveling compound before assembling the kit. Plan for a floor drain if you are installing a traditional heater that produces steam and water. Minimum clear headroom is 7’; anything less limits bench height and heater placement options.
Pre-install inspection checklist
- Run a dehumidifier for one week and record daily readings; address any reading consistently above 60% RH before proceeding
- Inspect the foundation walls and floor for active water intrusion or efflorescence
- Identify a realistic duct path to the exterior (rim joist, utility chase, or bulkhead)
- Confirm minimum 7’ clear headroom in the target footprint
- Inspect the electrical panel for available breaker slots and amperage headroom
- Check for any existing plumbing or HVAC runs that cross the planned sauna footprint
Moisture callout: Never exhaust sauna steam into the basement envelope. The moisture will migrate into wall cavities, insulation, and framing, creating conditions for mold growth that can be expensive to remediate.
How do you size a heater for a basement sauna?
Getting heater sizing right is the single most consequential decision in a basement sauna build. Undersized heaters produce slow heat-up times and disappointing upper-bench temperatures. Oversized heaters waste energy and can trip safety cutouts.
Heater types and their basement fit
Infrared heaters operate at lower temperatures (120–150°F vs. 160–195°F for traditional), produce no steam, and often run on 120V. They are the right choice when venting to the exterior is impractical or panel capacity is limited.
Traditional electric element heaters deliver the full Finnish sauna experience with steam capability. They require 240V dedicated circuits and proper ducted ventilation. They are the right choice when you have confirmed vent path and panel capacity.
Combi heaters combine electric elements with a steam generator, giving you both dry heat and steam in one unit. They require 240V and robust ventilation. They are a good upgrade for buyers who want flexibility.
Wood-fired heaters are possible in basements but require a dedicated chimney system routed to the exterior, carbon monoxide detection, and often a building permit for the flue installation. The HUUM Barrel Sauna Chimney Kit is designed for this application and includes the components needed for a proper exterior exhaust run.
Sizing rule and basement uplift
The standard starting point is approximately 1 kW per cubic meter of sauna volume. Because concrete walls and floors absorb heat, basement installs typically need a 10–15% higher heater output than the nominal calculation to offset the heat-sink effect.
Worked example: A 6’×5’×7’ cabin has a volume of 210 cubic feet, which converts to approximately 5.95 cubic meters. At 1 kW per cubic meter, the base requirement is about 6 kW. Adding a 12% basement uplift brings the target to roughly 6.7 kW. A 7 kW heater is the practical choice for this cabin.
Heater sizing and circuit requirements
| Cabin volume (cubic feet) | Base kW (1 kW/m³) | Basement-adjusted kW (+12%) | Typical circuit |
|---|---|---|---|
| 90–130 | 3.0–4.0 | 3.0–4.5 | 240V / 30–60A |
| 140–210 | 4.5–6.0 | 4.5–6.5 | 240V / 30–40A |
| 210–300 | 6.0–8.0 | 6.7–9.0 | 240V / 40–50A |
| 300–400 | 8.5–11.5 | 9.5–13.0 | 240V / 50–60A |
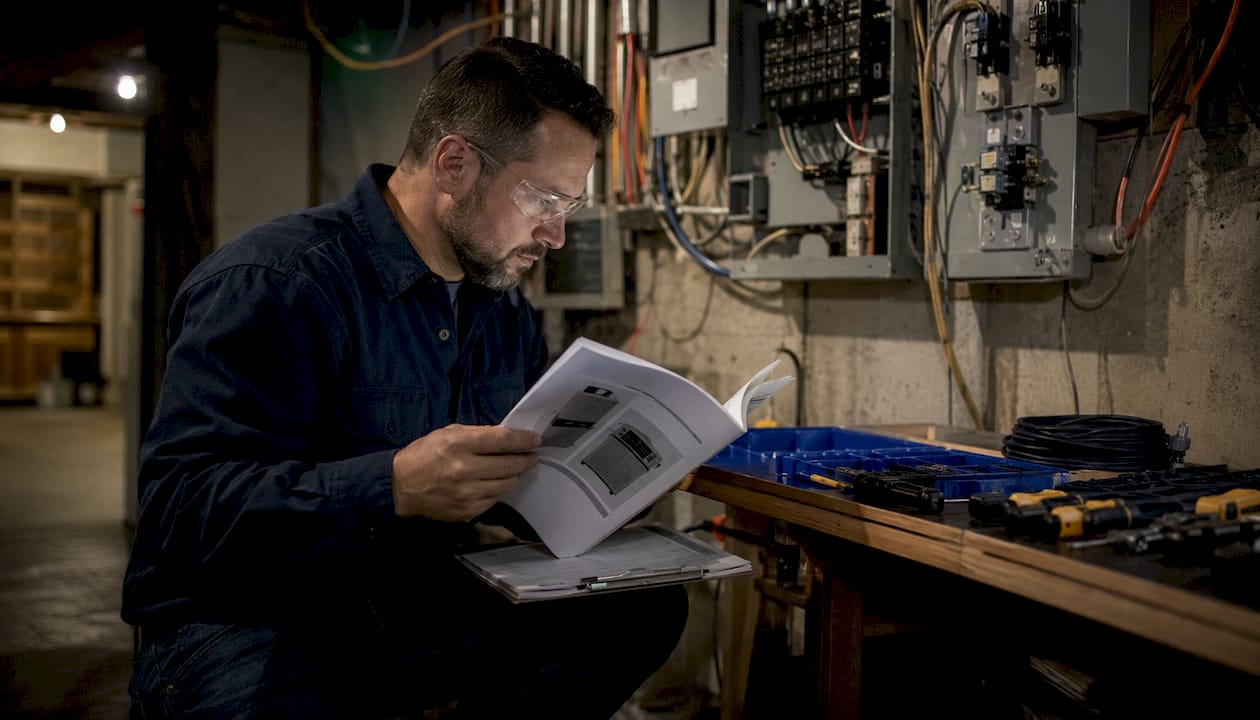
Electrical checklist
- Confirm available breaker slots in your panel before selecting a heater
- Verify the panel’s total amperage headroom (not just open slots)
- Size the dedicated circuit to the heater’s nameplate amperage plus a 25% safety margin
- Most traditional electric sauna heaters require a 240V dedicated circuit; smaller units may be 30A, larger ones 60A
- If the panel is marginal, budget for a panel upgrade early; upgrades commonly cost $1,500–$3,000 and shift a DIY install to a hybrid contractor project
Pro Tip: Always add the 10–15% basement uplift before selecting your heater model, not after. Choosing a heater at the low end of a size range for a basement cabin almost always results in slow heat-up and disappointing bench temperatures.
What does a typical basement sauna kit include?
Understanding what ships in the box versus what you must source separately prevents budget surprises and delays.
Standard kit contents
Most prefab traditional electric kits include:
- Pre-cut tongue-and-groove wall and ceiling panels (typically western red cedar or Nordic spruce)
- Upper and lower bench assemblies with support brackets
- Sauna door (glass-front or solid wood, depending on kit tier)
- Interior trim and corner molding
- Basic ventilation openings (pre-cut, not ducted)
- Assembly instructions and hardware
- Sometimes a bundled heater (verify before ordering; many kits are heater-optional)
Infrared cabin kits typically include the infrared heating panels integrated into the walls, a control panel, and a power cord. They rarely require separate heater purchases.
What you usually must buy separately
| Item | Typically included? | Notes |
|---|---|---|
| Vapor barrier / foil-faced insulation | No | Critical for traditional kits in basements |
| Exterior ducting kit | No | Required for traditional heaters |
| Heater (for non-bundled kits) | Sometimes | Verify at purchase |
| Thermostat / digital controller | Sometimes | Upgrade worth considering |
| Humidity sensor | No | Useful for basement monitoring |
| Floor risers / leveling hardware | No | Needed for uneven slabs |
| Floor drain | No | Recommended for traditional heaters |
| Electrical hookup materials | No | Licensed electrician required |
Wood and material choices
Western red cedar is the standard for premium kits. It resists moisture, stays cool to the touch at high temperatures, and has a natural aroma. Nordic spruce is a cost-effective alternative with good durability. Thermally modified aspen or alder are worth considering in high-humidity basements because they are less prone to resin bleed under heat. Avoid pressure-treated lumber and MDF inside the sauna cabin.
Pro Tip: Before purchasing, confirm whether the heater is bundled and what warranty covers it separately from the kit structure. A heater warranty from the manufacturer and a kit warranty from the panel supplier are two different documents. Verify both before checkout.
What does the installation timeline look like, and when do you need permits?
A two-person DIY team can complete a prefab basement sauna kit installation in roughly three to five days, assuming the electrical work is handled by a licensed electrician on a separate day.
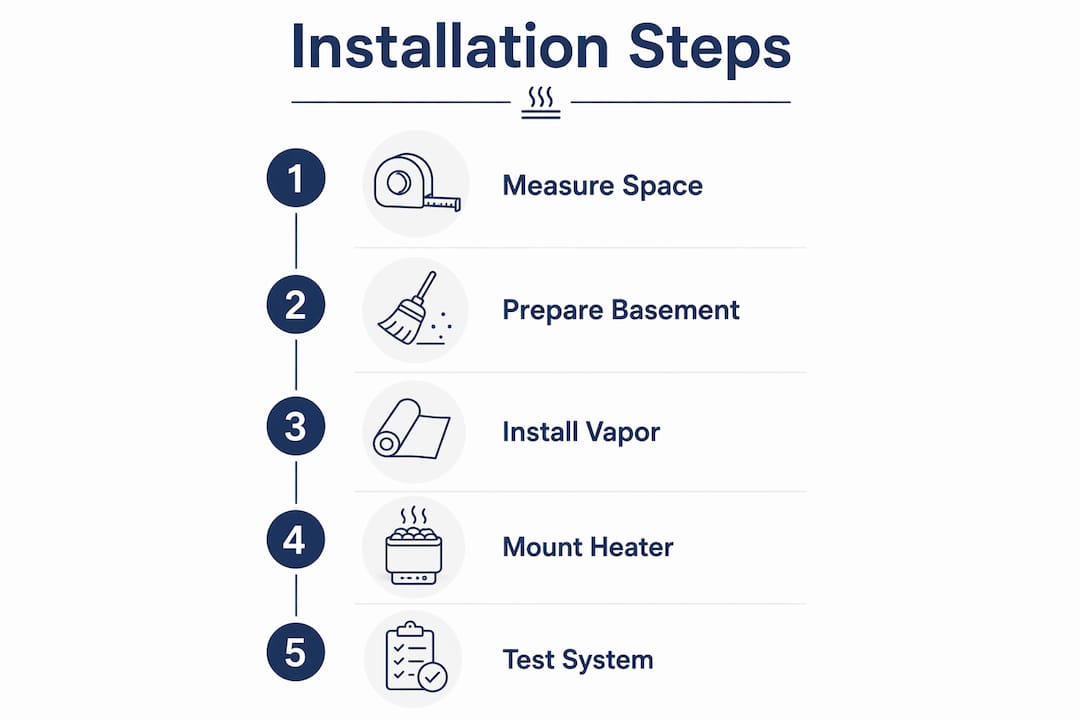
Step-by-step installation checklist
- Measure and mark the footprint. Confirm dimensions, headroom, and vent path. Mark the vapor barrier perimeter on the floor.
- Confirm vent path to exterior. Locate the rim joist or utility chase route. Order ducting materials before framing begins.
- Install vapor barrier and insulation. Foil-faced insulation with taped seams on all walls and ceiling. Seal every penetration.
- Frame the sauna walls (if building a room-within-a-room rather than using a freestanding kit). Use kiln-dried lumber; avoid pressure-treated.
- Assemble panels and benches. Follow the kit sequence: walls first, then ceiling, then benches. Prefab kits with tongue-and-groove panels typically take 4–8 hours for two people.
- Position the heater and route wiring. Leave the final electrical connection to the licensed electrician.
- Electrician installs dedicated circuit and disconnect. This step requires a permit in virtually every U.S. jurisdiction.
- Install ducting to exterior. Connect intake and exhaust vents; seal all duct penetrations with fire-rated caulk.
- Test and commission. Run the heater at full temperature for two hours; check for hot spots, unusual odors, and verify thermostat operation.
- Schedule building and electrical inspection. Required in most jurisdictions before regular use.
Permit callout
Electrical work for a sauna heater requires a permit in virtually every U.S. jurisdiction. Structural changes (framing a new room, cutting through a rim joist for ducting) may require a building permit depending on your municipality. Wood-fired or gas heater installations almost always require both a mechanical and a building permit. Pulling permits protects your home’s resale value and your homeowner’s insurance coverage. Unpermitted electrical work is a common reason home sales fall through during inspection.
Installation timeline summary
| Task | Typical duration | Licensed pro required? |
|---|---|---|
| Site prep and measurement | 2–4 hours | No |
| Vapor barrier and insulation | 4–8 hours | No |
| Panel and bench assembly | 4–8 hours | No |
| Electrical hookup and circuit | 4–8 hours | Yes (electrician) |
| Ducting to exterior | 4–6 hours | No (but permit may apply) |
| Final inspection | Varies by jurisdiction | Inspector |
Pro Tip: Schedule the electrician before you start assembly, not after. Electricians in most markets book 1–3 weeks out, and waiting for the electrical step is the most common reason basement sauna projects stall mid-build.
What does a basement sauna project realistically cost?
Honest cost planning prevents the most common frustration in basement sauna builds: discovering mid-project that the budget is 40% short.
Price ranges by kit type
Infrared cabin projects typically land in the $2,300–$7,000 range for total project cost, including the cabin, electrical connection, and minor accessories. Traditional basement builds, once electrical, vapor barrier, ducting, and labor are included, commonly run $5,800–$14,700.
Hidden costs to budget for
- Electrician and panel work: $1,500–$3,000 for a panel upgrade if needed; $500–$1,200 for circuit installation alone
- Ducting and vent routing: $200–$600 in materials; more if a contractor runs the duct
- Vapor barrier and insulation materials: $150–$400 depending on cabin size
- Shipping and freight: large kit crates often carry freight charges; inside delivery or lift-gate service adds cost
- Permits: $50–$300 depending on municipality
- Floor drain installation: $500–$1,500 if not already present
Sample project budget: two-person traditional electric basement kit
| Budget item | Estimated cost |
|---|---|
| Prefab 4’×4’ kit (panels, benches, door) | $1,500–$3,000 |
| Electric heater (e.g., 6–7 kW) | $600–$1,200 |
| Vapor barrier and insulation | $200–$300 |
| Ducting materials | $150–$400 |
| Electrician (circuit + permit) | $700–$1,300 |
| Accessories (controller, rocks, thermometer) | $150–$300 |
| Total | $3,600–$7,000 |
For a larger four-person traditional build with a panel upgrade, total costs may be substantially higher, depending on materials and labor. Infrared builds at the same footprint typically stay well below that range because they eliminate ducting, vapor barrier complexity, and often the panel upgrade.
How do you maintain a basement sauna and keep it safe?
Basement saunas require more active moisture management than above-grade installations. The enclosed environment and proximity to the foundation make annual checks non-negotiable.
Annual maintenance checklist
- Inspect vapor barrier seams for tears, gaps, or condensation staining
- Check the exterior of the sauna cabin for musty odors, which indicate moisture migration
- Verify thermostat accuracy and test the heater’s safety cutout function
- Clean heater stones (traditional heaters): remove, rinse, and inspect for cracked stones annually
- Reseal door thresholds and any gaps in the door frame
- Inspect the exhaust duct for blockages, especially if the exterior termination is near grade level
- Test carbon monoxide detectors if using a wood-fired heater
Material trade-offs in damp basements
Western red cedar performs well in humid environments and is the most widely used sauna wood in the U.S. Thermally modified aspen is a good alternative in basements with persistently high ambient humidity because the modification process reduces moisture absorption. Avoid untreated pine or spruce in high-humidity basement conditions; resin bleed under repeated heat cycles is a maintenance problem.
Safety requirements
- Maintain manufacturer-specified clearances around the heater on all sides; never store towels or accessories within the clearance zone
- Wood-fired heaters in basements require carbon monoxide detectors within 10 feet of the heater and a properly sealed chimney system
- Always use a lockout procedure when servicing the heater: disconnect power at the breaker, not just the thermostat
Basement-specific maintenance note: After the first several uses of a new traditional sauna, run a dehumidifier in the surrounding basement space to capture any residual moisture from the initial curing of the wood. Monitor ambient basement humidity monthly for the first season.
Which heaters does Saunaheatersupply recommend for basement kits?
Saunaheatersupply carries a curated selection of heaters matched to common basement kit sizes. The recommendations below are organized by cabin volume and circuit requirements.
Recommended heater pairings by cabin size
- Saunum Air 7 (7 kW): Ideal for 1–2 person cabins in the 140–210 cubic foot range. A strong match for the common 4’×4’ or 4’×5’ basement footprint after applying the 10–15% basement uplift. Requires a 240V/40A dedicated circuit.
- Saunum Air L 10 (10 kW): Suited for 2–3 person cabins in the 210–300 cubic foot range. A reliable mid-size choice for the 5’×6’ footprint. Requires a 240V/50A circuit.
- Saunum Air L 13 (13 kW): Covers larger 3–4 person cabins in the 300–380 cubic foot range. Pairs well with a 6’×6’ or 6’×7’ basement build. Requires a 240V/60A circuit.
- Saunum AirSolo 70 and AirSolo 80: Compact wall-mounted options suited for low-clearance or small basement cabins where a floor-standing heater is impractical.
- Harvia Virta Series 10.5 kW: A proven 240V stainless steel heater for larger basement cabins. The Virta series is well regarded for consistent heat output and durability.
- Harvia Cilindro Half Series 10.5 kW: A cylindrical design that suits mid-to-large basement kits and fits well in corner placements where floor space is at a premium.
Heater-to-cabin match table
| Cabin size | Volume (cu ft) | Recommended heater | Circuit needed |
|---|---|---|---|
| 3’×3’×7’ (1 person) | — | Infrared kit heater | 120V / 15A |
| 4’×4’×7’ (2 person) | — | Saunum Air 7 (7 kW) | 240V / 40A |
| 5’×5’×7’ (2–3 person) | — | Saunum Air L 10 (10 kW) | 240V / 50A |
| 5’×6’×7’ (3 person) | ~210 | Saunum Air L 10 or L 13 | 240V / 50–60A |
| 6’×7’×7’ (4 person) | — | Saunum Air L 13 (13 kW) | 240V / 60A |
All Saunaheatersupply heaters carry manufacturer warranties, and the store backs every purchase with a price-match guarantee. For buyers who want to confirm sizing before ordering, Saunaheatersupply offers personalized pre-purchase consultation.
Pro Tip: Always verify your final heater selection with both your electrician and Saunaheatersupply before purchasing. A five-minute sizing call can prevent a costly return or a panel upgrade you did not budget for.
Key Takeaways
A properly planned basement sauna kit requires confirmed exterior venting, a dedicated 240V circuit, and a heater sized with a 10–15% uplift for concrete heat-sink losses.
| Point | Details |
|---|---|
| Choose kit type by vent path | Infrared for limited vent access; traditional electric when exterior ducting is confirmed. |
| Size heater with basement uplift | Add 10–15% to the base kW calculation to offset concrete heat-sink losses in below-grade rooms. |
| Electrical permits are required | Dedicated 240V circuits for traditional heaters require a licensed electrician and a permit in virtually every U.S. jurisdiction. |
| Vapor barrier is non-negotiable | A continuous foil-faced vapor barrier on the warm side of insulation prevents moisture migration into the foundation. |
| Saunaheatersupply for heater pairings | Saunaheatersupply carries matched heaters from Saunum and Harvia for every common basement cabin size, with a price-match guarantee. |
What experienced installers know that most guides skip
The ventilation routing decision is where most basement sauna projects either succeed or create a years-long moisture problem. The standard advice is “duct to the exterior,” but the practical challenge is finding a path that does not require cutting through finished ceilings or load-bearing framing.
In most basements, the rim joist is the answer. It sits at the top of the foundation wall, just below the first-floor framing, and gives you a short, direct path to the exterior with minimal drywall impact. When the sauna is positioned against an exterior wall, the exhaust run can be as short as 18 inches. When the sauna is in the center of the basement, a utility chase or an existing HVAC bulkhead is the next best option. Routing through the ceiling plenum is the one path to avoid; it distributes moisture into the building structure rather than removing it.
In low-clearance basements, infrared is not a compromise. It is the technically correct choice. The lower operating temperature means no steam management, no vapor barrier complexity, and no ducting requirement. For a basement with 6’8" of headroom and no clear rim joist access, an infrared kit delivers a genuine sauna experience without the construction risk.
The cautionary case worth knowing: a homeowner in a finished basement installed a traditional electric kit and routed the exhaust into the drop ceiling cavity because cutting through the rim joist seemed difficult. Within two heating seasons, the ceiling tiles showed mold staining and the insulation above the ceiling had absorbed enough moisture to require full replacement. The remediation cost exceeded the original sauna installation budget. The fix was a proper exterior exhaust run through the rim joist, which took a contractor four hours.
Saunaheatersupply has the heaters, kits, and support your basement build needs

Saunaheatersupply stocks the heaters and accessories that match every basement sauna scenario covered in this guide. Whether you are pairing a Saunum Air L 10 with a mid-size two-person kit or sourcing a HUUM chimney kit for a wood-fired basement build, the product selection is curated specifically for residential installs. Every heater comes with a manufacturer warranty, and Saunaheatersupply backs every purchase with a price-match guarantee so you are not overpaying for the same unit elsewhere.
The store also carries controllers, humidity sensors, and ducting accessories that most kit suppliers do not bundle. That means one order, one support contact, and no compatibility guesswork between components. Buyers who want sizing confirmation before checkout can reach the Saunaheatersupply team directly for a personalized pre-purchase consultation. Browse the full heater selection and get your basement sauna project started at Saunaheatersupply.
Useful sources for your basement sauna project
The sources below were used in preparing this guide and are worth bookmarking for follow-up research on specific topics.
- Best Sauna for Basement: Ventilation, Moisture, and Code Done Right — The most thorough publicly available guide on basement-specific sauna installation. Best for: vapor barrier details, ventilation routing, heater sizing uplift, and cost ranges.
- Can You Install a Home Sauna in a Basement? (Saunum) — Manufacturer-authored guide covering heater sizing rules, electrical requirements, and the 1 kW/m³ baseline. Best for: sizing calculations and electrical checklist.
- Saunaheatersupply Product Pages — Product specifications, circuit requirements, and warranty details for every heater model recommended in this guide. Best for: confirming heater specs, pricing, and availability before purchase.
- Saunum Air 7 Product Page — Specifications and electrical requirements for the 7 kW model recommended for 1–2 person basement cabins.
- Saunum Air L 10 Product Page — Specifications for the 10 kW mid-size heater recommended for 2–3 person basement builds.
- Harvia Virta Series 10.5 kW Product Page — Specifications for the Harvia Virta 240V heater recommended for larger basement cabins.
- Your local building department — The authoritative source for permit requirements, electrical code specifics, and inspection schedules in your municipality. Always confirm local requirements before starting work.